To clear the WordPress cache, first work out which cache is showing the old version, then clear that layer: your browser with a hard reload, your caching plugin with its Delete Cache or Purge All button, your host’s cache from its control panel, and your CDN from its dashboard. If you use Elementor, clear its files first, because Elementor’s button does not touch the page cache.
I tested every plugin step in this guide on a lab site running WordPress 7.1.4 and PHP 8.2 in November 2026, and all the WordPress screenshots come from that test. Host and CDN steps come from each company’s own documentation, and I say so where they appear.
- Find the layer first. Clearing the wrong cache is the most common reason “I cleared it and nothing changed”.
- Most page edits clear themselves. In my test, a normal page update cleared its own cached copy. A site title change did not.
- Clearing cache is safe. It never deletes posts, pages or settings. It only removes stored copies that WordPress builds again.
Which Cache Is Showing the Old Version?
A WordPress site can have up to five layers of cache stacked on top of each other. Use this table to find the one that is causing your problem before you start clicking buttons.
| What you see | Likely layer | What to clear |
|---|---|---|
| Only you see the old version, other people see the new one | Your browser | Step 1 |
| You see the new version when logged in, but visitors (or a private window) see the old one | Page cache from a plugin or your host | Steps 2 and 3 |
| Changes show on your server but not for visitors in other countries | CDN | Step 5 |
| The layout or styles look broken after an Elementor edit | Elementor’s CSS files, then the page cache | Step 4, then Step 2 |
| A setting changed in the admin but the site still behaves the old way | Object cache (Redis or Memcached) on your host | Step 3 |
Do You Need to Clear the Cache at All?
Often you don’t. Most caching plugins clear the cached copy of a post or page when you update it. I turned on WP Super Cache, visited a test page while logged out, and the page came back with the same “Cached page generated by WP-Super-Cache” stamp on every visit. Then I edited the page and clicked Update. The very next logged-out visit showed the new text, so the plugin had cleared that page by itself.
Things changed when I edited something site-wide. I changed the site title under Settings > General, and the cached page kept showing the old title. That’s the case where you need to clear the cache yourself: changes to the site title, menus, widgets, theme settings, custom CSS or anything else that appears on many pages at once.
Not every plugin behaves this way out of the box. WP Fastest Cache, for example, has a setting called “Clear cache files when a post or page is updated”, and it was switched off by default on my test install. If you use it, turn that setting on.
Step 1: Clear Your Browser Cache
Your browser keeps copies of images, CSS and JavaScript so pages load faster on the next visit. That’s useful, until it shows you yesterday’s styles. The quickest fix is a hard reload, which asks the server for every file again:
- Windows and Linux: press
Ctrl + F5orCtrl + Shift + R. - Mac: press
Cmd + Shift + R.
I measured the difference in Chrome on the same page. A normal reload transferred just 19.5 KB, because nearly every file came from the browser cache. A hard reload transferred 985 KB for the same 70 files, none of them from the cache. So a hard reload really does bypass the browser cache.
If the hard reload doesn’t help, open the page in a private or incognito window. A private window starts with an empty cache. If the page looks right there, the problem is only your browser, and you can clear its stored images and files from the browser’s settings. If the page still looks old in a private window, the browser isn’t the problem. Move on to Step 2.
Step 2: Clear Your Caching Plugin’s Cache
This is the layer most people mean when they say “clear the WordPress cache”. Every caching plugin has a button for it. Here’s where to find it in the most popular ones.
WP Super Cache
Go to Settings > WP Super Cache. On the Easy tab you can see whether caching is on.
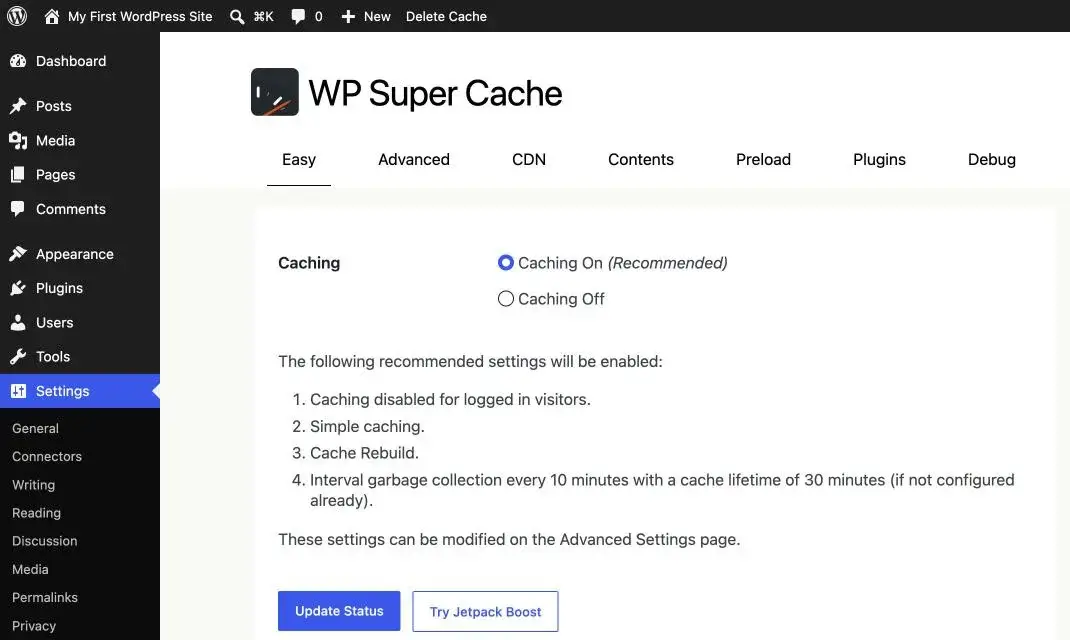
Scroll down to the Delete Cached Pages section and click Delete Cache.
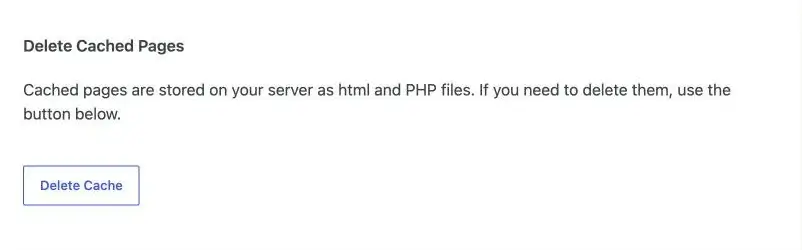
You can also do it from any screen with the Delete Cache link in the admin bar at the top. In my test, both buttons worked: the next visit showed the new site title with a fresh “generated” stamp.

W3 Total Cache
Hover over Performance in the admin bar and click Purge All Caches. W3 Total Cache shows the notice “All caches successfully emptied.”
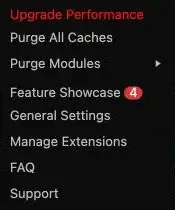
The same option is on the plugin’s dashboard as the Empty All Caches button.

LiteSpeed Cache
Hover over the LiteSpeed icon in the admin bar and click Purge All. The menu also has separate options for the LiteSpeed page cache, CSS/JS files and the PHP opcode cache, if you only want to clear one of them.
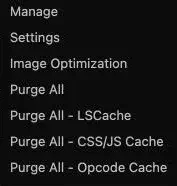
For more control, go to LiteSpeed Cache > Toolbox and open the Purge tab. There you can purge just the front page, just pages, or error pages.
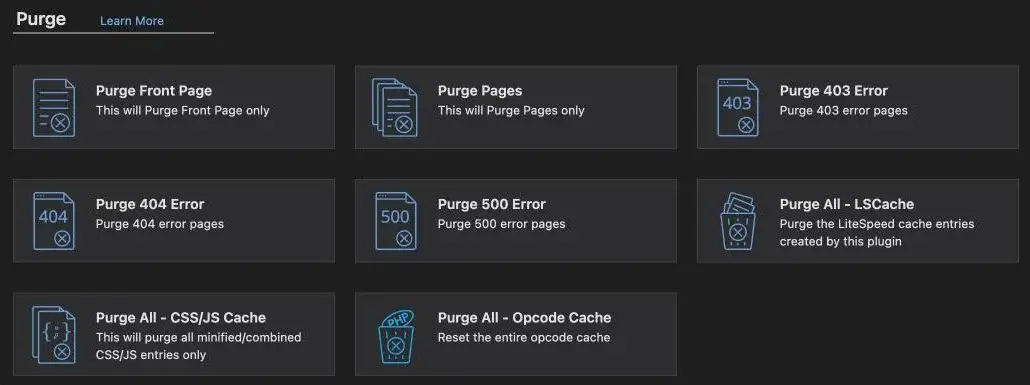
Note that LiteSpeed’s page cache only works on a LiteSpeed web server (or through QUIC.cloud). My lab runs nginx, so I could check the buttons but not watch a cached page clear.
WP Fastest Cache
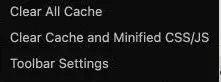
Hover over Clear Cache in the admin bar and click Clear All Cache. If you changed CSS or JavaScript, use Clear Cache and Minified CSS/JS instead.
WP Rocket
WP Rocket is a paid plugin, so I didn’t install it on the lab. According to WP Rocket’s own documentation, you hover over WP Rocket in the admin bar and click Clear and preload cache, or go to Settings > WP Rocket and click the same button on the Dashboard tab. You can also clear a single page with the Clear this cache link in your Pages or Posts list.
Step 3: Clear Your Host’s Cache
Many managed WordPress hosts run their own server cache in front of WordPress. If you use one of them, clearing your plugin isn’t enough. You have to clear the host’s cache too. I couldn’t test host panels on my local lab, so the steps below come from each host’s own documentation, which I read in November 2026.
- Kinsta: in MyKinsta, select your site, open the Caching tab and click Clear all caches. Kinsta also adds a Clear Caches button to your WordPress admin bar. (Kinsta’s guide)
- Hostinger: in hPanel, go to Advanced > Cache Manager and click Purge all. You can also purge a single URL there. (Hostinger’s guide)
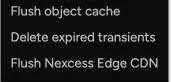
On Nexcess, which hosts this blog, the admin bar has a Nexcess menu with Flush object cache, Delete expired transients and Flush Nexcess Edge CDN.
If your host isn’t listed here, look for a “Cache”, “Caching” or “Performance” section in its control panel, or search its help center for “clear cache”. If you want to understand what these server caches do and how they’re set up, read my guide on server-side caching in WordPress.
One thing to watch for: some guides say the WP-CLI command wp cache flush clears your page cache. It doesn’t. It flushes the WordPress object cache only. To clear page cache from the command line, use your caching plugin’s own command, if it has one.
Step 4: Clear the Elementor Cache
Elementor saves your page styles as CSS files. If a page looks broken or doesn’t show your latest design after an edit, regenerate those files. Go to Elementor > Editor > Tools, stay on the General tab and click Clear Files & Data.
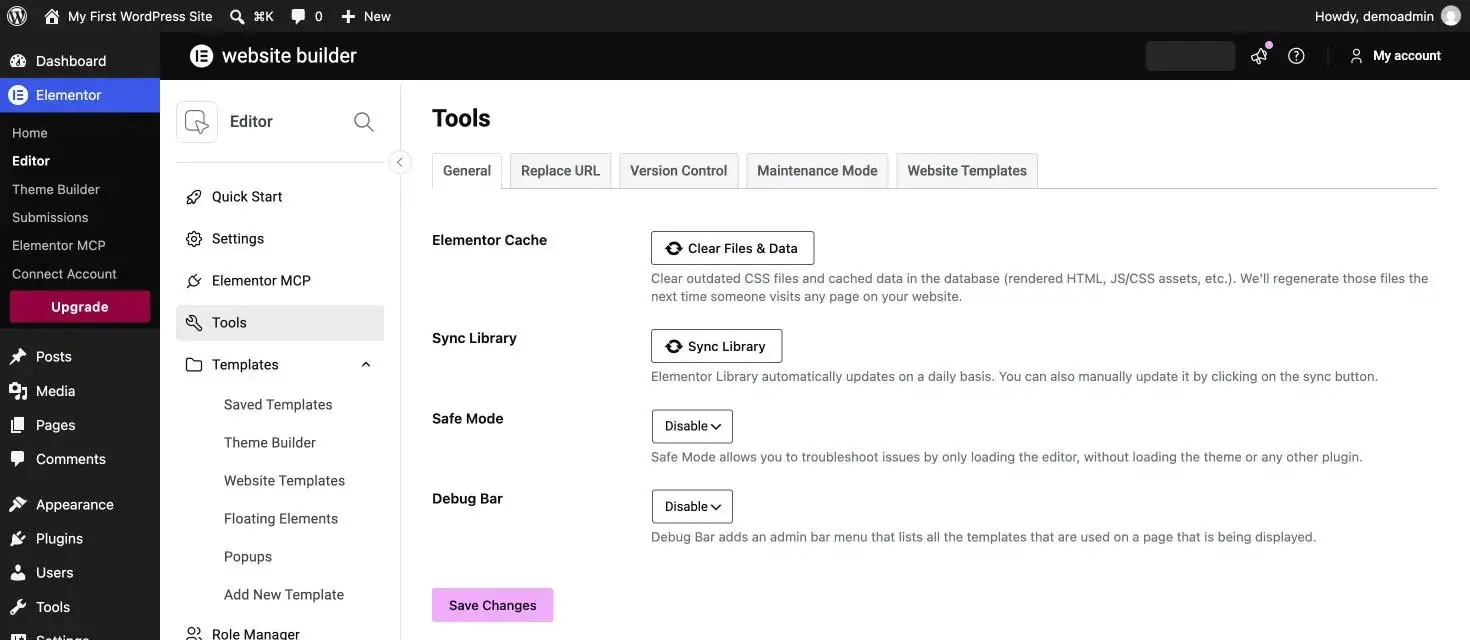
Here’s what my test showed. Right after the click, the page’s Elementor CSS file returned a 404, and a few seconds later it was back, rebuilt. But the cached page from WP Super Cache kept exactly the same “generated” stamp. In other words, clearing Elementor does not clear your page cache. Clear Elementor first, then clear your caching plugin as in Step 2.
Step 5: Clear Your CDN Cache
If you use a CDN such as Cloudflare, it keeps copies of your files on servers around the world. Clear it last, after the layers above. I didn’t test this on a live zone, so these steps are from Cloudflare’s documentation:
- In the Cloudflare dashboard, go to the Configuration page for your site.
- Under Purge Cache, choose Custom Purge, pick URL and enter the pages you changed. Then click Purge.
- Only if you changed something site-wide, use Purge Everything instead.
Cloudflare itself recommends purging by URL. After a full purge, every request has to go back to your server until the cache fills up again, which can slow the site down or overload a small server.
The Right Order to Clear Every Cache
When you’ve made a big change and want to be sure every visitor gets the new version, clear the layers from the inside out:
- Elementor or your page builder
- Your caching plugin
- Your host’s cache
- Your CDN
- Your browser (hard reload or private window)
Clearing in this order stops an outer layer from saving an old copy again from a layer you haven’t cleared yet.
How to Check It Worked
Open the page in a private window, where you’re logged out and your browser cache is empty. If you see the new version there, it worked.
For a closer look with WP Super Cache, right-click the page, choose View Page Source and scroll to the bottom. You’ll see a comment such as “Cached page generated by WP-Super-Cache on” followed by a date and time. If that time is after you cleared the cache, you’re looking at a fresh copy.
Still Seeing the Old Version?
- You cleared the wrong layer. Go back to the table at the top and check again.
- Your host has its own cache. Clear it as in Step 3, even if you also use a caching plugin.
- Your CDN still has the old file. Purge that URL in Step 5.
- You’re logged in. Some plugins never cache pages for logged-in users, so check in a private window instead.
- The change didn’t save. Open the post or setting again and confirm it’s there.
If nothing here helps, or the site broke after clearing the cache, I can take a look. My WordPress maintenance service covers cache setup and speed problems like this.
Frequently Asked Questions
Is It Safe to Clear the WordPress Cache?
Yes. Clearing cache removes stored copies of your pages and files, nothing else. Your posts, pages, media and settings stay exactly as they are.
Will Clearing the Cache Slow Down My Site?
For a short time. The first visit to each page after a clear builds a new cached copy, so it’s a bit slower. After that, pages are served from the cache again. That’s why it’s better to clear only what you changed when your plugin or CDN lets you.
What’s the Difference Between Page Cache and Object Cache?
Page cache stores whole finished pages, so the server can send them without running WordPress. Object cache stores the results of database queries, usually in Redis or Memcached on your server. Your caching plugin’s button clears the page cache. Your host’s “flush object cache” option, or wp cache flush, clears the object cache.
How Often Should I Clear the Cache?
Only when you need to. Most plugins clear the right pages automatically when you update content. Clear it by hand after site-wide changes, such as your site title, menu, theme settings or custom CSS, and after you update your theme or a plugin that changes how pages look.
Subscribe to our Monthly Newsletter
Get monthly updates of WordPress tips, tricks, and tutorials in your email.
Thanks. You have successfully subscribed.


