If you run a WordPress site, you may find yourself in the difficult position of being stuck with a bad hosting provider. This is very frustrating if you’re dealing with issues on a regular basis but feel as if you can’t do anything about it.
Fortunately, you can move your WordPress site to a new host without much hassle. By using the right tools, you should be able to transfer all of your content safely and efficiently.
In this article, we’ll discuss some of the reasons why you might need to change providers. Then, we’ll show you how to migrate from one web host to another. Let’s get started!
Why You May Need to Switch to a New Web Host

Everyone has their own reasons for switching providers. However, one of the most common issues that site owners face is poor performance, such as slow loading times and frequent glitches. These problems can be very stressful and time-consuming, leading to many people switching companies entirely.
Another common reason is that the features are too limited. Growing businesses often need to switch to a solution that offers more support and flexibility, and is suitable for their fast-paced, scaling operation.
Depending on the type of hosting plan, you may be eligible for assistance when moving your website. Some hosting providers offer site migration features as part of their plans. If you have access to this service, you may like to consider getting some direct help from the professionals.
How to Move Your WordPress Site to a New Host (In 4 Steps)
For this tutorial, we’ll be using the Duplicator plugin. We think this is one of the best migration solutions as it’s simple, yet powerful. Moreover, the pluginA plugin is a software component that adds specific features and functionality to your WordPress website. Esse… More has many positive reviews from happy users. In addition to its migration features, Duplicator allows users to duplicate and back up sites.
Before we start, we recommend creating a backup of your site, just in case something goes wrong.
Step 1: Create a Copy of Your Site
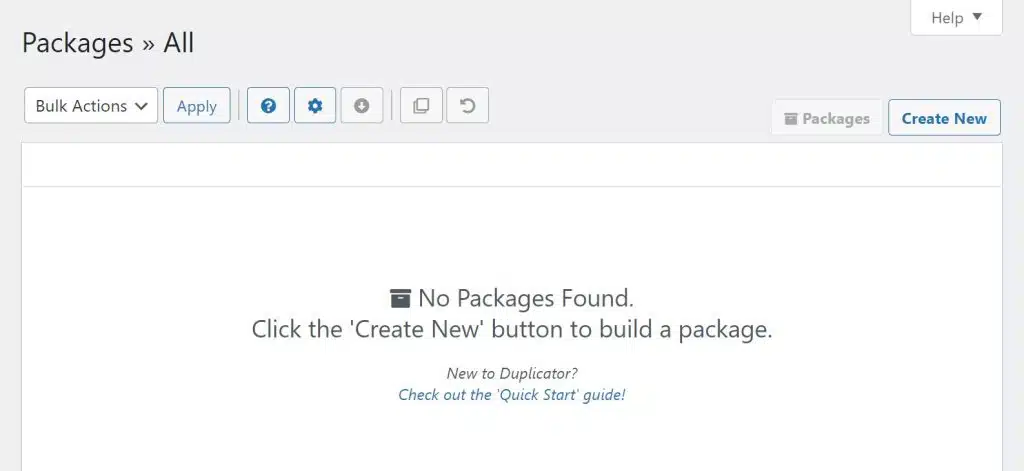
Once you’ve installed and activated Duplicator, you’ll need to create a copy of your site (or a “package”). This will involve downloading a ZIP file containing your site’s content.
To get started, go to Duplicator > Packages and click on the Create New button:
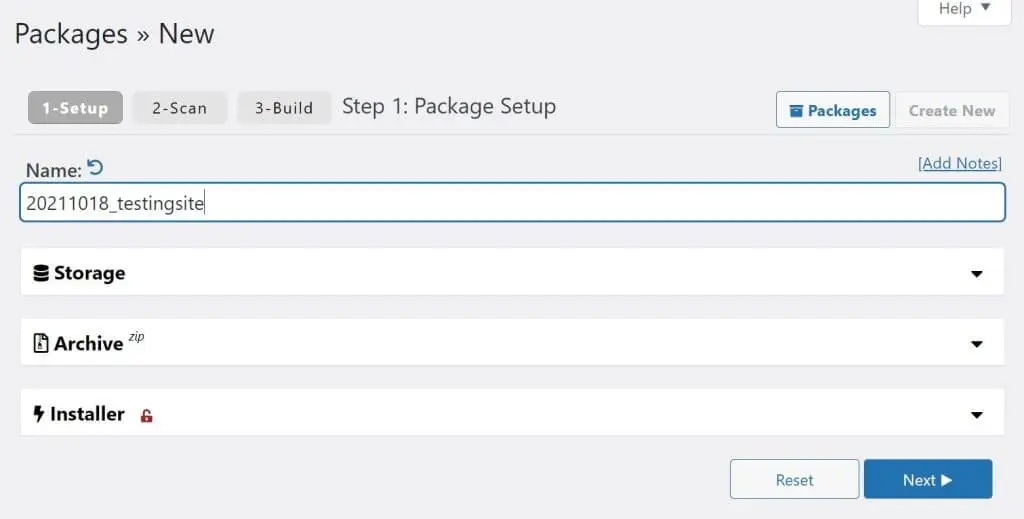
This will take you to a step-by-step setup for making a copy of you site. First, you’ll need to give this package a name:
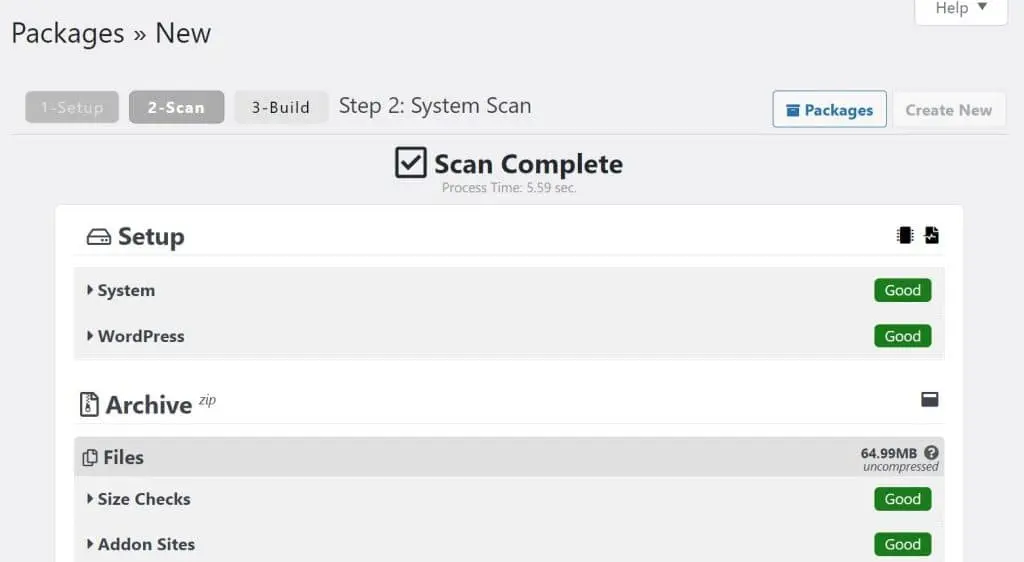
Once you click on Next, the tool will run a quick scan. When it’s ready, you can click on the Build button at the bottom of the pageIn WordPress, a page is a content type that is used to create non-dynamic pages on a website. Pages are typica… More:
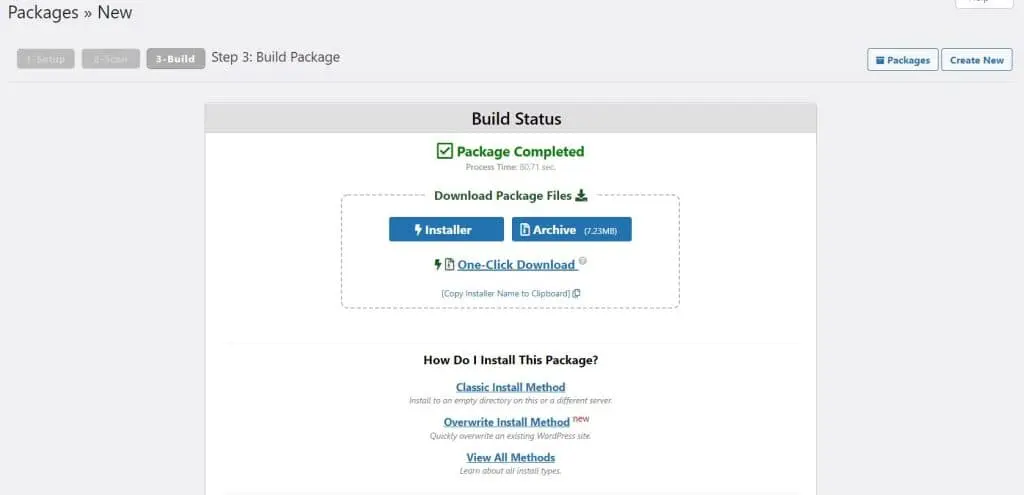
Duplicator will now create your package. The process may take a few minutes, depending on the size of your site.
Once it’s ready, you’ll be shown a few options for downloading the package to your computer. We recommend selecting One-Click Download. This will download both the Installer, which you’ll be using to move your site to your new host, and the archive, which includes your site’s files and databaseA database is an organized collection of data stored and accessed electronically. It is a crucial component of… More:
Your package will be downloaded as a ZIP file, while the Installer will appear as installer.php. That’s it – your website is now ready for the big move.
Step 2: Create a New Database
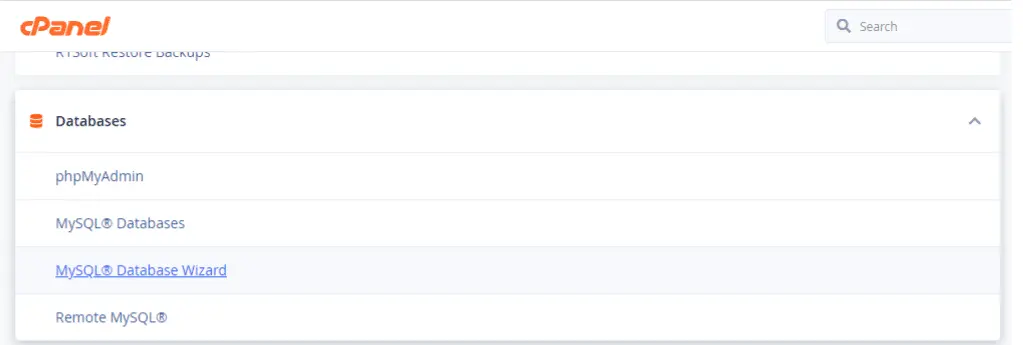
Next, you’ll need to prepare the new hosting account for the installation of your site. Most providers use cPanel, so we’ll be showing you how to create a new database using this dashboard.
Log into your new hosting account and locate the Databases section. Then, select MySQL Database Wizard:
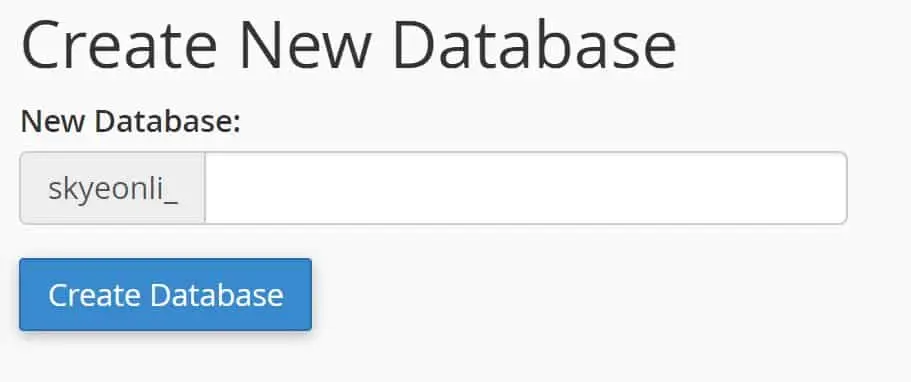
First, you’ll need to enter a name for your new database:
Next, you’ll also be asked to create a user account:
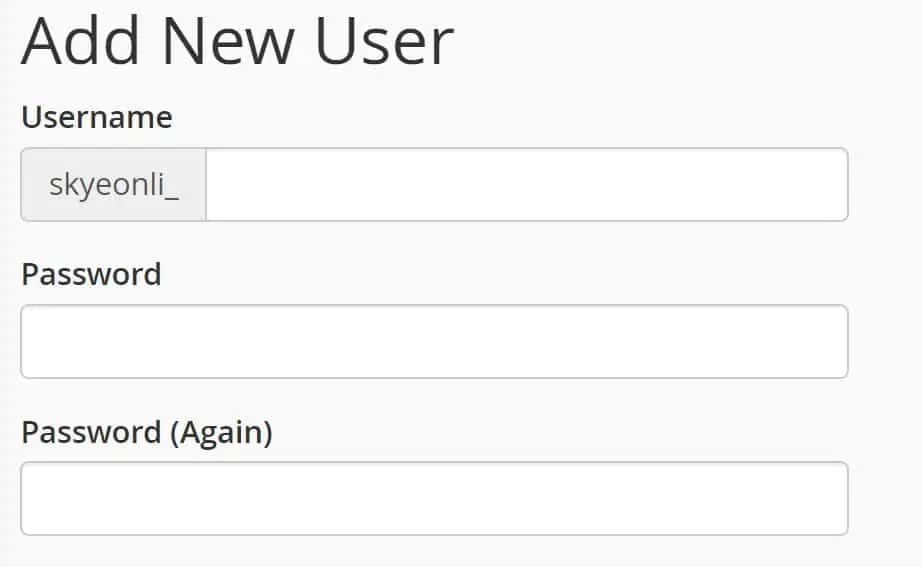
We recommend that you make note of your password and username, as you’ll be needing them later. Once the setup is complete, you’ll need to add a new domain name to your server.
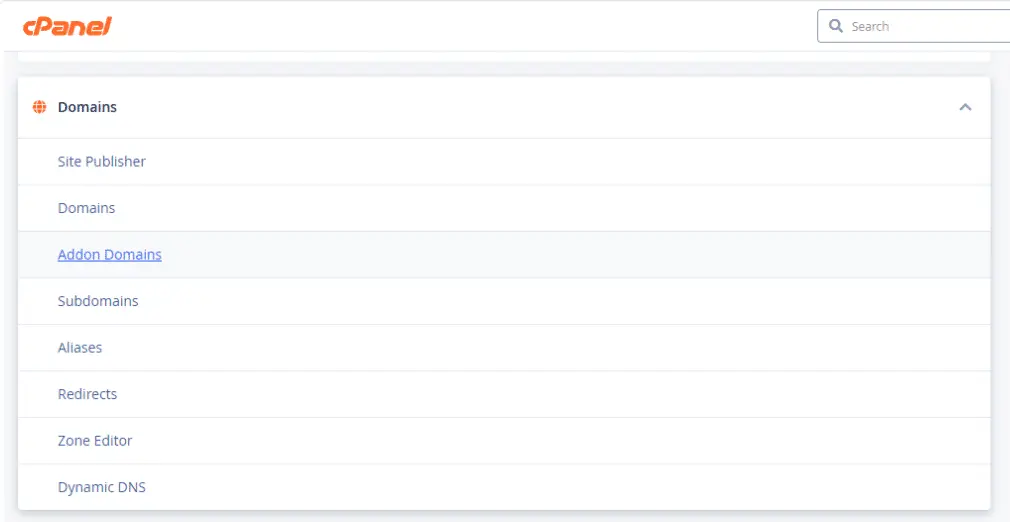
To do this, you’ll be using the cPanel again. Head to the Domains section and click on Addon Domains:
Next, enter your domain information and submit the form:
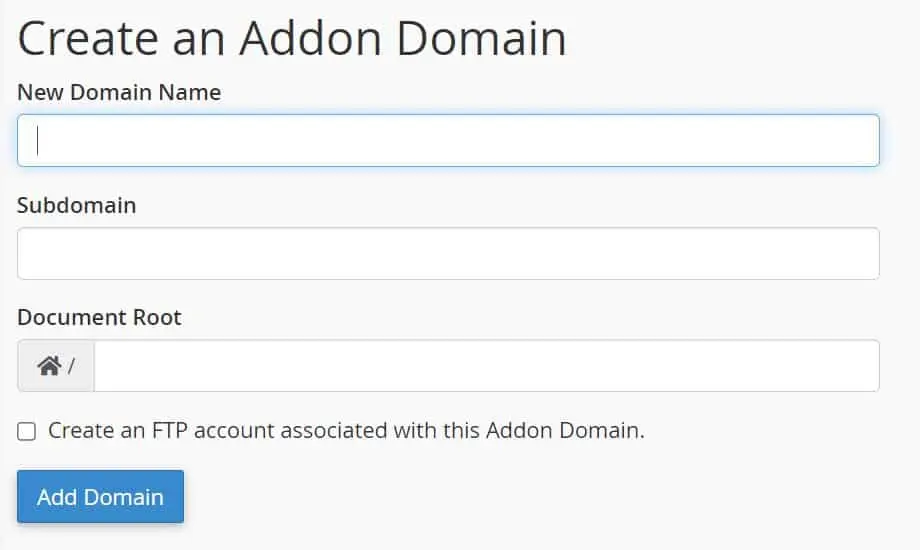
Your domain name will then be automatically added to your new hosting account. However, this process will be slightly different depending on your hosting providers. Therefore, you may need to seek some assistance from your host.
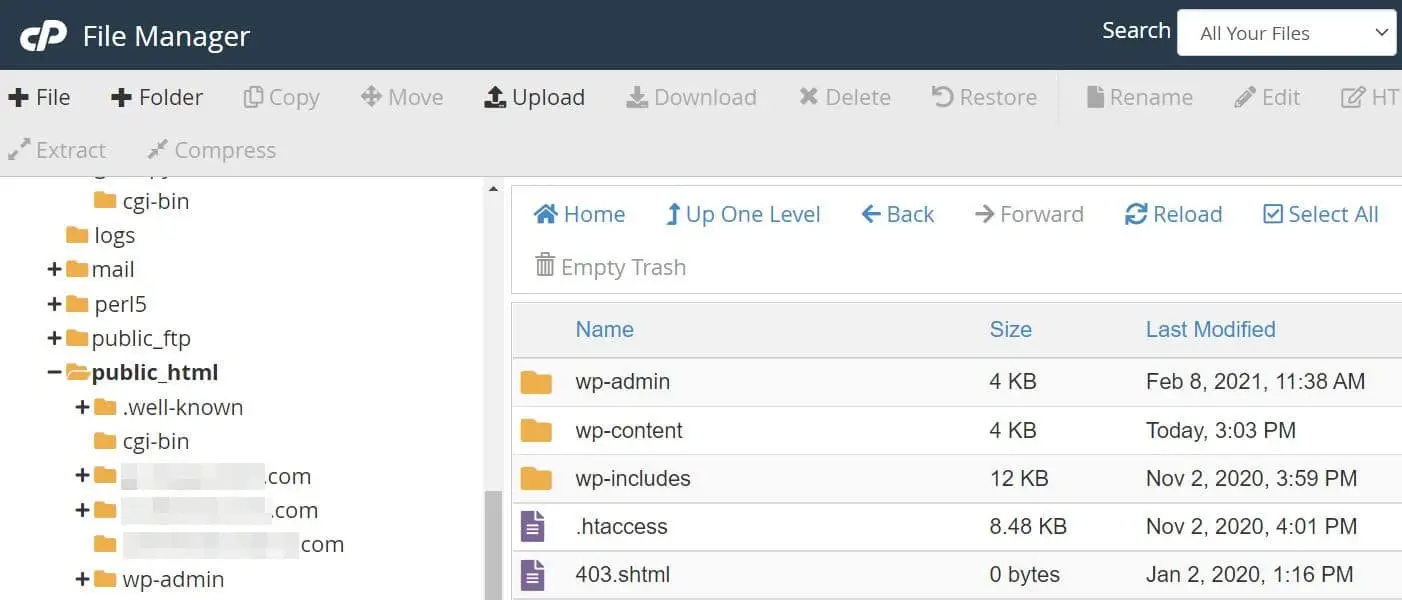
Step 3: Upload Your Site to the New Web Host
Now you’re ready to upload your content to the new host. If you’re using cPanel, find the Files section and open File Manager. Then, select the public_html folder and click on the folder labeled with your domain name:
Click on the Upload button. Then, select the ZIP file and the installer.php file that you downloaded earlier.
Once both files have been uploaded, open your browser and type your domain in the search bar, adding /installer.php to the URL (e.g. mysite.com/installer.php). This will load the Duplicator Installer:
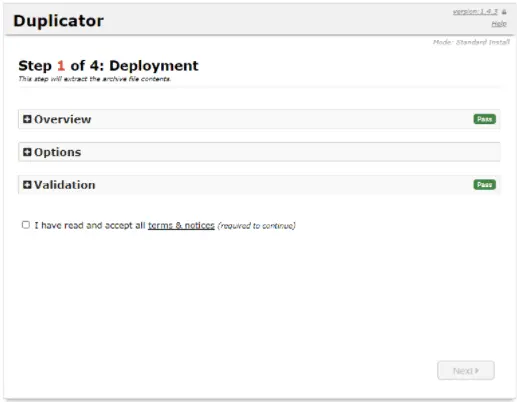
Accept the terms and conditions, and click on Next. You’ll then enter the database information that you created earlier, including your username and password:
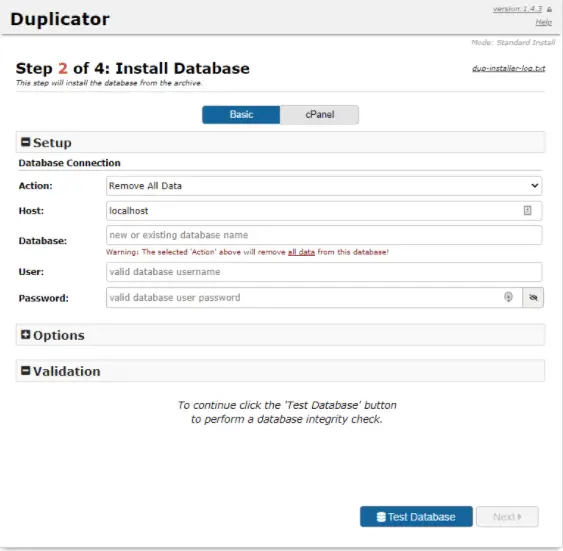
When you’re ready, click on Test Database. The Installer will then run a quick test and ask you to update your data:
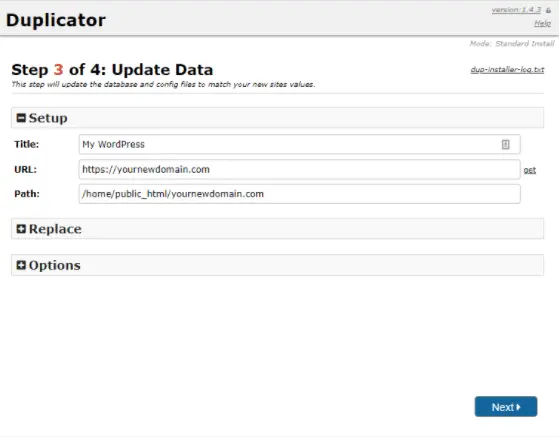
If you don’t need to change anything, you can go ahead and click on Next. Duplicator will now complete the upload process.
Once Duplicator has completed the transfer, it will ask you to test your site:
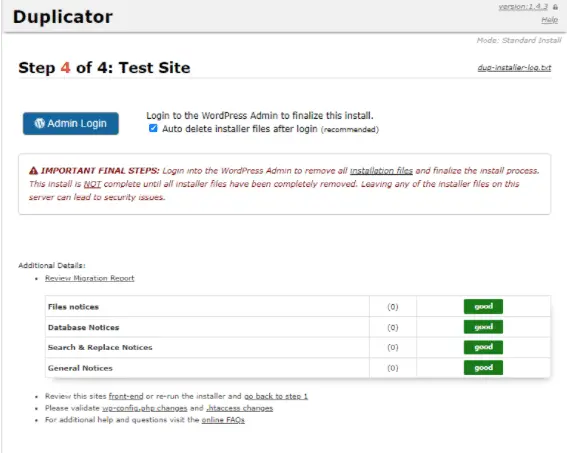
If you select the Admin Login button, you’ll be taken to your WordPress dashboardIn WordPress, the Dashboard is a central hub for managing a website’s content and settings. It is the first sc… More. Here, you’ll see a confirmation that your Installer files have been removed:
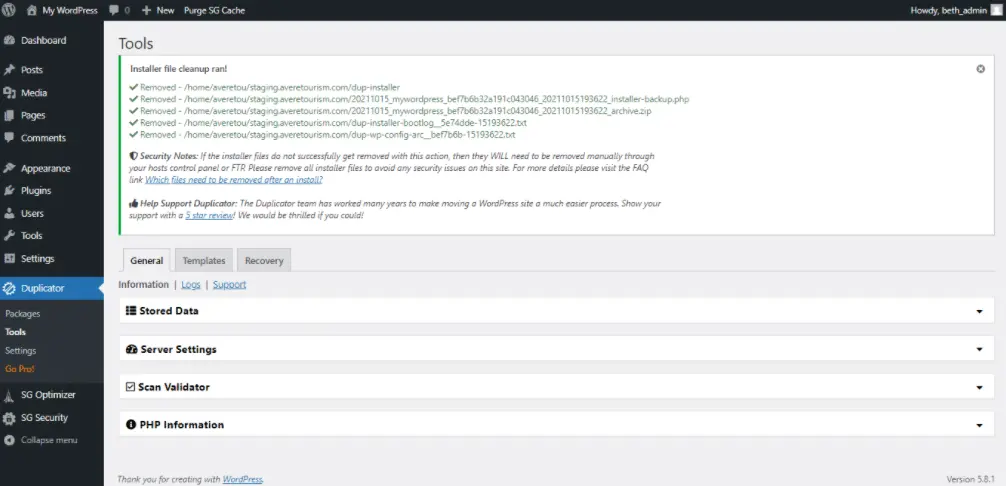
Feel free to remove the Duplicator plugin as you won’t be needing it anymore. When you’re ready, you can move on to the final step.
Step 4: Change Your DNS Settings to Point to the New Host
The final part involves changing your DNS settings to point to the new server. DNS settings define how your domain name connects with your hosting account. Although you’ve just migrated your site to a new host, your domain name is still pointing to your old host’s server.
First, you’ll need to find your new host’s nameservers. This information is normally available in your hosting account, and may look something like this: ns1.yournewhost.com
Then, log into your domain registrar account. Here, you should see an option to change your nameservers. All you have to do is enter the nameservers of your new host.
The process may be a little different, so you may need to contact your domain registrar for help. Note that it may take around 48 hours for your DNS settings to propagate. Therefore, you might want to wait until the process is complete before deleting your old hosting account. That way, users will still be able to access your site during the transfer.
Conclusion
If you find yourself stuck with a provider that doesn’t meet your expectations, you may feel like there is no way out. Fortunately, it’s very easy to move your WordPress website to a new web host.
In this article, we showed you how to migrate to a new provider using the Duplicator plugin:
- Create a copy of your site.
- Create a new database.
- Upload your site to the new web host.
- Change your DNS settings to point to the new host.
Do you have any questions about moving your WordPress site to a new hosting provider? Let us know in the commentsComments are a feature of WordPress that allow users to engage in discussions about the content of a website. … More section below!

![How to Create A WordPress Staging Site [A Visual Guide]](https://codingheros.com/wp-content/webp-express/webp-images/uploads/2024/06/how-to-create-a-wordpress-staging-site-a-visual-guide.png.webp)


