The internet can be an incredible tool for connecting with others. Nevertheless, you might not want every aspect of your life out there for public consumption. Therefore, you might be wondering if there’s a way to make your WordPress site private.
Fortunately, keeping your information private can be simple. By following a few steps to determine who has access to your site, you can create a WordPress page that’s only accessible to the people you choose.
In this article, we’ll cover a few reasons you might want to make your WordPress site private. Then we’ll walk you through three steps to privatize your page to meet your exact needs. Let’s dive right in!
Why You Might Want to Make Your WordPress Site Private
Privacy is valuable in the digital age. Technology makes it easier to share, but that doesn’t mean you always want to! Beyond personal preference, there are a few other reasons you might want to keep your site to yourself.
For example, you might have family in other locations. If you have images you’d like to share, sending large files over email can be tricky. However, the alternative of publishing family photos for all to see might not be much better.
Instead, you can upload them to a semi-private family site and create logins for them alone. That way, only your family will have easy and instant access to your files.
On the other hand, there are also professional reasons to make your WordPress site private. Keeping sensitive information within an organization can be crucial. As such, a company-only page can help protect your data from outsiders.
Alternatively, you might want to start a membership club. In this way, you can monetize your site by enabling subscribers to view your content for a fee.
However, this also means that you probably need a way to keep non-paying users out. When combined with a monetization plan, a private WordPress website can be a simple way to get the job done.
How to Make Your WordPress Site Private (In 3 Steps)
Whatever your reasons, the good news is that it’s easy to make your WordPress page private. You can follow these steps to curate your audience.
Step 1: Choose a Privatization Plugin
Unfortunately, there’s no built-in option to make your WordPress site private. Thus, you’ll need to use a pluginA plugin is a software component that adds specific features and functionality to your WordPress website. Esse… More to add this function. That’s why the first thing you’ll need to do is choose your tool.
There are several traits you might want to consider when selecting a privatization plugin. For one thing, some of these programs are specialized. For example, some plugins focus on creating a corporate intranet.
A specialized plugin can save you time if it serves your needs. However, it might get in the way if it doesn’t match your goals. Therefore, it’s important to know exactly what you’re looking for.
Another element you might want to think about is how much of your content you want to make private. Some plugins will make the entire site inaccessible. Alternatively, others will only work on a few pagesIn WordPress, a page is a content type that is used to create non-dynamic pages on a website. Pages are typica… More.
There are also options in the middle that let you more closely control access. If you only need to make a page or two private, for example, you may not want to bog down your site with an unnecessarily complex program.
Fortunately, you have plenty of powerful options. You could choose Force Login to restrict access to only registered users. On the other hand, All-In-One Intranet could be best for you if you need to create a private corporate site.
For this article, we’ve chosen to use My Private Site:
We like this plugin because it gives you a lot of control. You can make your site as open or as closed as you like. It’s also easy to use, meaning you can adjust the settings if your needs change.
Step 2: Adjust Your Plugin Settings
Once you’ve chosen your plugin, go ahead and download it. Be sure to install and activate it afterwards.
If you’re using My Private Site, go to My Private Site > Site Privacy:
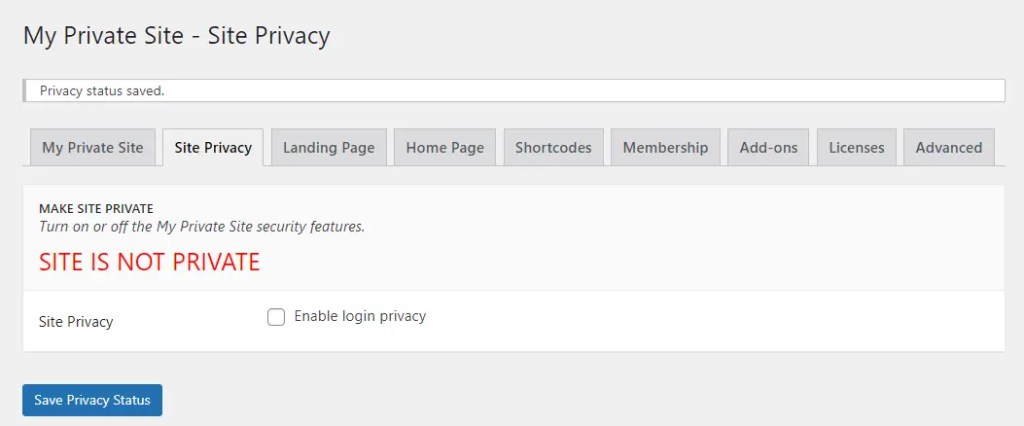
Check this box, and then click on Save Privacy Status. Doing so will limit your site to only logged-in users. However, this doesn’t remove their ability to register. This means that anybody can fill out a quick form and still gain a new user role.
As such, you’ll now need to make a decision: whether or not you’ll allow self-registration. Self-registration is, as you might expect, where users can sign themselves up and gain access.
If you only want to make your WordPress site private to track your audience more effectively, you might want to enable this process. On the other hand, it isn’t exactly ‘private’ if anyone can view your site. You might also consider this a security flaw.
If you don’t want to allow self-registration, that’s also easy to do. Move over to the Membership tab. There are two checkboxes there, labeled Membership and Reveal Registration Page:
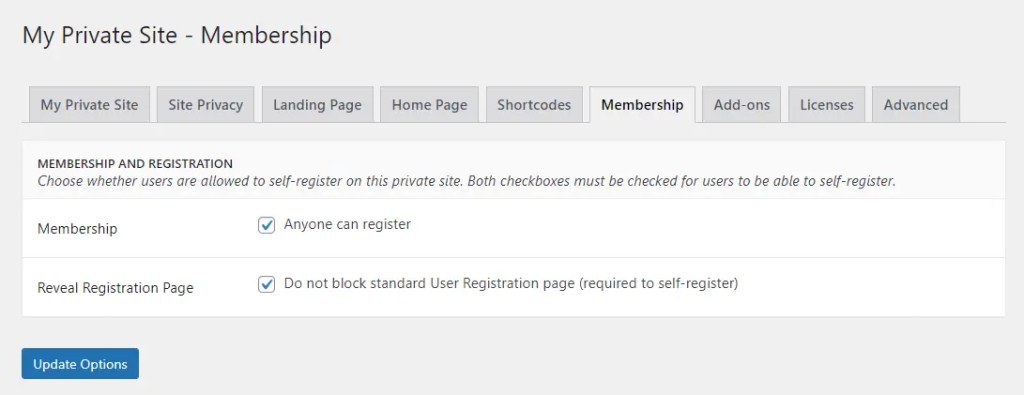
As the page says, you’ll need to check both to allow self-registration. Adjust the selections to fit your needs. Afterwards, click on Update Options.
Finally, you might also want to create a custom login option. To do so, head over to the Advanced tab:
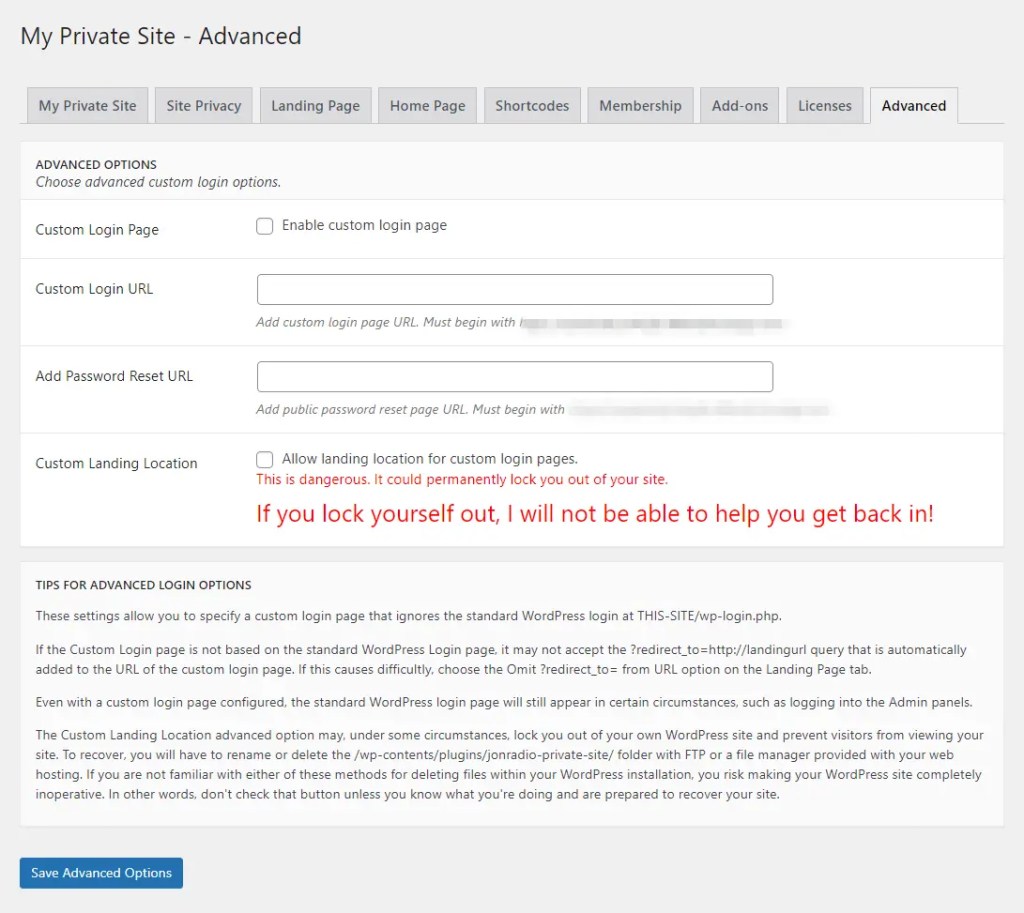
You can check Custom Login Page to get started. Then, you’ll add the specific URL as well as a password reset URL. This can give you granular control over who gets to register for your private WordPress site.
However, we highly recommend that you read the warnings carefully. Allowing a custom landing location could result in you being locked out of your own site. If you choose this option, be sure to proceed with caution.
Step 3: Discourage Google From Indexing Your Site
Finally, you might also want to consider making your site private from search engines. Google goes through a process called ‘indexing.’ This is how it collects your site data and presents it to users in search results.
While indexing can be essential to attracting visitors, heavy traffic probably isn’t your primary goal with a private WordPress site. Fortunately, you can discourage Google from collecting that information.
First, go to your WordPress dashboardIn WordPress, the Dashboard is a central hub for managing a website’s content and settings. It is the first sc… More. Select Settings > Reading:
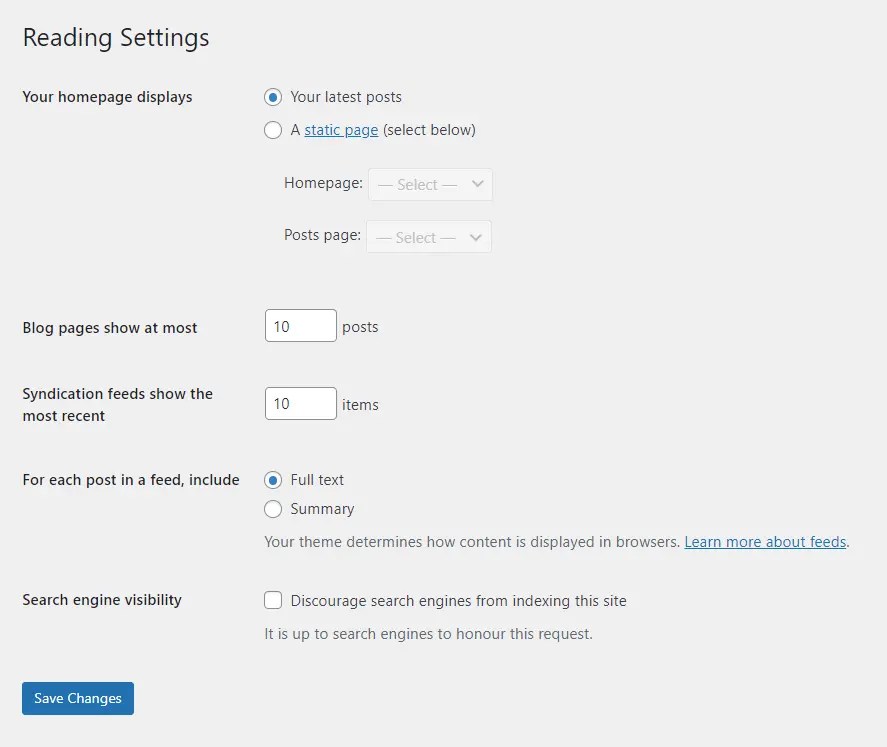
Check the box labeled Search engine visibility near the bottom of the page. Then, click on Save Changes. While it’s not guaranteed to work, this sends a message to search engines that you don’t want this site to be visible.
However, this setting only prevents future indexing. As such, your WordPress site might still be easily visible if it wasn’t private before this. Fortunately, you can fix this through Google Search Console.
Go ahead and add your website property if you haven’t already. Then go to Index > Removals > New Request:
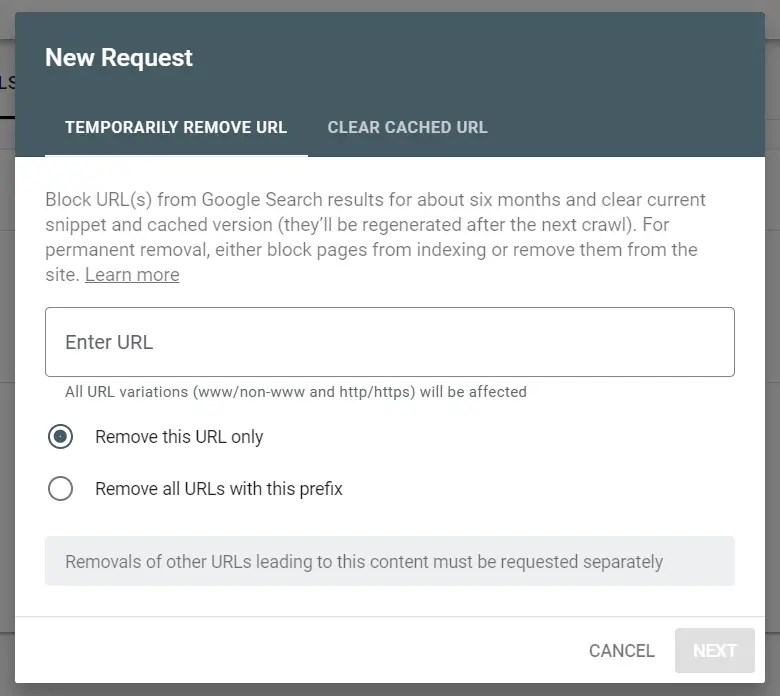
Enter your URL and click on Next. You can also choose if you’d like to remove a single URL or all of them with that prefix. Follow the rest of the instructions to submit your request. Google should then remove its previous records of your site.
Conclusion
You might have any number of reasons for wanting to make your WordPress site private. Whether it’s for personal or professional purposes, the good news is that it can be a simple process. You’re only a few keystrokes away from having control over who accesses your content.
In this article, we covered three steps to make your WordPress site private:
- Select a plugin to help you with the process.
- Adjust your settings to give select users access.
- Request that Google stops indexing your page.
Do you have any questions about creating a private WordPress page? Let us know in the commentsComments are a feature of WordPress that allow users to engage in discussions about the content of a website. … More section below!


