How often have you thought about creating a website, but just weren’t sure where to begin?Creating a website is a fundamental step for establishing your online presence. Our beginner’s guide on how to create a website offers clear, step-by-step instructions to help you get started effectively. Whether you’re a novice or have some experience, this guide covers everything from domain registration to website launch, ensuring you can create a professional site tailored to your needs. Discover the essential tools and techniques required to bring your online vision to life with confidence.
Building a website is easier than you might think, and we cover the entire process, step-by-step, in this tutorial.
If you’re ready to design a website and create a new online presence—for yourself, your business, or a side project—today is the day.
In this guide, you’ll learn how to create a beautiful website quickly and easily, without having to learn HTML/CSS and without writing a single line of code.
You’ll also learn how to avoid some of the unnecessary costs of building a website. You don’t need an expensive website builder!
This comes from our experience building dozens of websites over the last 10+ years, including this one! We know what works, and we’re here to walk you through every step of the process to create a website.
There’s a lot of information here—so feel free to bookmark this page and return to it as you move through the steps.
And of course, if you have any questions along the way, just leave a comment below this article and we’ll do our best to help you out. 🙂
Sound good? Let’s dive in and start to create a website!
How Long Does It Take to Create a Website?
Understanding the time it takes to create a website involves considering several key factors. Let’s break down what influences the development time:
- Platform Selection: The choice of platform sets the initial pace; some platforms offer rapid deployment, while others, built for bespoke needs, may require more setup time.
- Website Complexity: The complexity of your website is pivotal. A straightforward site with a few pages will naturally take less time than a comprehensive enterprise site with intricate functionalities.
- Tools for Efficiency: Efficiency tools play a crucial role. Modern website builders, for example, can have a basic site up and running in under an hour, streamlining the process significantly.
- Customization Time: Customization adds another layer. Projects needing unique features tailored to specific needs extend development timelines, often taking days or weeks to complete.
In summary, website development timelines can vary widely, ranging from as little as an hour for basic setups to several days or longer for complex, customized projects that align closely with your specific vision.
How To Create A Website: Video Tutorial
Prefer to watch instead of reading? We’ve converted this entire guide to a video on our YouTube channel:
(Click here for the discount mentioned in the video.)
If you prefer text, read on! Each step to create a website is covered in detail below.
Step 1: Choose A Platform to Create a Website
There are so many different platforms and website builders out there, and choosing the right one can feel a bit overwhelming.
WordPress, Drupal, Squarespace, Joomla, and Wix are just a few examples.
(You could also code a website yourself from scratch, but that would take much longer, and you probably wouldn’t love the end result.)
So which website builder should you use to create your website?
Well, let’s take a look at what other people are using.
The Most Popular Website Builders
According to BuiltWith, here’s a breakdown of website builders by market share:

As you can see, WordPress leads the pack with a solid 52% of the market, followed by Wix (7%), Progress Sitefinity (5%), Squarespace (4%), and Joomla (3%).
Why We Recommend WordPress To Create Website
It’s no coincidence that WordPress holds such a strong lead—it offers a number of advantages over other website builders.
- WordPress is completely free. While you’ll still need to purchase a domain name and a web hosting account, there is no cost associated with WordPress itself (unlike many other website builders, which can be quite expensive).
- WordPress is extremely powerful. Whether you’re starting a blog, creating a business website, or building a full-fledged e-commerce store, WordPress can handle just about anything.
- WordPress is easy to use. Even if you’re a total beginner, it doesn’t take long to get comfortable using WordPress—and you don’t need any coding knowledge to build a great website.
If you’re just getting started, we strongly suggest going with WordPress.
With that said, you can always change your mind later! Most web hosting services offer one-click installations for a variety of website builders, including WordPress, Joomla, and Drupal—which are all free.
Step 2: Get A Domain Name & Hosting Account to Create a Website
Before you can start to create your website, you’ll need a domain name and a web hosting account.
- Your domain name is your website’s unique web address, e.g.
yoursite.com - Your web host is the service that stores your website’s files and connects it to the public Internet
This isn’t as complex or technical as it may sound. It’s just a matter of following a few simple steps.
You can get both your domain name and your web hosting account from Gigapress, which is one of the most popular web hosting providers in the industry (and officially recommended by WordPress.org)
Which Hosting Plan Is Right For You to Create a Website?
GigaPress offers three main web hosting plans: Starter, Advanced, and Premium.
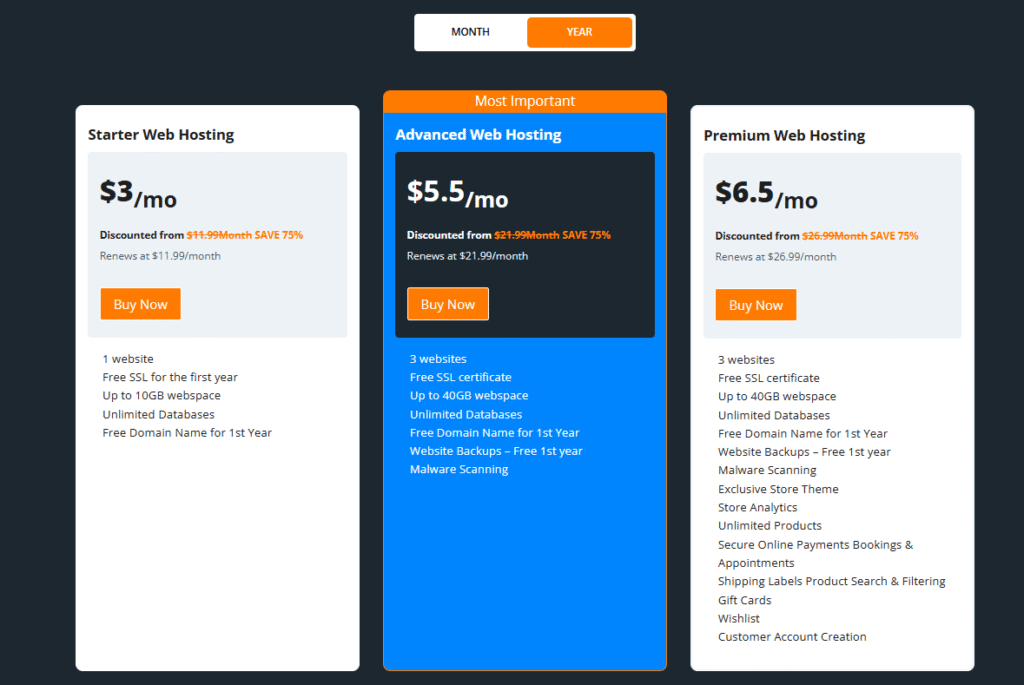
Starter Web Hosting: This plan is designed for beginners and individuals just getting started. At the lowest cost, it includes hosting for one website, up to 10 GB of webspace, a free SSL certificate for the first year, unlimited databasesA database is an organized collection of data stored and accessed electronically. It is a crucial component of… More, and a free domain name for the first year. It’s perfect if you only need one site and want to minimize expenses while still getting all the essential features.
Advanced Web Hosting: Ideal for growing websites or users who want to host multiple sites. This plan supports up to three websites with 40 GB of webspace, includes a free SSL certificate, unlimited databases, a free domain name for the first year, website backups for the first year, and built-in malware scanning. It’s a solid option for media-rich websites or small businesses looking for extra performance and protection.
Premium Web Hosting: Tailored for users planning to run an online store or who need advanced tools and e-commerce capabilities. Like the Advanced plan, it allows hosting for up to three websites with 40 GB of storage, free SSL, unlimited databases, and first-year access to a free domain, backups, and malware scanning. On top of that, it includes premium e-commerce features such as an exclusive store themeA WordPress theme is a set of files that determine the design and layout of a website. It controls everything … More, built-in analytics, unlimited products, secure payment integration, support for appointments and bookings, gift cards, shipping labels, wishlists, and customer accounts.
Not sure which plan to choose?
- If you’re focused on lowest cost and only need one website, go with the Starter plan.
- If you need support for multiple sites, larger storage, daily backups, and malware protection, the Advanced plan is a strong match.
- If you plan to run an online store or require features like product listings, store analytics, payment integrations, and appointments, the Premium plan is the most suitable.
Create A Website: Choosing Your Domain Name
On the next pageIn WordPress, a page is a content type that is used to create non-dynamic pages on a website. Pages are typica… More, you can register a domain name for your new website:
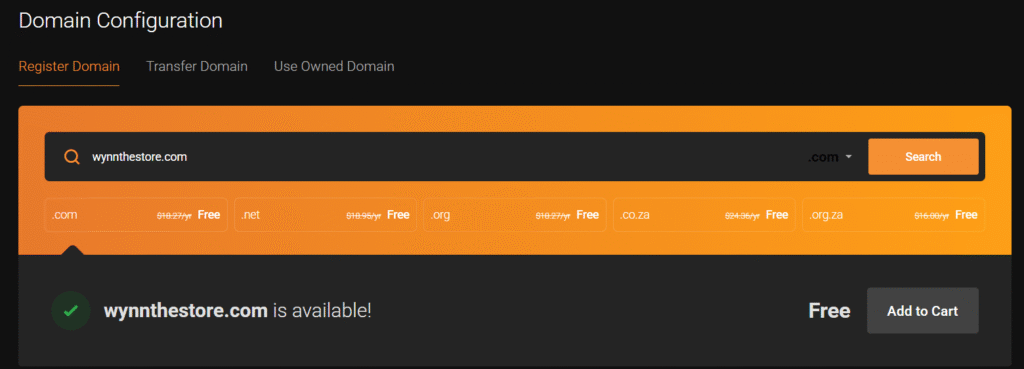
This is where people will find your site on the web—for example, yoursite.com.
And remember, since you used the discount link above, this is included for free with your hosting package! (Domain names usually cost anywhere from $15-30 per year to register.)
How To Choose A Good Domain Name
If you haven’t decided on a name for your website yet, here are a few tips:
- Go for
.comif you can. The extension doesn’t really matter, but many people still trust.comand.netthe most. - Make it brandable. This means your domain should be unique, easy to memorize and pronounce, and trustworthy.
- Use only words. Generally, you’ll want to avoid using hyphens, and only use numbers if they’re part of your brand name (for example: 9to5Mac.com).
If you’re having trouble coming up with good ideas that aren’t taken, here’s a process I like to use:
- Make a list of random words related to your topic or niche.
- Run each of those words through Thesaurus.com to get some synonyms, and add those to the list.
- Throw in some other words that aren’t necessarily related to your topic: adjectives, prefixes, suffixes, words you just happen to like, etc.
- Spend some time playing with different combinations of the words on your list to see what works and what doesn’t.
You can also look at other websites in your industry and draw inspiration from them.
If you’re really stuck, you can try using one of these name generators:
Once you’ve decided on a name, go ahead and enter it into the “Create a new domain” box and click Next.
Create Your GigaPress Account and Complete Checkout
Finally, you’ll need to enter a few details to create your GigaPress account and complete your purchase:
- Account Information
Enter your name, email address, and create a secure password for your new GigaPress account. - Domain Selection
Choose a new domain, transfer an existing one, or use a temporary domain to get started right away. - Billing Details
Provide your payment information and select your preferred billing cycle (monthly, annually, etc.). - Review & Confirm
Double-check your selections and complete the checkout process.
Once your payment is processed, your hosting account will be activated automatically—and WordPress will be installed for you.
Step 3: Set Up WordPress On Gigapress to Create a Website
Now that you’ve signed up for GigaPress hosting, WordPress is already installed for you — no manual setup needed. It’s quick, beginner-friendly, and ready to go out of the box. This step-by-step guide will walk you through accessing your site and getting it set up just the way you want.
Log into Your GigaPress Customer DashboardIn WordPress, the Dashboard is a central hub for managing a website’s content and settings. It is the first sc… More
After signing up, check your email for your GigaPress welcome message. Click the link to access your GigaPress control panel. Inside, you’ll see a friendly dashboard with prompts like:
- “Launch a New Website”
- “One‑Click WordPress Setup”
It’s GigaPress’s simplified onboarding: lightweight, scalable, and fast.
Step 3.1: Use the One‑Click WordPress Installer
Click on “Install WordPress” in the dashboard. GigaPress supports hassle‑free installation with a guided wizard:
- Select a domain (if you registered with GigaPress, it’s already listed).
- Choose your site name and admin credentials.
- Skip any extras or site builders—you’ll set things up manually for maximum flexibility.
GigaPress installs WordPress cleanly with no extra bloat.
Step 3.2: Access Your WordPress DashboardIn WordPress, the Dashboard is a central hub for managing a website’s content and settings. It is the first sc… More
Once installation finishes (often within a few minutes), find the link to “Log into WordPress Admin”. This goes directly to your WordPress /dashboard—no GigaPress login required each time. Bookmark it as yourdomain.com/wp-admin.
Step 3.3: Clean Out Unwanted Pre‑Installed Plugins
Some hosting providers fill WordPress with trial plugins or extra apps. GigaPress provides a mostly clean install, but check for any default plugins:
- Go to Plugins → Installed Plugins
- Use the checkbox to select all
- Choose Deactivate, then Delete, via Bulk Actions
Your dashboard is now fresher and easier to customize on your own terms.
Step 3.4: (Optional) Create Your Own WordPress Admin User
GigaPress automatically creates a WordPress admin account linked to your hosting dashboard for one-click login—no password needed.
⚠️ Important: Do not change the password of this default admin user, or the one-click login feature may stop working.
If you prefer to log in directly via yourdomain.com/wp-admin with your own password, follow these steps:
- In your WordPress dashboard, go to Users → Add New.
- Fill in the details:
- Username: Choose something unique.
- Email: Use an address you have access to.
- Role: Set this to Administrator.
- Set a strong password (you can use a password manager or passphrase).
- Click Add New User.
You can now log in at yourdomain.com/wp-admin using this new account anytime—while still keeping the one-click login feature for convenience.
Congratulations! Your WordPress site is live on GigaPress
Open a new browser tab and visit your domain. You’ll see a default WordPress page—your site exists, and you’re ready to build.
(Note: if you get some kind of error when trying to visit your website or your WordPress dashboard directly, you probably just need to wait a few minutes for your domain name to finish activating. Once again, make sure you’ve verified your email address.)
Why GigaPress Hosting Is a Great Choice for Beginners
- Automatic SSL certificate, renewable each year
- Daily automatic backups included (first year or select plans)
- Malware scanning built in
- Free domain registration or transfer in many plans (first year)
These features mean you get a secure, high‑performance WordPress site from day one.
Why Choose Gigapress?
At Gigapress, we pride ourselves on delivering hosting solutions that are:
- Scalable: Designed to grow with your business.
- Secure: Equipped with advanced tools to protect your digital assets.
- Reliable: Built on industry-leading technology for unmatched uptime and performance.
- Budget-Friendly: Offering affordable plans without compromising quality.
Let Gigapress be your trusted partner in hosting and development, empowering your online presence to achieve new heights.
🎉 Before we move on, let me be the first to congratulate you…
You just took a major first step. You literally have a live website up and running now. Seriously—open up a new tab and type in your domain name.

It’s not much yet, but it’s there!
Step 4: Log Into Your WordPress Dashboard
From now on, you’ll be managing your website from your WordPress dashboard.
Once again, you can access your WordPress dashboard by adding /wp-admin to the end of your domain name. For example: yourdomain.com/wp-admin/
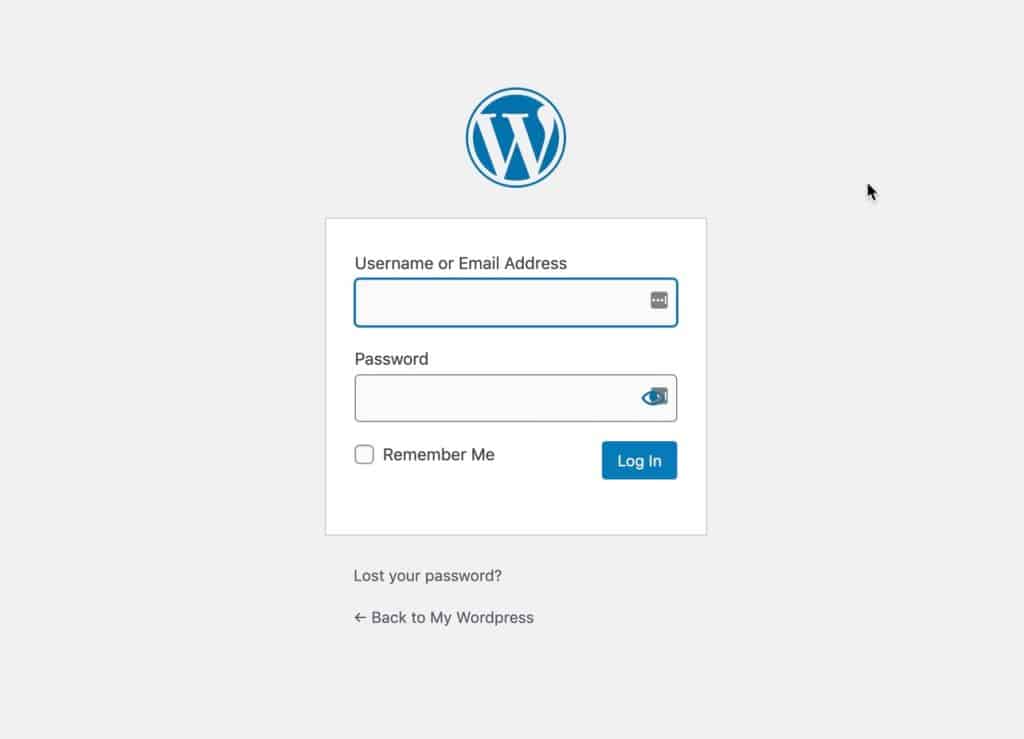
If you’re not already logged in, go ahead and log in using your email address and the password you chose in the previous step.

This is where you’ll manage every part of your website, from your theme and appearance to your pagesIn WordPress, a page is a content type that is used to create non-dynamic pages on a website. Pages are typica… More, blog postsA post is a type of content in WordPress, a popular open-source content management system used for creating an… More, settings, and so on.
At first, you may feel overwhelmed by all the various menus and options—but don’t worry, it doesn’t take long to get comfortable using WordPress.
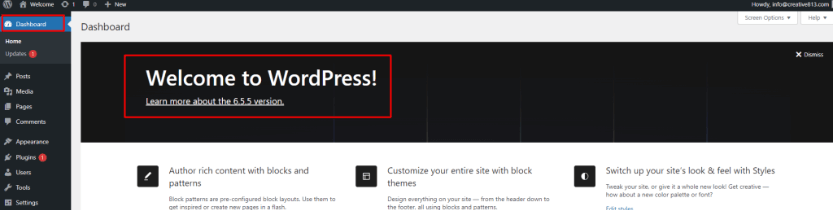
Here’s a quick overview of the WordPress dashboard and how to navigate it:
Next up, it’s time to customize your site.
Step 5: Customize Your Basic Site Settings
Now that your website is up and running, there are a few basic settings you’ll want to customize to your liking.
Start by navigating to Settings > General in the main WordPress MenuIn WordPress, a menu is a collection of links that are displayed as a navigation menu on a website. Menus are … More.

On this page, you can change your site title from the default placeholder.
You can also add a short tagline, which may show up in various places on your site. This is optional—you can just delete the placeholder text if you’re unsure.
Finally, be sure to set the timezone to match your local time.
When you’re happy with these settings, scroll down and click Save Changes.
Step 6: Install A WordPress Theme
Now it’s time to make your website look beautiful.
One of the reasons I love WordPress is because it’s ridiculously easy to customize your website and build something truly unique. That’s made possible by themes.
WordPress themes determine how your website looks. They don’t change your content itself (posts pages, etc.), but they do change how that content is displayed on your site.
As an example, you could go from this:
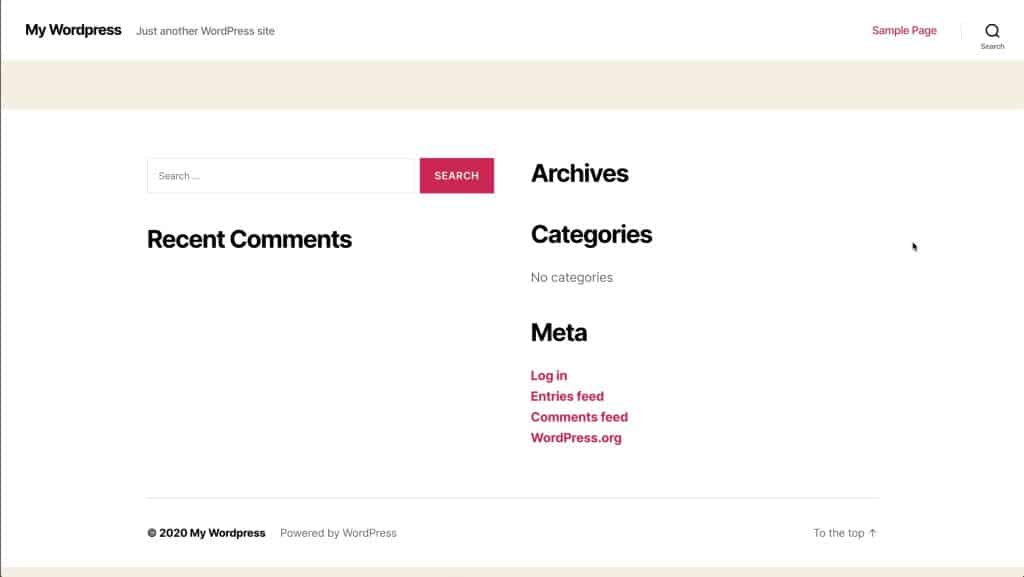
…to this:

…in just a few clicks.
WordPress comes with a default theme that gets an overhaul about once a year. As you’d expect, it’s compatible with most of the things you’d want to do with a WordPress site.
However, I would advise most people not to use the default theme that comes with WordPress. That’s not to say it’s a bad theme—it’s just hard to stand out and brand your business/project if your site looks the same as thousands of others.
So, then, how do you find a good theme for your website?
I’m glad you asked…
Free Themes From WordPress.org
WordPress has a massive community of theme developers, many of whom release their themesA WordPress theme is a set of files that determine the design and layout of a website. It controls everything … More for free on WordPress.org.
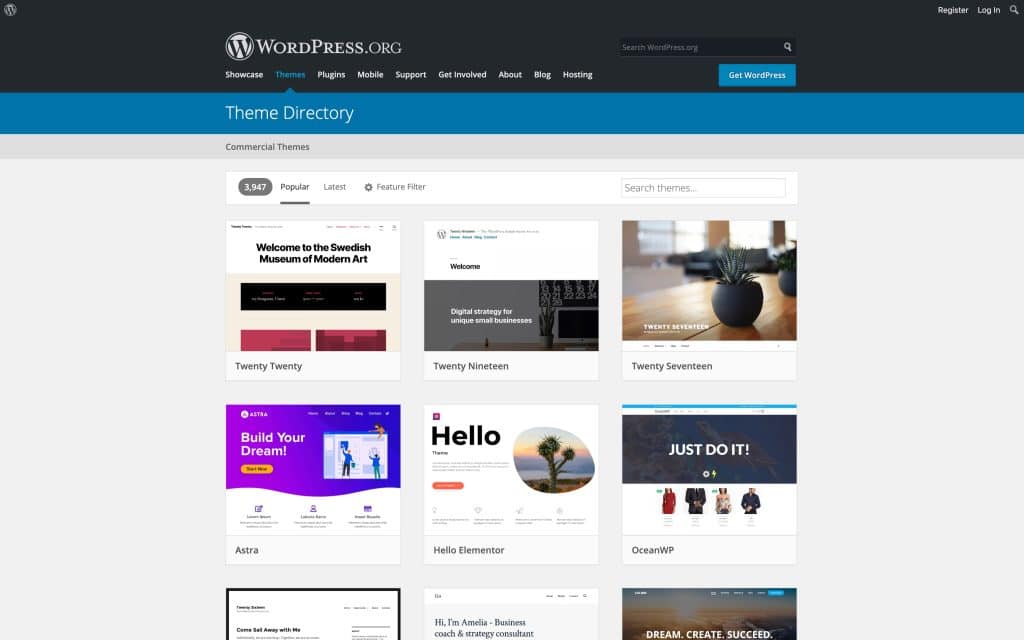
There are thousands of free themes available, and many of them are quite good.
You can view and install free themes through your own WordPress dashboard by going to Appearance > Themes, and clicking the Add New button at the top:
There are themes for just about anything, whether you’re building a business site, a blog, an e-commerce store, or something else entirely.
When you find a theme that piques your interest, you can click on it to see a more detailed description and a rough preview. If you like it, you can click Install to add it to your site, and then Activate to immediately make it your active theme.
(Note that some themes may require a bit of customization before they look exactly like the thumbnail image. More on that below.)
Premium Themes
In addition to the free themes from WordPress.org, there’s a whole world of premium themes that you can buy from third-party sellers and marketplaces.
Again, there’s nothing inherently wrong with free themes, but a premium theme can be a great investment if you want a high-quality design and ongoing support from the developer—which is usually included in the purchase price.
Here are a few of my favorite places to get premium WordPress themesA WordPress theme is a set of files that determine the design and layout of a website. It controls everything … More:
- ThemeForest — A huge marketplace where independent developers sell their themes
- StudioPress — One of the most reputable theme vendors in the business
- GeneratePress — A lightning-fast multipurpose theme that can be customized for nearly any purpose (check out their demo sites)
When you purchase a premium theme, it will usually be delivered as a .zip file, which you can install directly through your WordPress dashboard.
Just go to Appearance > Themes, click Add New, and then click Upload Theme:
From there, just upload the .zip file, and you’ll have the option to preview or activate your new theme right away.
Step 7: Customize Your Theme
Chances are, even the best theme won’t look exactly the way you want right out of the box. You’ll need to do some tweaking.
Luckily, WordPress has a great feature where you can customize your site’s appearance while viewing a live preview, so you can see the effects of your changes in real time.
After you’ve chosen a theme, go to Appearance > Customize to open the WordPress customizer.

On this screen, you’ll see a number of appearance options in the left sidebar, with a live preview of your site on the right.
Every theme has its own unique options in the customizer, from typography to colors, layout options, and more. You’ll definitely want to spend some time going through these settings and tweaking them until your site looks just right.
Note: If your site doesn’t have any content yet, it may be hard to visualize exactly how the end result will look. You may want to come back to the customizer later, after you’ve added some posts and pages.
Step 8: Add Content To Your Website
While design is important, the most crucial part of any website is its content.
By default, WordPress supports two main types of content: pages and posts.
- Pages are typically used for permanent, static content such as your “About” page and “Contact” page.
- Posts are displayed on your blog in reverse-chronological order, and they usually have a date, categories, and tags associated with them.
Creating A Page
Let’s start by creating a page.
To do this, open up your WordPress dashboard and go to Pages > Add New.
You’ll see a content editor that looks something like this:
It may look slightly different depending on your theme, but the functionality is the same.
Go ahead and enter a page title and some content. It doesn’t have to be perfect yet—you can always edit it later.
The editor divides your content into “blocks,” which are basically little chunks of content like paragraphs, headings, images, tables, etc.
By default, every time you press enter/return, a new paragraph block will be created. This is exactly like writing in any other text editor.
However, if you’d like to add some other type of content, such as a heading or an image, you can click the + icon to choose a different block:
Notice that the sidebar on the right side provides various options for each type of block.
The sidebar also has a “Document” tab where you can edit a few settings for the page as a whole:

When you’re ready, you can click Publish to publish your page immediately, or Save Draft if you want to come back and finish your work later.
If you click Preview, you’ll see a live preview of what this page will look like on your website.
You can view and edit your existing pages at any time by going to Pages > All Pages.
Creating A Menu
Once you’ve created one or more pages, you may want to add them to your site’s navigation menu.
You can manage your menusIn WordPress, a menu is a collection of links that are displayed as a navigation menu on a website. Menus are … More by going to Appearance > Menus in your WordPress dashboard.
From there, click “create a new menu” and give it a name, then use the options on the left to add whatever items you want:
You can also edit the display labels of any pages you add to the menu.
Once you’ve added some pages to your menu, be sure to select at least one “Display location” at the bottom. This determines where the menu will actually appear on your website.
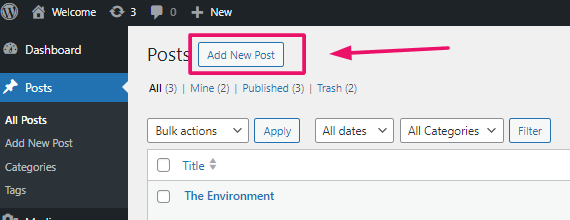
Creating A Post
The process of creating a post is very similar to creating a page.
Go to Posts > Add New to create your first blog postA post is a type of content in WordPress, a popular open-source content management system used for creating an… More.
As you can see, the post editor is nearly identical to the page editor.
The main difference is that you have the option to add categoriesIn WordPress, categories are a fundamental taxonomy used to group and organize posts based on their topics or … More and tagsIn WordPress, tags are a taxonomy used to classify and organize posts. They are similar to categories, but unl… More, which are used to organize your blog posts by topic.
See also: How To Start A Successful Blog: The Definitive Guide
This is our all-inclusive blogging tutorial where we discuss not just how to build a website, but how to create amazing content, drive traffic, and make money. 📈
Setting A Static Front Page
By default, your website’s homepage will show your latest blog posts in reverse-chronological order.
If you would prefer to have more control over what people see when they first land on your site, you can opt to use a static homepage instead.
To do this, you’ll need to create two new pages:
- A homepage — This will be your actual custom homepage. Feel free to customize it however you like.
- A blog page — Because your homepage will no longer show your blog posts, you’ll want to create a separate blog page. You can simply create a blank page and title it “Blog” or something similar.
Then go to Settings > Reading in your WordPress dashboard:

In the section that says “Your homepage displays,” select “A static page.”
Then specify the homepage and blog page that you just created, and save your changes.
Once you’ve done this, your custom homepage will be the front page of your website, and the blank “Blog” page will now display your latest blog posts.
For some more tips on how to do this properly, check out our article on How To Edit Your Homepage In WordPress.
If your WordPress theme has a sidebar, you can customize what shows up there by using “widgets.”
WidgetsA widget is a small block of content that performs a specific function and can be added to certain areas of a … More are small blocks of content that perform a specific function, such as displaying your latest posts, archives, social media profiles, a search box, or even just custom text:

They are most commonly used in sidebars, but many themes also have widget areas in other locations, like the footer.
You can manage your widgets in the WordPress customizer by going to Appearance > Customize and navigating to the “Widgets” section.
Step 10: Install Plugins For Added Functionality
One of the biggest selling points of WordPress is its extensibility.
With the right plugins, you can make your website do just about anything.
Plugins range in their scope from simple modifications like adding social media buttons to your blog posts, to more complex things like turning your site into a full-fledged social network.
There are tens of thousands of plugins available for free from WordPress.org.
Like themes, you can install plugins directly through your WordPress dashboard, without downloading anything. Just go to Plugins > Add New, and either browse the recommended plugins or search for whatever you need.
To get you started, here are a few plugins we recommend installing:
- Yoast SEO — This plugin does all sorts of things to make your website more SEO-friendly, to help you rank higher in search engines like Google. (Check out our WordPress SEO tutorial for tips on how to set it up.)
- GA Google Analytics — This pluginA plugin is a software component that adds specific features and functionality to your WordPress website. Esse… More makes it super easy to add your Google Analytics tracking code to all pages on your site, so you don’t have to do it manually.
- Contact Form 7 — An easy way to add contact forms to your posts and pages.
After you install and activate a plugin, it will usually add a new link somewhere in your WordPress menu where you can manage its settings.
For example, Yoast SEO adds a new SEO menu:
How to Populate Your WordPress Website with Engaging Content
Creating compelling content on your WordPress site is crucial for attracting and retaining readers. WordPress offers robust blogging features alongside its page creation tools, making it easy to populate your site effectively. Here’s a step-by-step guide and strategies to help you craft engaging content.
Step-by-Step Guide to Creating a Post
- Start a New Post:
- Navigate to ‘Posts’ in your WordPress dashboard and click on ‘Add New’ to open the post editor.
- Craft Your Content:
- Create a captivating title and write your main text. Enhance your post with images, videos, and interactive elements like widgets to keep your audience engaged.
- Organize with Categories and Tags:
- Use categories to group posts into broad themes and tags to highlight specific details within each post.
- Set Visibility and Publishing Options:
- Decide who can view the post by setting a password, keeping it private, or scheduling it for future publication.
- Publish Your Post:
- Once everything is ready, click ‘Publish’ to make your post live on your website.
Tips for Creating Engaging Content
- Quality Over Quantity: Focus on providing valuable information or entertainment with each post.
- Interactive Elements: Incorporate polls, surveys, or interactive videos to boost user engagement.
- Consistent Updates: Keep your content fresh and updated regularly to encourage visitors to return.
For inspiration on effective content presentation, explore successful WordPress websites. Studying well-structured and engaging content examples can offer insights into attracting more traffic and engagement. By following these guidelines, your WordPress site will thrive as a vibrant hub for your audience.
Build A Website: How Do Website Owners Get Paid?
Website owners have multiple avenues to monetize their platforms and generate income. Here’s a detailed exploration of the most common methods:
- Advertising Revenue: Website owners can earn income by displaying ads, often through platforms like Google AdSense. These ads are tailored to match viewer interests and earn revenue when visitors click on them.
- Selling Products and Services: Websites serve as digital storefronts where owners can sell physical goods, digital downloads, or services. Integrated payment gateways ensure smooth transactions for buyers.
- Affiliate Marketing: Owners promote other companies’ products through referral links and earn commissions on each sale. This strategy is ideal for those looking to profit from sales without creating their own products.
- Sponsored Content: Influential websites publish sponsored posts where businesses pay to have their content featured. Transparency is maintained by marking such content as “sponsored”.
By leveraging these strategies, website owners can establish diverse revenue streams based on their content and audience. Successful websites often combine multiple methods to maximize their earning potential, each requiring different levels of involvement and strategic planning.
Enhancing Your Website with Blogging and eCommerce Features
Integrating advanced functionalities like blogging and eCommerce can significantly boost engagement and sales on your website. Here’s a user-friendly guide to adding these features using a typical site creation tool, such as Hostinger.
Adding a Blog: Step-by-Step Guide
- Initialize Your Blog:
- Navigate to the sidebar and click on ‘Pages and navigation,’ then select ‘Add page.’
- Choose ‘Blog’ as your page type and pick a template that matches your style.
- Managing Your Blog:
- Access the ‘Blog’ section from the menu to view drafts, schedule posts, or manage published articles.
- Click ‘Add new post’ to start creating content manually or use AI tools to assist in setting the tone, length, and focus of your post.
- Customizing and Publishing:
- Edit text, insert images, and utilize the toolbar to refine your post.
- Once satisfied, set the post to ‘Public’ to share your content when your site goes live.

For comprehensive blogging tips, explore beginner-friendly guides covering best practices and effective strategies.
Setting Up an eCommerce Store: Step-by-Step Guide
- Enable Your Online Store:
- In the sidebar, navigate to ‘Website settings’ > ‘Online store,’ then click ‘Add store’ to create a new store page with a product list section.
- Managing Your Store:
- Access the ‘Manage store’ option under ‘Online store’ to open the store manager.
- Begin by setting up your store details including name, country, and preferred currency. Click ‘Continue’ to proceed.
- Completing Store Setup:
- Follow the onboarding process to enter the store management area.
- Use the checklist to finalize setup tasks such as product listings and payment method configurations.
For a successful online store, define your business strategy and understand your target audience. Comprehensive tutorials can provide a strong foundation for your eCommerce venture.
By following these steps, you can effectively enrich your website with blogging and eCommerce capabilities, transforming it into a dynamic platform that engages visitors and drives revenue growth.
How to Install WordPress Using cPanel’s WordPress Onboarding Flow
Installing WordPress is straightforward with cPanel’s intuitive onboarding process. Follow these steps to quickly set up your WordPress site:
Step 1: Initiate WordPress Installation
- Log in to your hosting account and navigate to hPanel.
- Go to the ‘Websites’ section and select ‘Add website’.
- Choose WordPress from the options provided to start the installation process.
Step 2: Configure Your Website
- Define the type of website you want (blog, eCommerce, personal, etc.).
- Select your primary language and set up your WordPress login credentials.
Step 3: Skip Plugin Installation
- Initially skip installing plugins to streamline the setup process.
- You can add plugins later based on your site’s specific needs.
Step 4: Select a Theme
- Browse through available WordPress themes and use the ‘Preview’ feature to visualize how they look.
- Choose a theme that aligns with your website’s vision and click ‘Select’ to apply it.
Step 5: Utilize AI Assistance
- Take advantage of AI tools in hPanel to simplify setup.
- Enter your brand name and a brief description to personalize initial content creation.
Step 6: Register and Install
- Register a free domain included with your hosting package, if available.
- Complete domain registration and finalize WordPress installation following the prompts.
Step 7: Access Your WordPress Dashboard
- Navigate back to hPanel’s ‘Websites’ section.
- Click on ‘Admin Panel’ next to your new website to access the WordPress dashboard.
Step 8: Set Privacy Settings
- If your website isn’t ready for public viewing, navigate to ‘Settings’ → ‘Reading’ in the WordPress dashboard.
- Check the ‘Search engine visibility’ option to prevent search engines from indexing your site temporarily.
By following these steps, you can efficiently set up your WordPress site using hPanel’s user-friendly onboarding flow. Enjoy a hassle-free installation process and get your website up and running quickly.
Create A Website: Frequently Asked Questions
Here are the answers to a few common questions we often hear about creating a website. (Click to expand.)
How much does it cost to build a website?
If you use WordPress, the only required costs are your annual domain registration fee and your web hosting account.
By using discount, you can get a web hosting package for as low as $3 per month, with a free domain name included. Like most web hosting companies, bill annually.
If you choose to purchase a premium WordPress themeA WordPress theme is a set of files that determine the design and layout of a website. It controls everything … More, they typically run from $30–70 as a one-time purchase.
All in all, it is completely feasible to build a beautiful, functional website with less than $100 USD invested upfront.
Do I need any special software to build a website?
Coding knowledge is not required to build a great website.
Platforms like WordPress have made it incredibly easy for nontechnical people to build websites without writing a single line of code. If you can use a computer, you can build a website with WordPress.
That’s not to say that a little HTML and CSS knowledge won’t come in handy—but believe it or not, those are skills you can pick up organically over time, and they’re certainly not required.
Can I create a website from my phone?
While we recommend performing the initial setup on a computer, it is certainly possible to do it from a smartphone or tablet.
After you’ve created your website, you can manage your content using the WordPress app for iOS or Android.
Can I keep my website private while I’m still working on it?
Yes! We recommend installing this Coming Soon page plugin, which will ensure that only you can see your site before you’re ready to launch.
Can I add other users to my website?
Yes! If you’d like to give someone else an account to help you with your website, you can do so by going to Users > Add New in your WordPress dashboard.
If you do grant someone else access to your website, be sure to give them an appropriate user role. You almost never want to give administrator access to another person. Learn more here: WordPress User Roles: Everything You Need To Know
How can I get my website to rank on Google?
Ranking on Google begins with publishing great content, so make sure you’re doing that. Check out our blogging tutorial to learn exactly what that entails.
You’ll also want to install the Yoast SEO plugin, and read our WordPress SEO tutorial for some advanced optimization tips.
To submit your site to Google and monitor your performance in the search results, you’ll want to create an account on Google Search Console.
How can I make money from my website?
Websites make money from a variety of sources, including advertising, e-commerce, affiliate marketing, consulting services, private memberships, and more. We cover all of these in our blogging tutorial here.
How can I add an online store to my website?
If you have products to sell on your website, you’ll want to use the WooCommerce plugin, which integrates full e-commerce functionality into WordPress.
How to Conduct a Final Review and Create Your WordPress Website
To ensure your WordPress website is ready for launch, follow these steps to review and publish it effectively:
Final Review Process
- Preview Your Site: Visit your live site to see how it appears to visitors. Navigate to your WordPress dashboard, click on your site’s name at the upper left corner, and select ‘Visit Site’.
- Check Functionality: Review all elements such as links, forms, images, and functionalities. Ensure everything works smoothly without any issues.
- Review Setup Steps: Return to the WordPress admin dashboard and verify completion of all setup tasks. Navigate through each step to ensure nothing has been overlooked. Prompt links will guide you to complete any pending tasks.
Create And Publishing Your Website
- Adjust Visibility Settings: Go to ‘Settings’ > ‘Reading’ in your dashboard. Uncheck ‘Discourage search engines from indexing this site’ to make your site visible to search engines.
- Go Live: Once satisfied with functionality and appearance, confirm all settings. Your website is now ready to be published and accessible to visitors online.
Following these steps ensures your WordPress website functions smoothly and is optimized for search engine visibility upon launch.
How to Publish Your Website: Create a Website Once It’s Ready for Launch
Publishing your website marks the final step in your development process. Here’s a straightforward guide to help you launch your site effectively:
Step-by-Step Guide to Launch A Website
- Final Checks:
- Proofread all web content thoroughly to eliminate errors.
- Test all website functionalities to ensure they work seamlessly.
- Preview your site across different browsers and mobile devices to ensure consistent appearance and functionality.
- Find the Publish Button:
- Locate the ‘Publish’ or ‘Go Live’ button in your website builder dashboard. It’s usually found in the upper right corner, but this can vary by platform.
- Going Live:
- Click the ‘Publish’ button to initiate the process. It may take a few minutes for your website to go live as the system finalizes settings and publishes your content online.
- Confirmation and Testing:
- Once live, you’ll receive confirmation from your website builder platform.
- Visit your live URL to verify everything functions correctly and appears as expected.
- Announce Your Launch:
- Promote your new website through social media, email newsletters, and other marketing channels to attract visitors.
By following these steps, you can confidently create a website and publish it, ensuring it’s ready to welcome visitors smoothly and professionally.
The Next Steps: Create A Website and Launch It

At this point, we’ve covered all the major steps to create a website, and you’re well on your way to building something great.
Of course, there’s always a learning curve with any new project. Don’t get discouraged if you run into problems! There are plenty of resources here on GigaPress and around the web.
Be patient and keep at it—you’ll master this stuff in no time.
If you have any questions about building a website, or if you run into problems along the way, please feel free to leave a comment below!
If you’re looking for fast wordpress hosting as well as done-for-you updates such as creating a website and establishing your online presence, check out our hosting packages by clicking the button below:


![How to Remove Duplicate Title Tags in WordPress [Best Way]](https://codingheros.com/wp-content/uploads/2024/07/how-to-remove-duplicate-title-tags-in-wordpress-best-way.webp)

