If you’re an artist or content creator, you might be wondering how you can sell your work online. If you’re not offering your products on the internet, you could be missing out on a huge market and potentially leaving money on the table.

Fortunately, you can sell your work as digital downloads. Using WordPress, you can set up an online store where customers can download and purchase your digital products. The process is easy, and you’ll be able to make money from your creations.
This article will introduce digital downloads and explain the benefits of selling them online. Then, we’ll show you how to set up your online store using a WordPress pluginA plugin is a software component that adds specific features and functionality to your WordPress website. Esse… More. Let’s get to work!
Digital Downloads: What They Are and Why You Should Consider Selling Them
A digital download is a file, document, or other online software that you can buy online. It can be any file, including music, an e-book, or a game:

Users will navigate to your e-commerce store. There they can purchase and download your content onto their desktops or mobile devices. Your file will remain on their devices or online accounts, where they can access it whenever they want.
Unlike an online store that sells material goods such as beauty products, clothing, or sports gear, there aren’t any physical products involved in digital downloads. This means you won’t have to deal with packaging, inventory, and shipping management. Once you create your downloadable product, it can remain in your e-commerce store forever.
There are many benefits to selling digital downloads on your WordPress site. These include:
- Downloads are easier to manage and sell than physical products.
- You’ll have lower overhead costs.
- Get access to virtually everyone on the internet.
- Have the creative freedom to design unique products.
Furthermore, it’s easy to start your own online business selling digital products with WordPress. You’ll be able to profit from selling your content, whether it’s a podcast, online course, or anything else that can be digitalized.
How to Sell Digital Downloads in WordPress (In 5 Steps)
For this tutorial, we’ll be using the Easy Digital Downloads plugin. It’s free to use (although there are also paid plans if you’re searching for more advanced options). Additionally, it’s user-friendly and has customizable checkout and payment gateway integrations. Now, let’s get to work!
Step 1: Install Easy Digital Downloads and Enter Store Information
First, install and activate the Easy Digital Downloads plugin on your WordPress website. After you’ve activated the plugin, head to Downloads > Settings in your WordPress dashboardIn WordPress, the Dashboard is a central hub for managing a website’s content and settings. It is the first sc… More:
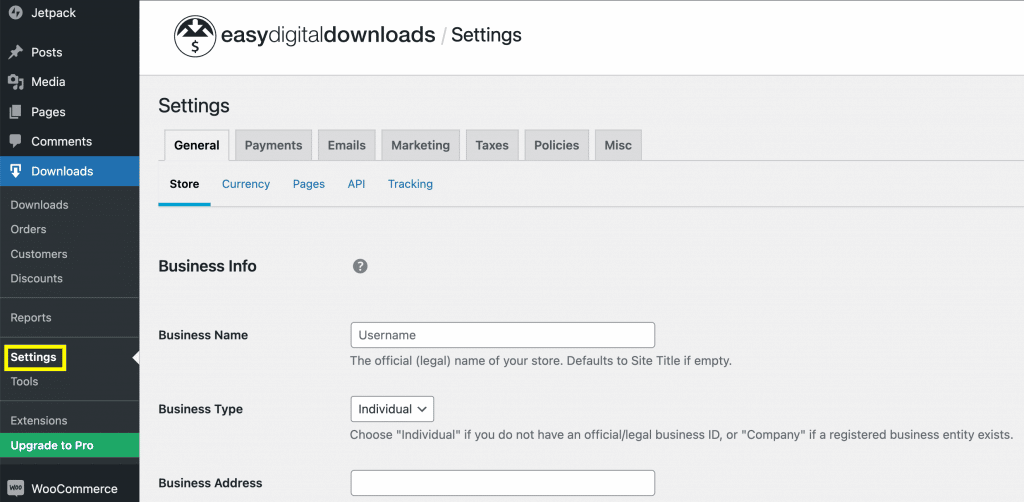
Here you can enter your business information:
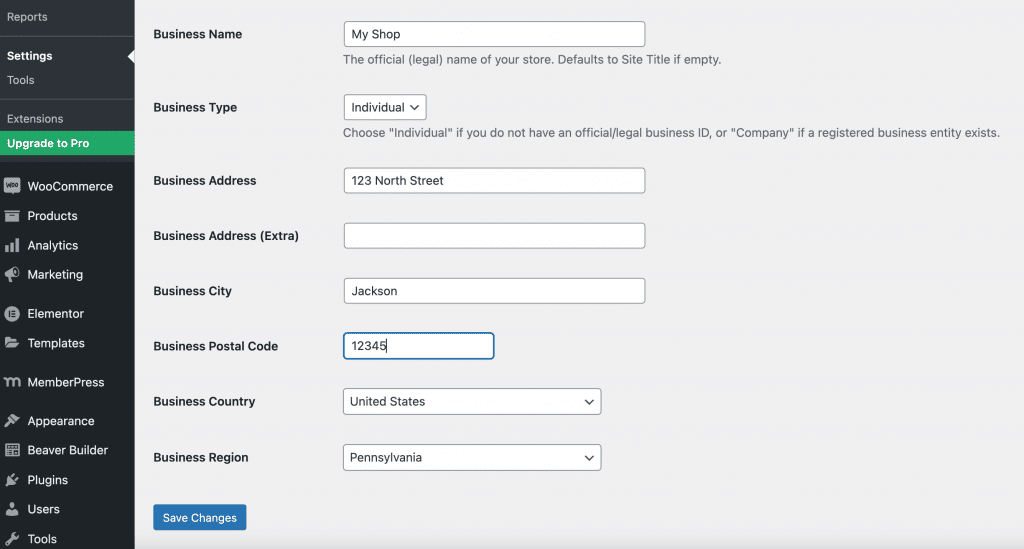
This information includes your business name, type, and address. When you’re done, hit Save Changes at the bottom left of the pageIn WordPress, a page is a content type that is used to create non-dynamic pages on a website. Pages are typica… More.
Step 2: Add Payment Gateways
Once you’ve added your business information, you’ll need to provide a way for customers to pay for your digital products. The Easy Digital Downloads plugin has numerous payment gateway options that you can choose from, including PayPal and Stripe.
On the Settings page, click on the Payments tab:
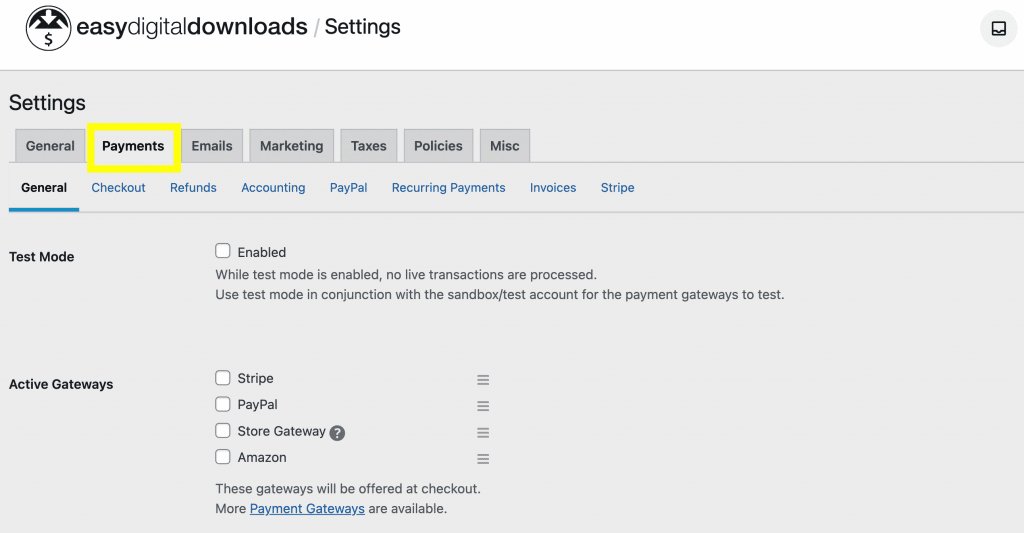
This will take you to the General tab. From here, you’ll be able to choose your preferred payment gateways:
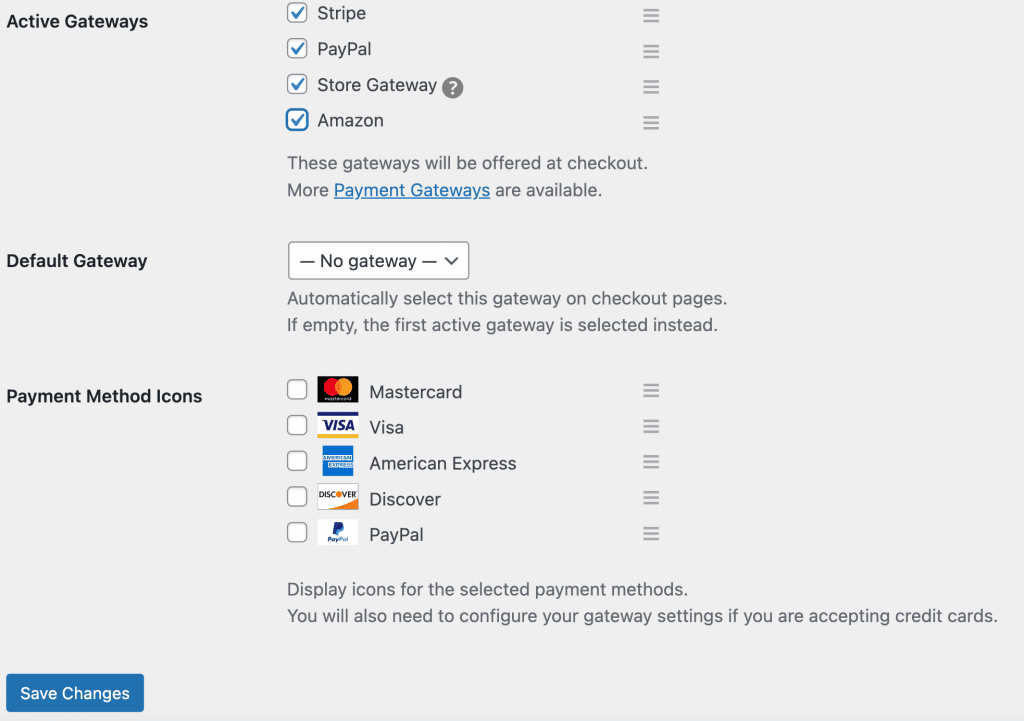
You’ll need to connect your associated accounts. We recommend enabling multiple gateways so that your customers can select their preferred payment methods.
You can also reconfigure the gateways in the order you want them. Choose a few display method icons here, depending on the credit cards your store will accept.
Hit Save Changes at the bottom left of the page when you’re done.
Step 3: Create Your Digital Products
Now it’s time to add your digital products to your online store. To do this, go to the Downloads tab and click on Add New:
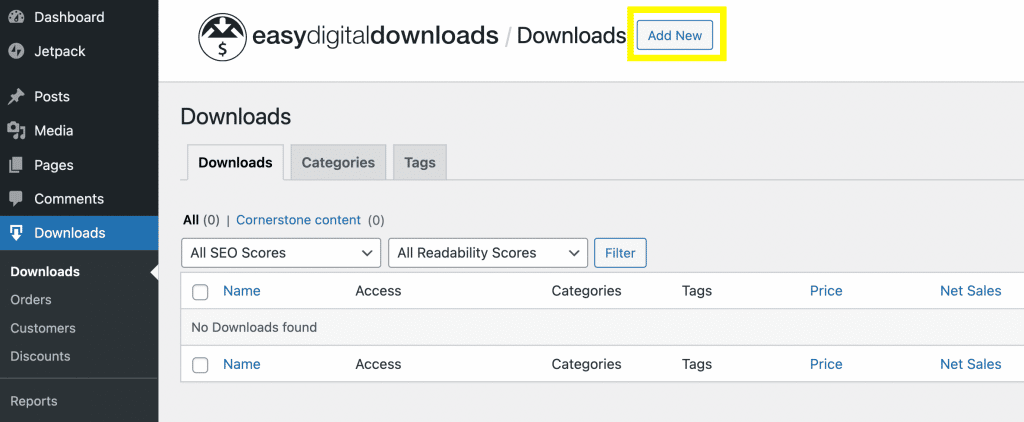
This will open up a new WordPress page where you can add your product information. Start by writing your product name in the title field and a description of the download just below:

Then add your price in the field under Pricing Options, as well as the product type (you can choose either Default or Bundle):
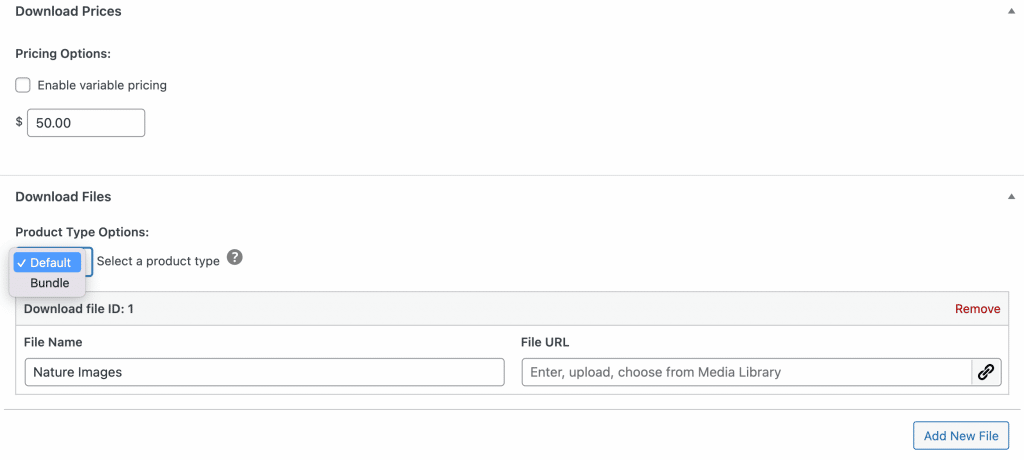
Next, add your digital file. It will include your file name and URL. You can do this from your computer or Media LibraryThe Media Library in WordPress is a feature that allows users to easily upload and manage media files such as … More by selecting the File URL field:

Upload any additional files by clicking on Add New File. You can also add instructions that users will see when they purchase the file:

Next, navigate to the Download tab on the right side of the page:
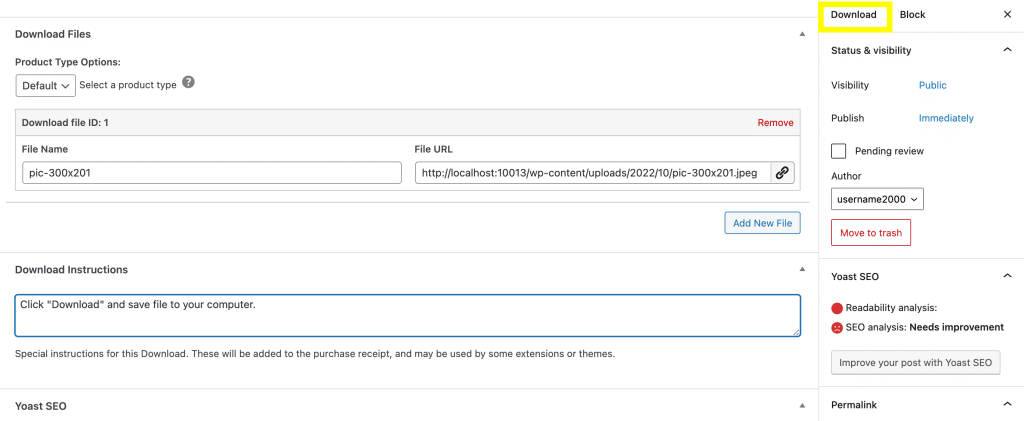
Here you can edit different aspects of your product. Scroll down until you reach the section marked Categories. Add a categoryIn WordPress, categories are a fundamental taxonomy used to group and organize posts based on their topics or … More, tagIn WordPress, tags are a taxonomy used to classify and organize posts. They are similar to categories, but unl… More, and image that represents your product:
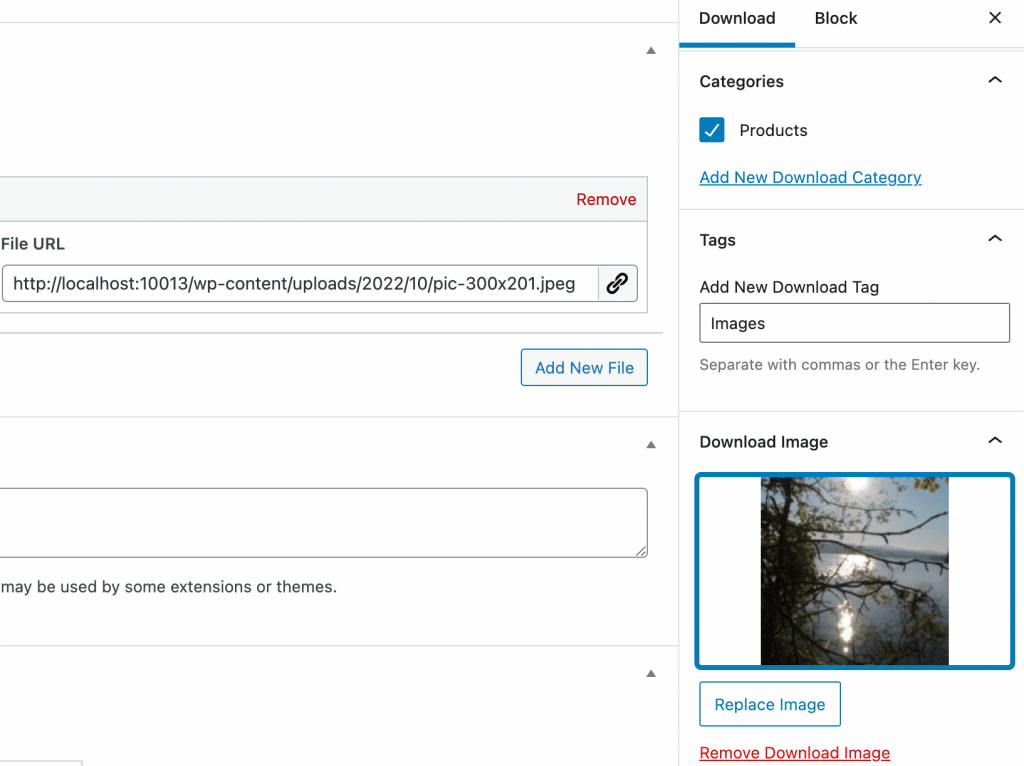
There are other parts of your file that you can edit from this tab. These include download settings, product reviews, and file download limits.
Once you’ve made all of your desired changes, go ahead and click on Preview to see what your digital download will look like on the front end of your website:
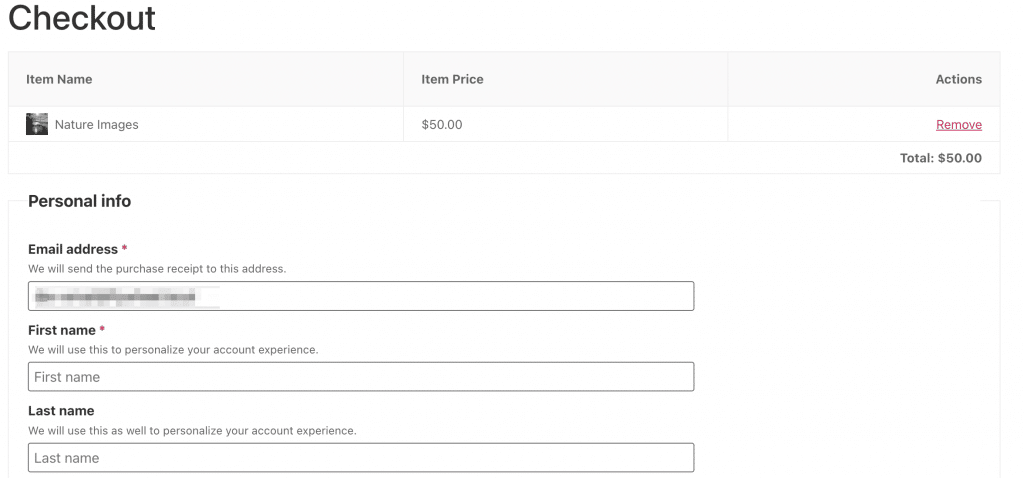
If you’re satisfied with the result, hit Publish.
Step 4: Add and Customize Your Email Receipt
Once you’ve created your digital product, consider customizing the email your buyer will receive after purchasing it. Head to Downloads > Settings > Emails:
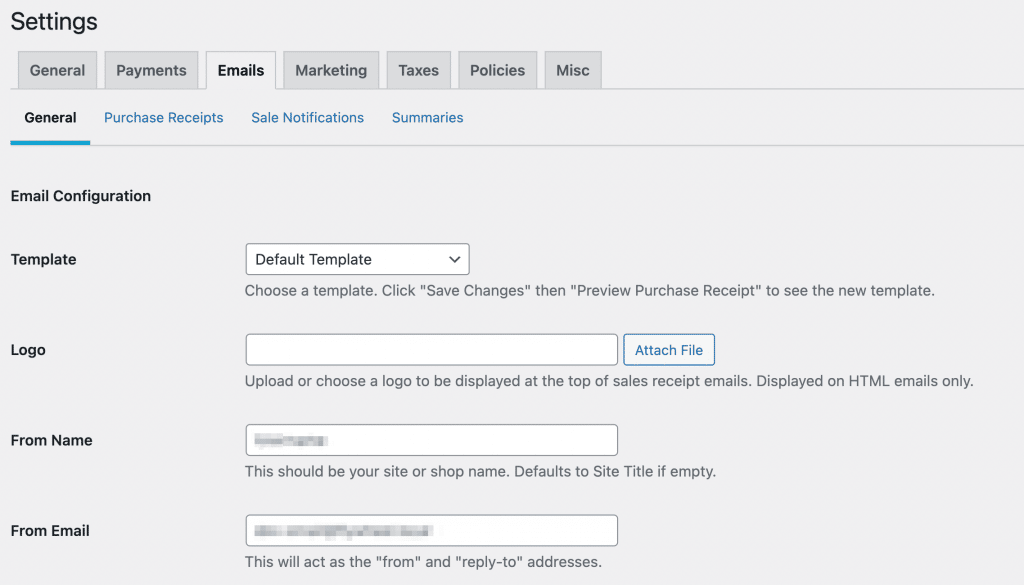
From here, you can customize the email message with your branding. This will include your company name, logo, and email address:
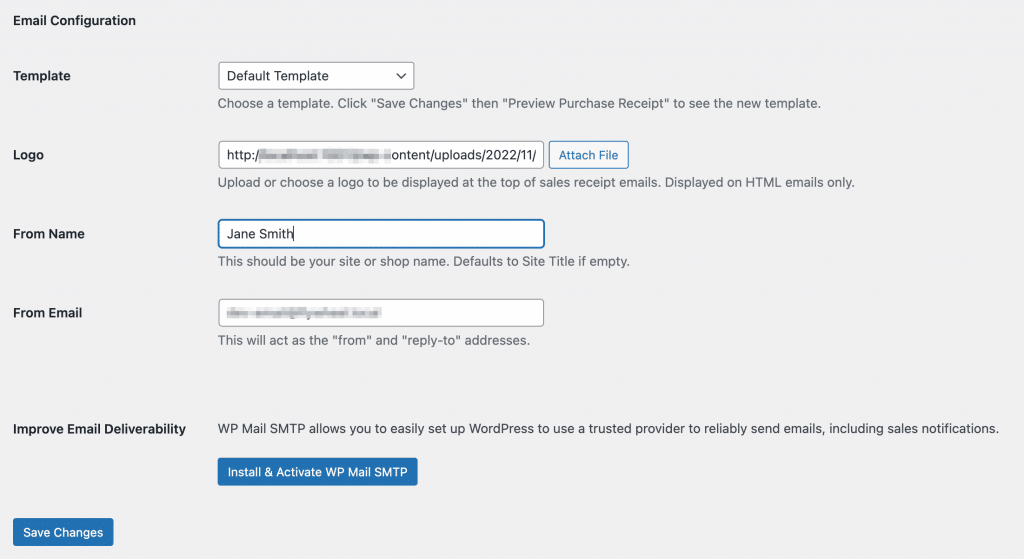
Hit Save Changes at the bottom left. Then, navigate to the Purchase Receipts tab:
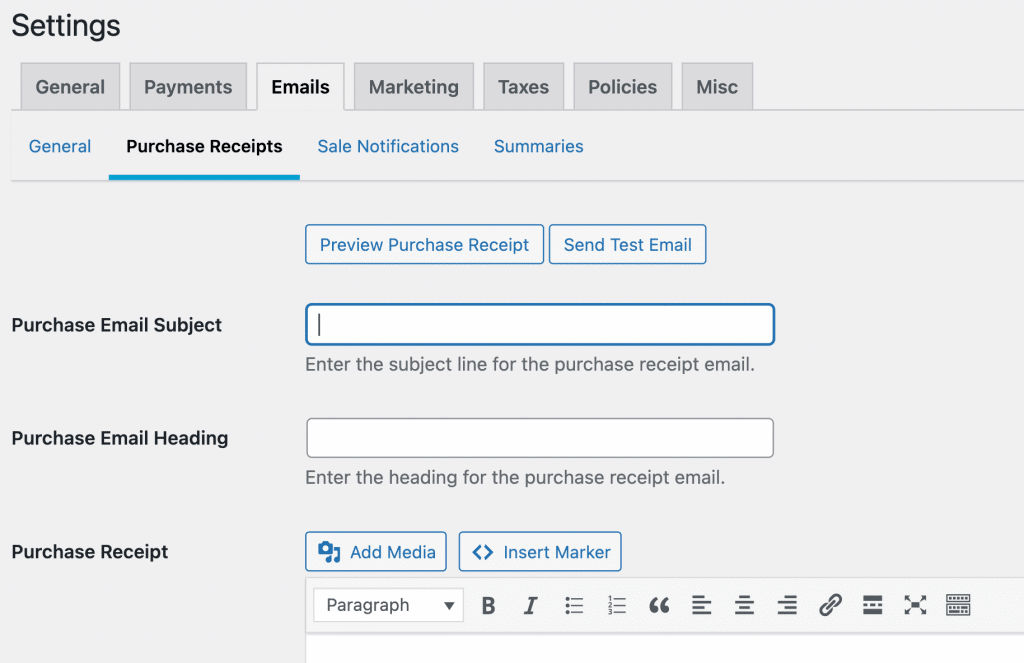
Here you can get a preview of the email that your customers will receive when they purchase your product. Click on Preview Purchase Receipt to view it on the front end:

If you’re happy with the results, click on Save Changes.
Step 5: Promote Your Products
Now that you’ve created a digital download, it’s time to promote it. Otherwise, customers might struggle to find your product online, let alone buy it.
There are a few ways to promote your digital products. To start, we recommend using SEO best practices on your website. These techniques can increase organic traffic by improving your rankings in the search results.
Some SEO best practices include:
- Ensuring your site is mobile-friendly
- Optimizing images
- Using compelling and descriptive titles, headings, and product descriptions
- Creating content based on strategic target keyword research
If your business has social media profiles, make sure that you’re promoting your digital downloads there too. Creating a few postsA post is a type of content in WordPress, a popular open-source content management system used for creating an… More with images of your products can encourage your followers to check out your online store and possibly buy your downloads.
Conclusion
Selling your products online is vital in today’s market. Fortunately, WordPress makes it easy to create an online store and market your digital downloads. This business approach enables you to expand your audience and increase your profits.
To recap, here’s how to sell digital downloads on WordPress in five easy steps:
- Install and activate Easy Digital Downloads, then enter your e-commerce store’s information.
- Include payment gateways for your store, such as PayPal or Stripe.
- Add your digital download(s) to your website, including images, prices, and product information.
- Add and customize the email that your customer will receive after buying your download.
- Market your new digital download by optimizing your website’s SEO and promoting your store on social media.
Do you have any questions about selling digital downloads in WordPress? Let us know in the commentsComments are a feature of WordPress that allow users to engage in discussions about the content of a website. … More section below!
![WordPress Powers 10.57% Of Top 10,000 Sites [Original Research] • GigaPress](https://codingheros.com/wp-content/uploads/2024/06/wordpress-powers-10-57-of-top-10000-sites-original-research-gigapress.png)
