The header of your WordPress website is like the front door of your home. It’s the first thing visitors see and can leave a lasting impression. Understanding how to edit the header in WordPress is crucial. Because a well-designed header can improve your branding, user experience, and SEO performance. Whether you want to change your logo, add a custom script, or tweak the design. The right changes to the header can enhance your site.
In this guide, I’ll show you how to edit the header in WordPress using different methods. Ranging from beginner-friendly options to more advanced customizations. Don’t worry—whether you’re tech-savvy or new to WordPress. You’ll find a method that suits your skill level and helps you achieve the perfect header design!
What is a WordPress Header?
A WordPress header is the upper section of your website. It contains key elements such as the logo, navigation menuIn WordPress, a menu is a collection of links that are displayed as a navigation menu on a website. Menus are … More, and components. Like social media links or a search bar. This area serves as a crucial part of your site’s branding and user experience. The header appears on every page. Providing visitors with consistent navigation and quick access to essential site features.
Key components of a WordPress header include:
- Logo: Represents your brand visually.
- Navigation Menu: Guides users through your website’s pagesIn WordPress, a page is a content type that is used to create non-dynamic pages on a website. Pages are typica… More.
- Header Image: A customizable banner or background image.
- Call-to-Action (CTA): Elements like “Contact Us” buttons or social icons.
Customizing the header allows you to shape the first impression visitors get. And ensure that navigation is intuitive. Improving your site’s overall user experience and functionality.
Why Edit the Header in WordPress?
Your website’s header holds important elements. Like the logo, navigation menu, and sometimes contact information or social media links. Customizing your header can help improve your site’s visual appeal. Make your brand more recognizable, and provide a better user experience. Plus, many users need to add custom scripts like Google Analytics, which often go in the header.
Reasons to edit your WordPress header include:
- Branding: Update your logo, tagline, or colors to reflect your brand.
- Navigation: Improve user experience by reorganizing the navigation bar.
- Custom Code: Add scripts for tracking, SEO, or advertising.
Let’s dive into the ways you can edit your WordPress header, starting with the easiest methods.
Different Methods to Edit the Header in WordPress
You don’t need to be a coding expert to edit your header. Depending on your preference and comfort level, you can customize the header through:
- WordPress Customizer: Best for quick edits like changing the logo, text, or header layout.
- Theme Editor: Ideal for advanced users who want to manually edit the header.php file.
- Plugins: Great for adding custom code to the header without touching theme files.
Each method offers its own advantages, so I’ll cover them all to help you choose the right one for your needs.
Using the WordPress Customizer to Edit the Header
One of the easiest ways to edit your WordPress header is through the WordPress Customizer. This method doesn’t require any coding knowledge and allows you to make changes.
To edit your header using the Customizer:
- Go to your WordPress dashboardIn WordPress, the Dashboard is a central hub for managing a website’s content and settings. It is the first sc… More.
- Navigate to Appearance > Customize.
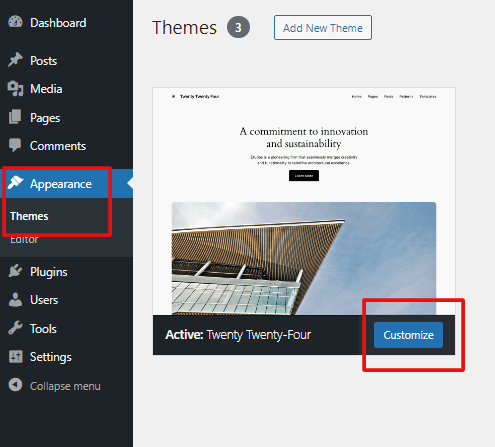
- Select Header, or find the header options under your theme’s specific settings.
- From here, you can edit:
- Logo: Upload a new logo.
- Header Text: Change the site title or tagline.
- Header Layout: Adjust the positioning of elements like the menu or social icons.
This is a user-friendly way to quickly adjust how your header looks without breaking your site.
Editing the Header with the WordPress Theme Editor
If you’re feeling more adventurous or need deeper customizations. You can edit the header directly by modifying the header.php file. This file controls what elements appear in the header across your site.
Steps to edit the header.php file:
- Go to your WordPress dashboard.
- Navigate to Appearance > Theme File Editor.
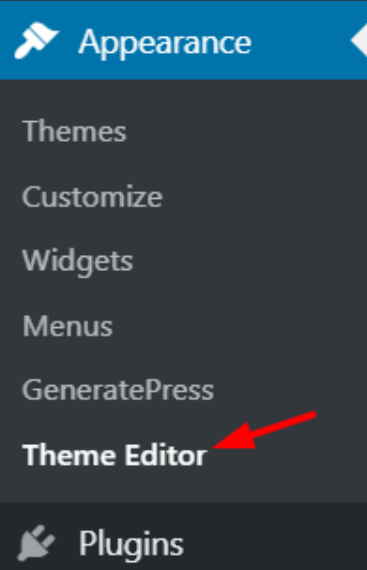
- On the right-hand side, locate header.php under the theme files.
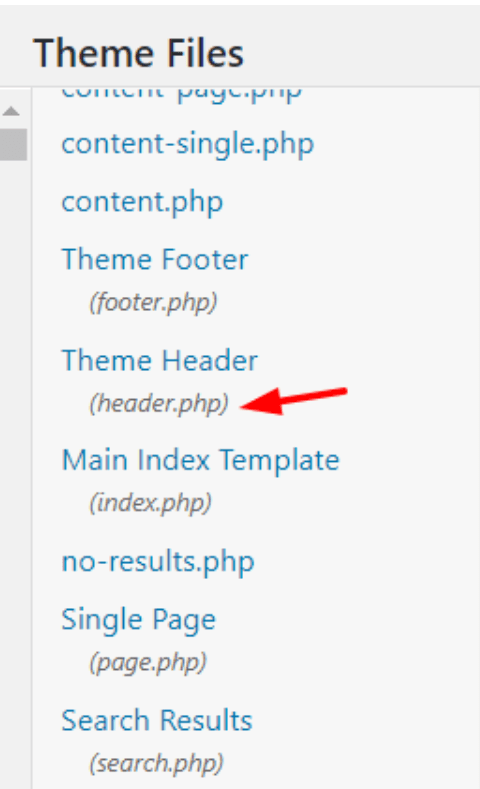
- Make your changes to the code. For example, you might want to:
- Add custom HTML for a banner or announcement.
- Insert JavaScript for analytics or advertising.
- Reorganize the HTML structure for better SEO.
Caution: Always create a child themeA child theme is a WordPress theme that inherits the functionality and styling of another theme, referred to a… More or back up your site before making changes to your theme files. Editing these files incorrectly can break your site or remove customizations when the theme updates.
Adding Custom Code to the Header
Sometimes, you’ll need to add code to your header for things like Google Analytics, Facebook Pixel, or SEO-related meta tagsIn WordPress, tags are a taxonomy used to classify and organize posts. They are similar to categories, but unl… More. There are two main ways to do this: by editing the header.php file (as mentioned above) or by using the functions.php file.
To add code using functions.php:
- Go to Appearance > Theme File Editor.
- Locate functions.php.
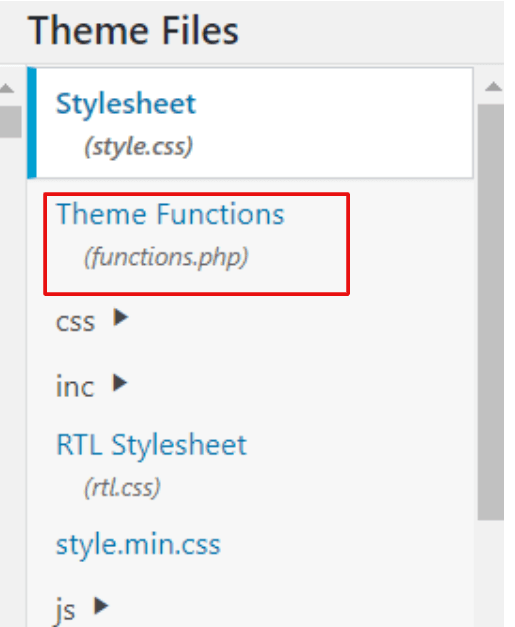
- Add the following code to insert your script:
function add_custom_script() {
    echo '<script>Your custom code here</script>';
}
add_action('wp_head', 'add_custom_script');
This method is cleaner than directly editing the header.php file. And reduces the risk of breaking your theme.
Using a Plugin to Edit the Header in WordPress
If you’re uncomfortable editing code or your theme files, don’t worry—there’s a pluginA plugin is a software component that adds specific features and functionality to your WordPress website. Esse… More for that! One of the best tools for this is Insert Headers and Footers.
To use the Insert Headers and Footers plugin:
- Install and activate the plugin by going to Plugins > Add New and searching for it.
- After activation, go to Settings > Insert Headers and Footers.
- Paste your custom code in the Header section.
This plugin is great for adding scripts. Like Google Analytics or custom meta tags without touching any code. It’s also theme-agnostic, so your code will stay intact even if you switch themesA WordPress theme is a set of files that determine the design and layout of a website. It controls everything … More.
Customizing the Header Image in WordPress
Many themes allow you to display a header image at the top of your website. Which can be a powerful branding element. Customizing this image is easy via the Customizer.
Steps to customize your header image:
- Go to Appearance > Customize.
- Navigate to Header > Header Image.
- Upload or select an image from your media libraryThe Media Library in WordPress is a feature that allows users to easily upload and manage media files such as … More.
Make sure your header image is optimized for fast loading (compressed). And fits within the recommended dimensions, which usually varies depending on your theme.
Creating a Sticky Header in WordPress
A sticky header remains fixed at the top of the screen as users scroll down. It can improve navigation and user experience.
To create a sticky header:
- Use a plugin like Sticky Menu (or Anything!) on Scroll.
- Install and activate the plugin via Plugins > Add New.
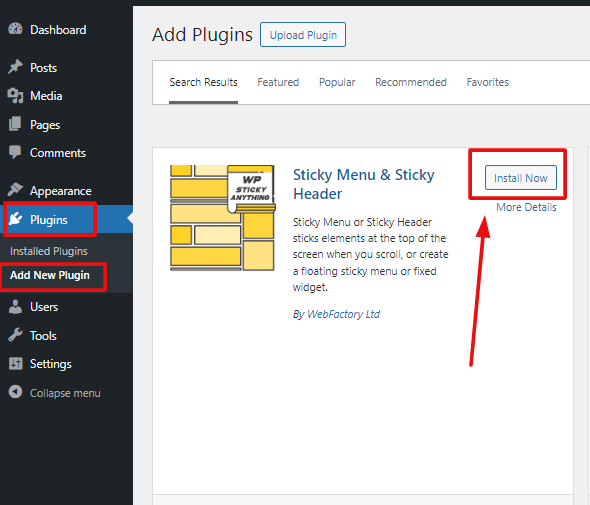
- Configure the settings to select which elements in your header should stay sticky as users scroll.
Alternatively, you can add custom CSS to make your header sticky if you’re comfortable with code:
header {
    position: fixed;
    top: 0;
    width: 100%;
}
Editing the Mobile Header in WordPress
A responsive website is crucial. And that includes making sure your header looks good on mobile devices. Some themes offer mobile-specific header options. While others need you to tweak the layout yourself.
Tips for optimizing the mobile header:
- Choose a mobile-friendly theme that adjusts the header layout automatically.
- Use Custom CSS to adjust the header’s height or menu alignment for smaller screens.
- Test your site on various devices to ensure everything looks right.
Best Practices for Editing WordPress Headers
To ensure your WordPress header enhances your site’s performance, follow these best practices:
- Keep it clean: Focus on essential elements like the logo and navigation menu. A clutter-free header improves user experience. Making it easier for visitors to navigate your site and find important information.
- Optimize for speed: Compress header images and reduce the number of scripts to improve loading times. Speed is a critical ranking factor in SEO. And optimizing your header for fast load times helps your site rank higher on search engines.
- Mobile-first design: Ensure your header is fully responsive. And displays perfectly on all devices, especially mobile. With most users accessing websites via smartphones, having a mobile-friendly header is crucial for a seamless user experience and better SEO performance.
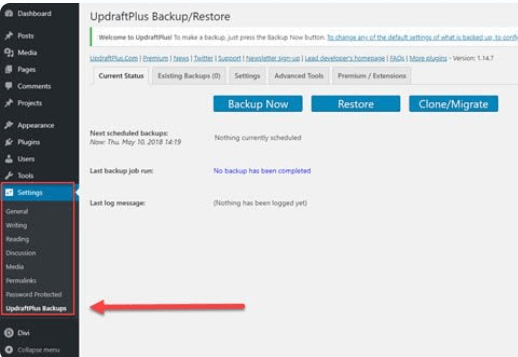
- Always Backup: Always back up your site before making major changes. Especially if you’re editing the theme files directly. Tools like UpdraftPlus and BackupBuddy make this process easy and efficient.
By following these best practices. You can ensure that your header enhances both usability and SEO.
FAQs About WordPress Headers
1. Can I edit the header without coding knowledge? Yes! WordPress provides a user-friendly Customizer where you can easily update your header’s elements (like the logo or layout) without needing to write code. For more advanced edits, plugins like Insert Headers and Footers can help you add scripts without coding.
2. How can I change the header image? You can change the header image by navigating to Appearance > Customize > Header Image in your WordPress dashboard. From there, upload your new image and adjust its size to fit your theme’s dimensions.
3. Is it safe to edit the header.php file? While editing the header.php file can give you more control, it’s risky without proper backup or a child theme. Changes can break your site or be overwritten with theme updates, so always proceed with caution.
4. Can I have different headers for different pages? Yes! Some themes or plugins, like Elementor Pro or Theme Builder, allow you to create custom headers for specific pages, improving design flexibility and functionality across your site.
Conclusion: Editing Your WordPress Header
Editing the header in WordPress can seem intimidating at first. But knowing how to edit header in WordPress with the right tools and approach makes it straightforward. Whether you’re making visual tweaks through the Customizer. Adding code snippets with a plugin, or diving into the theme files. This guide will help you explore several methods on how to edit header in WordPress.
With this guide, you should now feel confident about how to edit header in WordPress to match your site’s design needs. Choose the method that works best for you. Whether it’s through the Customizer, plugins, or manual code editing. Remember to back up your site before making any changes. Ensuring a smooth experience when learning how to edit header in WordPress!
Remember, your header is an essential part of your site’s branding and navigation. So take the time to master how to edit header in WordPress. And get it right for a more professional-looking website!
If you’re wondering how to edit the header in WordPress. And need a hosting solution that also handles updates, we’ve got you covered! Explore our fast WordPress hosting packages and let us manage the technical side for you. Click the button below to get started: