Performing regular backups is an essential step in keeping your WordPress website safe. If your site is ever hacked, or even if it’s just behaving oddly after an update, you risk losing valuable data or content.
While it may sound intimidating, backing up your website is actually a fairly straightforward process. You also have a couple of options for how to go about it.
In this article, we’ll go over why it’s so important to back up your website regularly. Then we’ll show you two ways to accomplish the task. Let’s get started!
Why It’s Important to Back Up Your Website

Getting hacked is something no website owner really wants to think about, but it’s essential to be prepared for this eventuality. While malware attacks did decrease in 2020, there were still over 5 billion incidents reported. Unfortunately, WordPress sites are often targeted due to the popularity of the platform.
However, threats to your website aren’t exclusively due to bad actors. Occasionally, an update to your theme or a pluginA plugin is a software component that adds specific features and functionality to your WordPress website. Esse… More, or even the WordPress core, can cause your site to malfunction. If you have automatic updates enabled, the damage may be done before you have time to intervene.
Similarly, installing a new theme or plugin can break your site. In this case, simply uninstalling it may not be enough to return your website to a functioning state.
It’s also possible to accidentally lock yourself out of your own website. Perhaps you added some code that triggered a PHP error, or you’re encountering the dreaded white screen of death. Whatever the cause, quite often the quickest fix is to restore a backup.
While some hosts may offer limited backup services, it’s a good idea to have your own solution in place as well. As the owner, you’re in the best position to determine what components of your site need to be backed up.
The frequency of site backups depends heavily on how often you update your content. If your site is relatively static, you can likely get away with backing up every few months or so. On the other hand, if you have an active blog that generates a lot of commentsComments are a feature of WordPress that allow users to engage in discussions about the content of a website. … More, you should perform a backup at least once a week.
It’s worth noting that to do a complete backup, you’ll need to save copies of both your files and your database. Your files include your site’s themesA WordPress theme is a set of files that determine the design and layout of a website. It controls everything … More, plugins, and any media you’ve uploaded. The WordPress database holds your postsA post is a type of content in WordPress, a popular open-source content management system used for creating an… More, pagesIn WordPress, a page is a content type that is used to create non-dynamic pages on a website. Pages are typica… More, comments, and associated settings.
Once you’ve created a backup, you’ll need to store it somewhere safe. You can keep your files on your computer, or on an external hard drive if you have space. Alternatively, you could store backups using a cloud service such as Google Drive.
How to Back Up Your WordPress Site (2 Simple Ways)
Now that we’ve covered some backup basics, let’s explore two ways to perform this important task.
1. Use a Trusted Plugin
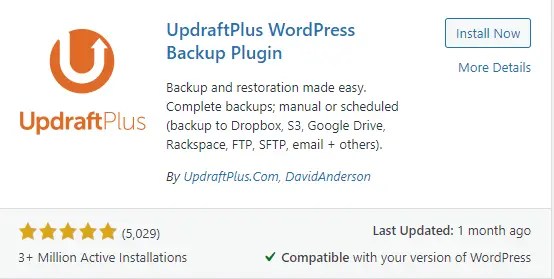
The simplest way to back up your WordPress site is by using a plugin. UpdraftPlus is a free tool you can use to schedule automatic backups:

To get started, go to your WordPress admin dashboardIn WordPress, the Dashboard is a central hub for managing a website’s content and settings. It is the first sc… More and navigate to Plugins > Add New. Search for UpdraftPlus and click on the Install Now button:
Once you’ve installed the plugin, select Activate. Next, go to Settings > UpdraftPlus Backups. If you’d like to create a backup immediately, simply hit the Backup Now button and choose the files you’d like to include:

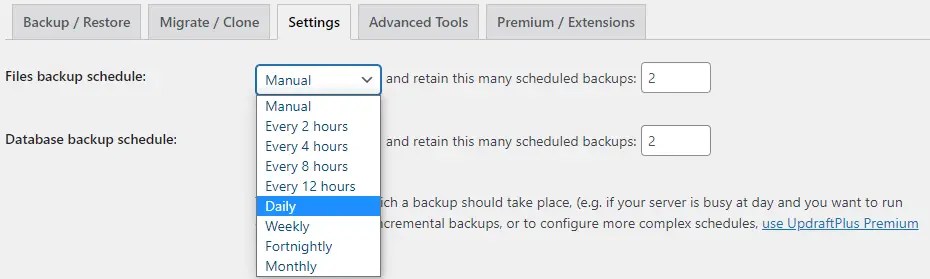
However, you may want to define some settings and perhaps even schedule automatic backups. To do this, click on the Settings tab.
Here, you can create a separate schedule for your files and your WordPress database. Select your preferences from the dropdown menusIn WordPress, a menu is a collection of links that are displayed as a navigation menu on a website. Menus are … More:
Next, you can choose a remote storage option for your backups. UpdraftPlus gives you a variety of options, including Google Drive and Dropbox:
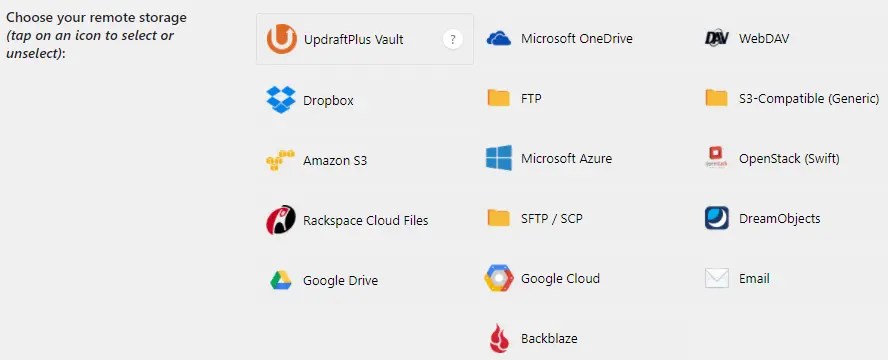
Depending on the service you choose, you’ll need to authenticate your account and give UpdraftPlus access to it. You’ll do this after saving your backup settings.
Once you’ve configured these simple settings, you can scroll down and click on the Save Changes button. UpdraftPlus will take it from there. However, you’ll likely want to check your storage option every so often, to be sure that your backups are being performed as planned.
2. Perform a Manual Backup
If you prefer not to use a plugin, you can perform website backups manually. This means you’ll have to back up your files and databasesA database is an organized collection of data stored and accessed electronically. It is a crucial component of… More separately.
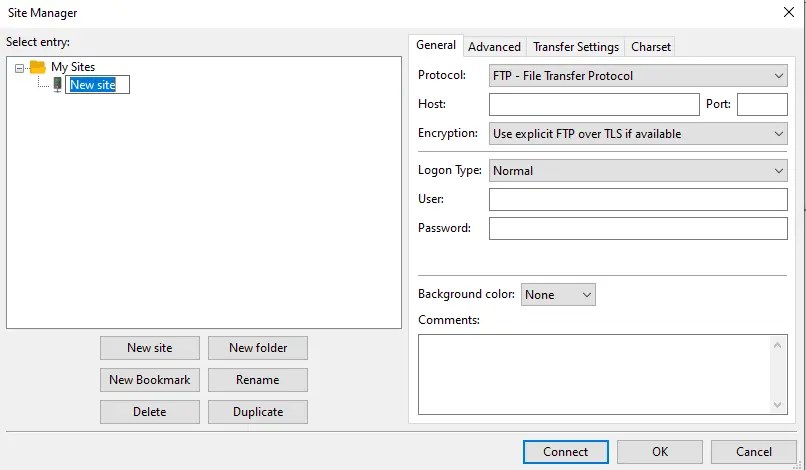
You can use a File Transfer Protocol (FTP) client such as FileZilla to access your site’s files. The first step is to connect to your server via the FTP client. If this is the first time you’ve done this, you may need to get your FTP credentials, including server address, from your web hosting account.
Once you have your credentials, open FileZilla and navigate to File > Site Manager. Click on the New Site button, and you’ll be able to enter your details. Then, select the Connect button to connect to your server:
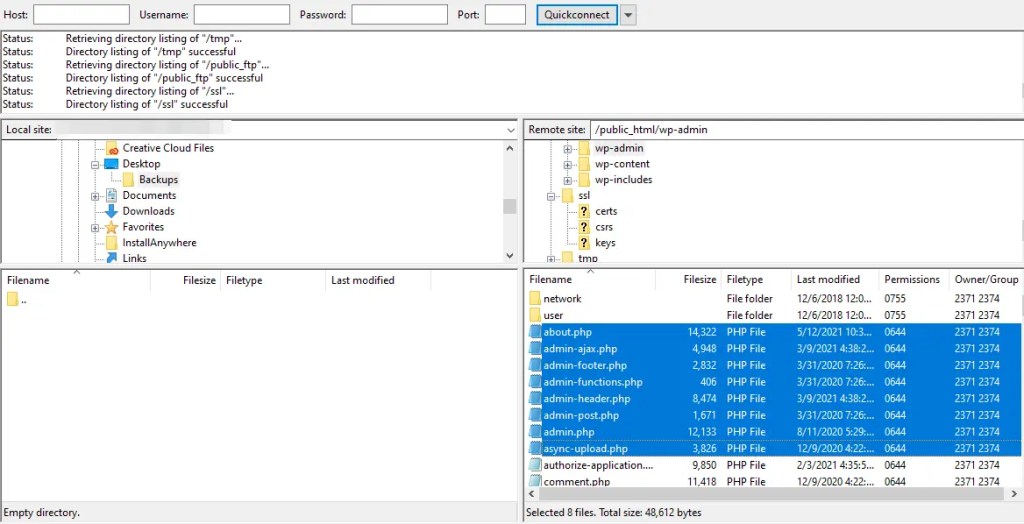
When you’re connected, you should see your local files on the left-hand side of your screen and your WordPress files on the right. In the left pane, find the folder you’d like to download your WordPress files to.
Next, you can select the files you’d like to back up from the right side of your screen. With the files selected, right-click and choose Download. You can also drag and drop the files into your selected backup folder:
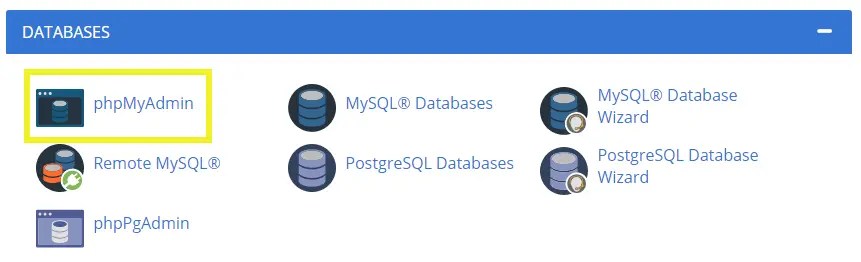
To back up your WordPress databases, you can use phpMyAdmin. This tool provides a simple interface for managing MySQL databases. You can usually access it via cPanel in your hosting account. This may look slightly different depending on your web host:
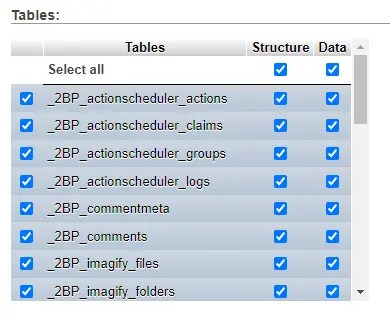
Once you’ve launched phpMyAdmin, you should be able to select your WordPress database from the panel at the left of your screen. With your database selected, click on the Export tab. Then, select Custom for the export method. You’ll be able to choose the tables you’d like exported from the list that appears:
Under the Output section, make sure the box next to Save output to a file is checked. Then, select your desired compression type from the dropdown menu:

Finally, scroll to the bottom of the screen and click on the Go button to download your database. Now you have a backup of your WordPress files as well as the database.
Conclusion
Regularly backing up your website can ensure that you’re prepared if something goes wrong with it. Knowing that you can get your site back up and running without losing months of hard work should give you some peace of mind.
In this post, we showed you two different methods you can use to back up your site:
- Use a trusted plugin such as UpdraftPlus.
- Perform a manual backup using FileZilla and phpMyAdmin
Do you still have questions about how to back up your WordPress site? Ask us in the comments section below!


