Adding a sidebar in WordPress is one of the easiest ways to improve your website’s functionality and user experience. Whether you want to highlight recent postsA post is a type of content in WordPress, a popular open-source content management system used for creating an… More, add a search box, display ads, or include social media links, a sidebar helps you organize that information in a clean, accessible space.
In this beginner-friendly tutorial, we’ll walk you through exactly how to add a sidebar in WordPress, step by step. You’ll also learn how to create a custom sidebar, what to do if your WordPress sidebar is not showing, and how to use sidebar plugins for even more flexibility.
Let’s dive in!
TABLE OF CONTENTS
A sidebar in WordPress is a vertical column—usually displayed on the left or right side of your pageIn WordPress, a page is a content type that is used to create non-dynamic pages on a website. Pages are typica… More content—where you can insert widgetsA widget is a small block of content that performs a specific function and can be added to certain areas of a … More, menusIn WordPress, a menu is a collection of links that are displayed as a navigation menu on a website. Menus are … More, ads, and other features.
CategoriesIn WordPress, categories are a fundamental taxonomy used to group and organize posts based on their topics or … More or tagsIn WordPress, tags are a taxonomy used to classify and organize posts. They are similar to categories, but unl… More for easy navigation
A search bar to help users find content
Email newsletter signup forms
Banner ads or affiliate links
Social media icons for easy following
Sidebars are managed through WordPress widgets, and most modern themesA WordPress theme is a set of files that determine the design and layout of a website. It controls everything … More allow you to customize what appears in these areas.
Step 1: Check If Your ThemeA WordPress theme is a set of files that determine the design and layout of a website. It controls everything … More Supports Sidebars
Not every WordPress themeA WordPress theme is a set of files that determine the design and layout of a website. It controls everything … More includes a sidebar by default. Here’s how to check if yours does:
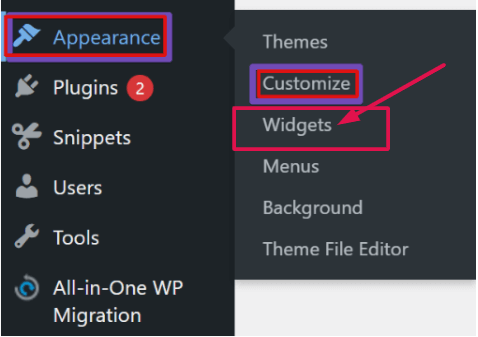
In your WordPress dashboardIn WordPress, the Dashboard is a central hub for managing a website’s content and settings. It is the first sc… More, go to Appearance > Widgets.
If your theme supports sidebars, you’ll see a widgetA widget is a small block of content that performs a specific function and can be added to certain areas of a … More area labeled Sidebar, Right Sidebar, or something similar.
Alternatively, go to Appearance > Customize and select Layout or Widgets to see if sidebars are included in the layout options.
💡 Tip: If your current theme doesn’t support sidebars, consider switching to a more flexible theme like Astra, OceanWP, or GeneratePress—all of which are free and sidebar-friendly.
Step 2: Add Widgets to Your Sidebar
Once you’ve confirmed your theme supports sidebars, the next step is to populate them with content using widgets.
On the left, you’ll see a list of available widgets (e.g., Search, Recent Posts, Categories).
On the right, you’ll see your Sidebar widget area.
Drag and drop any widget into the sidebar area.
Customize the widget (e.g., rename it, adjust the number of items to display).
Click Save.
You can add as many widgets as you want, but be mindful not to overcrowd the sidebar—it should be useful, not overwhelming.
Step 3: Using the Block Editor to Add a Sidebar
If you’re using a block-based theme (like those created with the GutenbergGutenberg is the name of a modern WordPress editor that was introduced with the release of WordPress 5.0 in De… More editor), adding sidebars works a bit differently.
How to add a sidebar with the Block Editor:
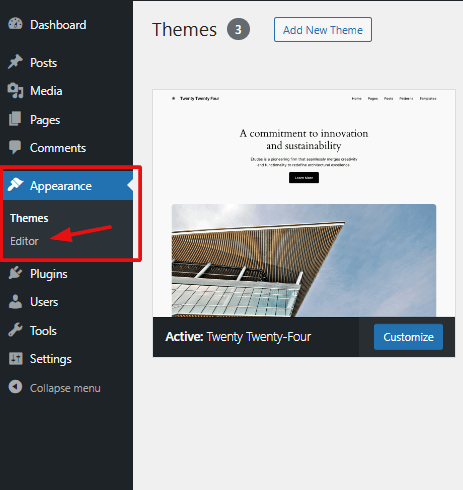
Go to Appearance > Editor (this opens the Site Editor).
Select the template you want to modify (like “Single PostA post is a type of content in WordPress, a popular open-source content management system used for creating an… More” or “Page”).
Click the + button to add a new block.
Add a Columns block and select a 2-column layout.
Use one column for your content and the other as a custom sidebar.
Insert widgets (blocks) such as Search, Categories, or ShortcodeA shortcode in WordPress is a small piece of code that allows users to perform complex functions or display dy… More for custom tools.
This approach gives you total control over layout and design, but it requires more manual setup.
Step 4: How to Create a Custom Sidebar in WordPress
Do you want different sidebars for different pagesIn WordPress, a page is a content type that is used to create non-dynamic pages on a website. Pages are typica… More, posts, or categories? You’ll need to create custom sidebars.
Method 1: Using a Plugin
The easiest way to create custom sidebars is with a pluginA plugin is a software component that adds specific features and functionality to your WordPress website. Esse… More. We recommend:
🔌 Custom Sidebars – Dynamic Widget Area Manager
How to use it:
Install and activate Custom Sidebars from the Plugins page.
Go to Appearance > Widgets.
Click Create a new sidebar and name it.
Add widgets to your custom sidebar.
Go to the page or post where you want this sidebar.
On the right-hand side under “Sidebar,” select the custom one you just made.
This is perfect for showing different content on different pages, like specific offers on product pages or author bios on blog posts.
Method 2: Manually Adding via Code (Advanced Users)
You can also create sidebars manually by editing your theme’s functions.php file, but this is only recommended if you’re comfortable with code and using a child themeA child theme is a WordPress theme that inherits the functionality and styling of another theme, referred to a… More.
Sometimes, your WordPress sidebar doesn’t show up even after adding widgets. Here are the most common reasons—and fixes:
❌ Problem: Theme Doesn’t Support Sidebars
✅ Solution: Switch to a sidebar-compatible theme or use a block layout with columns.
❌ Problem: Wrong Template Being Used
✅ Solution: Check if the page/post is using a full-width or no-sidebar template. Change it under Page Attributes in the editor.
❌ Problem: Plugin Conflict
✅ Solution: Deactivate recently added plugins to identify conflicts.
❌ Problem: Custom CSS or Code
✅ Solution: Revert recent changes to functions.php or style.css if applicable.
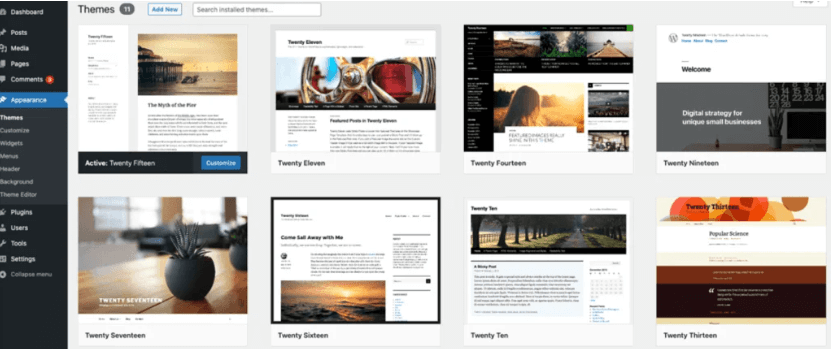
🔍 You can also try temporarily switching to a default theme (like Twenty Twenty-Four) to isolate the issue.
Step 6: Use Sidebar Plugins for More Control
Here are some top-rated sidebar plugins for WordPress that give you more control:
🔹 Widget Options
Control widget visibility by page, post, device, or user roleIn WordPress, a user role is a set of permissions that determines what actions a user can perform on a website… More
Add animations, custom IDs, and classes
Hide widgets on mobile for better UX
🔹 Content Aware Sidebars
Assign different sidebars to specific content types
Schedule widget visibility
Compatible with WooCommerce and Custom Post TypesA custom post type is a feature in WordPress that allows users to create their own content types, beyond the d… More
🔹 WP Sticky Sidebar
Make your sidebar “sticky” so it scrolls with users
Great for CTA buttons, ads, or newsletters
Lightweight and responsive
These tools help you create a more dynamic, flexible sidebar experience.
A sidebar should be helpful—not distracting. Here are some best practices:
✅ Prioritize important content (search bar, CTA, recent posts)
✅ Limit the number of widgets—avoid clutter
✅ Make it mobile-responsive or hide on mobile
✅ Use consistent styling for fonts and colors
✅ Test different sidebar layouts to see what works
How to Add Sidebar in WordPress Specific Pages Only
Want a sidebar on your blog posts but not your homepage or landing page? You can set this up using:
Page templates with or without sidebar support
Plugins like Elementor, which allow sidebar widgets on any page
Custom sidebars as covered above
This allows full flexibility and keeps your pages clean and focused.
Conclusion
Adding a sidebar in WordPress is a simple way to boost site navigation, showcase key content, and improve user engagement. Whether you’re using the widget area, the block editor, or a custom sidebar plugin, there’s a method that fits your workflow.
To recap:
Check if your theme supports sidebars
Use widgets to add content
Create custom sidebars for flexibility
Troubleshoot layout issues easily
Use plugins for dynamic control
Now that you know how to add and customize a WordPress sidebar, go ahead and make your site more useful, beautiful, and user-friendly.
If you’ve made it this far, you now know how to add a sidebar in WordPress using widgets, plugins, or the block editor—even if you’re just starting out. Sidebars are a powerful way to improve site navigation, highlight key content, and boost user engagement.
But what if you want your website running fast, secure, and fully optimized—without spending hours on updates?
👉 If you’re looking for fast WordPress hosting as well as done-for-you updates, check out our all-in-one hosting packages by clicking the button below:
Get your site running smoothly with expert support and built-in performance upgrades—so you can focus on growing your business, not managing updates.