You load your WordPress site, and you receive the following error: “Your PHP installation appears to be missing the MySQL extension which is required by WordPress.” This message can be alarming.
Don’t panic. Your website is still there; it just can’t be accessed. You may just need to update WordPress, update/reinstall PHP, or fix your PHP configuration to fix the error.
The most common cause of a MySQL extension error is an out-of-date WordPress or PHP installation. Luckily, you can fix the error by updating WordPress, updating PHP/MySQL, or changing your PHP configuration.
Below, we’ll explain why this WordPress error can happen and outline the three most effective fixes. Let’s get started!
The Causes of the Missing MySQL Extension Error

The MySQL extension error means that PHP doesn’t know how to ‘talk’ to MySQL. In WordPress, PHP (a programming language) controls the way your site displays. MySQL (a databaseA database is an organized collection of data stored and accessed electronically. It is a crucial component of… More) contains the data that drives the website.
Without MySQL, PHP may know how to display the title of a pageIn WordPress, a page is a content type that is used to create non-dynamic pages on a website. Pages are typica… More, but it won’t know what the title of the page is. Likewise, it might be able to display a post, but it won’t have a record of any of the postsA post is a type of content in WordPress, a popular open-source content management system used for creating an… More on your website.
If you’re receiving a MySQL extension error suddenly, it’s likely that you just haven’t updated your WordPress installation recently. However, if you see the message directly after installing WordPress, it’s more likely that your services weren’t installed correctly or the extension wasn’t properly configured.
How to Fix the “Your PHP Installation Seems to be Missing the MySQL Extension” Error (3 Methods)
Before you start troubleshooting, it’s important to know your WordPress and PHP versions. You can usually check your WordPress version by logging into the dashboard and heading to Updates:
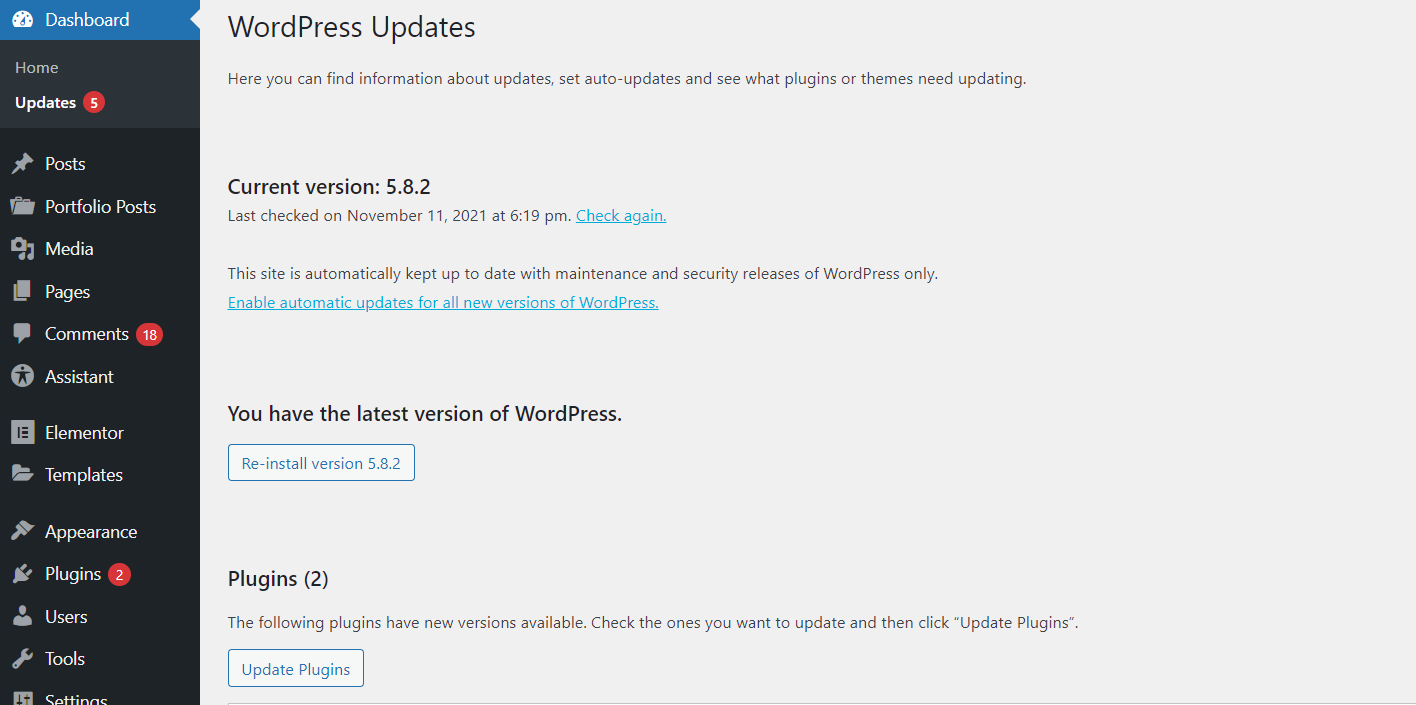
Above, you can see that it says, “You have the latest version of WordPress.” If you need to upgrade the WordPress core software, there should be a button that says: “Install version x.x.x” (where x.x.x is the current version).
However, if you can’t reach your WordPress dashboardIn WordPress, the Dashboard is a central hub for managing a website’s content and settings. It is the first sc… More, you’ll need to access it via File Transfer Protocol (FTP). For example, you could use FileZilla to log into your server.
Then, download a file called version.php that appears in the base directory of your WordPress installation:
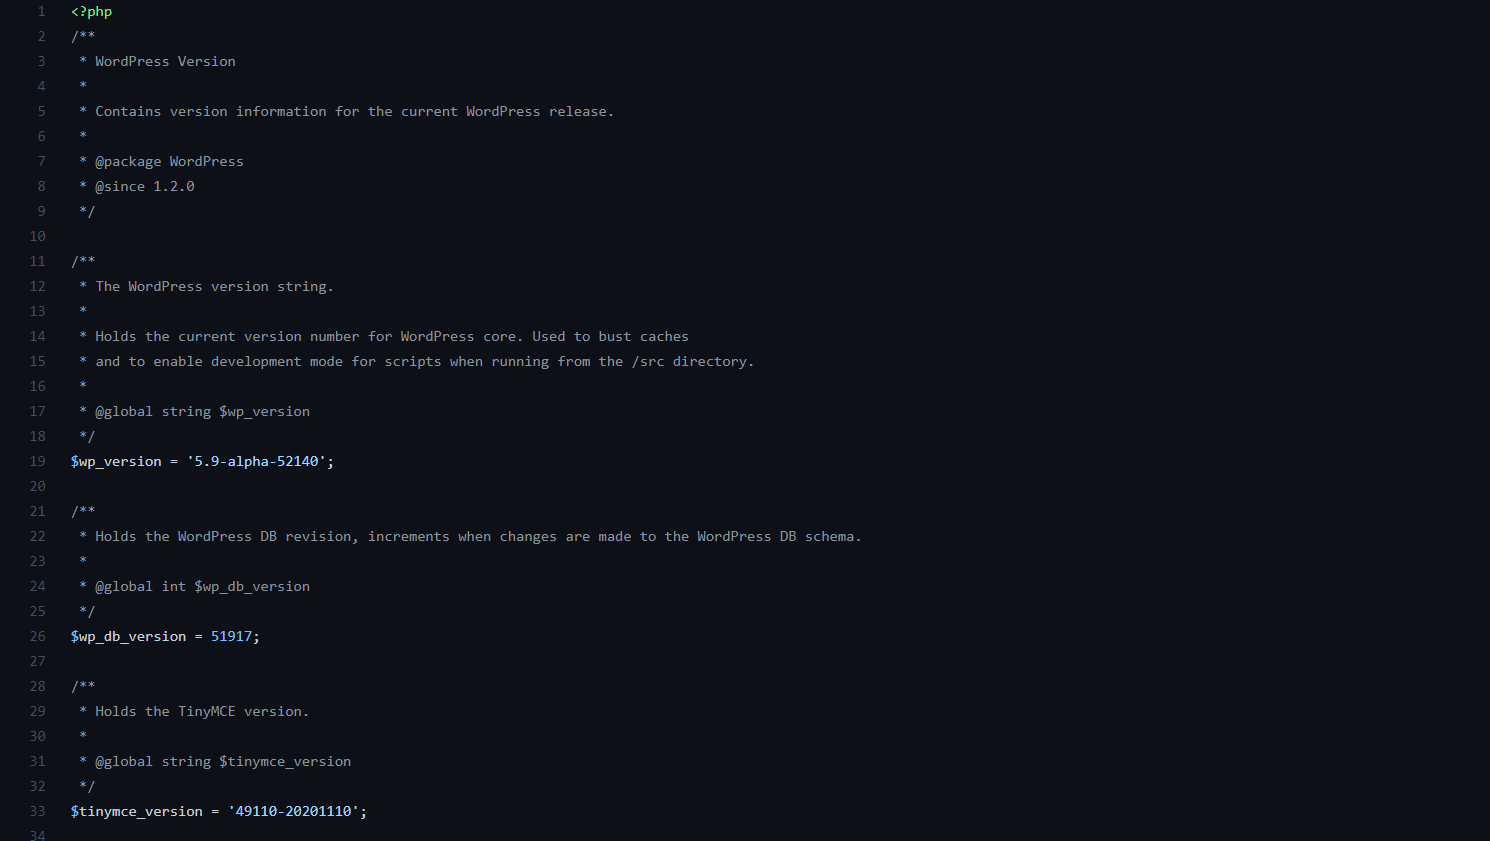
In the above version.php file, you can see that the $wp_version is 5.9 alpha.
Next, you’ll need to know your PHP version. There are a few methods you can use to find your PHP version, but we’ll be using PHPINFO().
To find out your PHP version, you must first call the PHPINFO() function. You do this by saving a file called phpinfo.php with the following text:
<?PHP
   phpinfo();
?>
When you upload this file to your server and run it, you will see the following information:
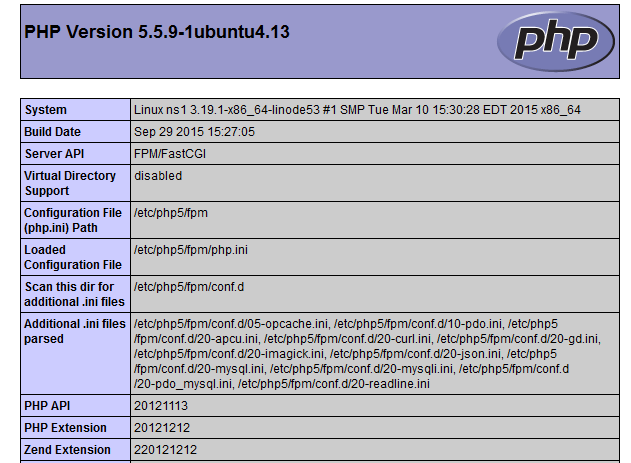
Above, you can see that the PHP version is PHP Version 5.5.9-1ubuntu4.13.
You might like to check to see the current WordPress requirements. As of November 2021, they are:
- PHP 7.4+
- MySQL 5.6+
- HTTPS
In the above example, you would need to update PHP to 7.4 or later to meet the recommended requirements.
It’s easier to find this information on some servers. For example, if you have the cPanel software in your hosting panel, you’ll see a listing of PHP and MySQL services on the left-hand side. However, the FTP method should work for any hosting service.
Now that you know which version of WordPress and PHP you have installed, you can start fixing your problem. Let’s look at three possible solutions!
1. Update WordPress to the Most Recent Version
The most common reason that you receive the MySQL extension error is that WordPress is not up-to-date. If you checked your WordPress version earlier and found that it isn’t the most recent software, you will have to update it manually through FTP.
First, you need to download the latest version of WordPress from WordPress.org:
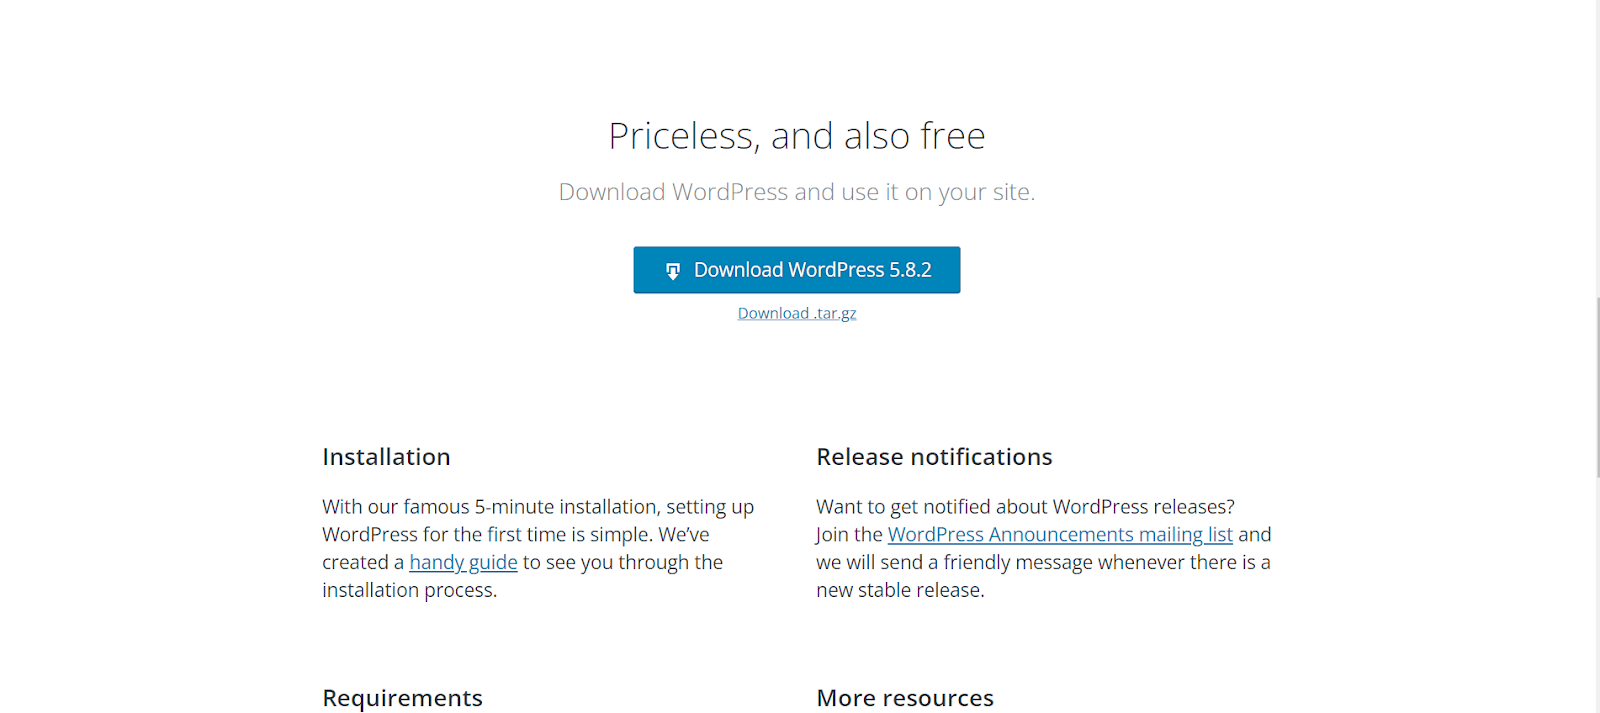
Your computer will download the software in a file. You will need to upload this to your hosting account through an FTP client such as FileZilla:
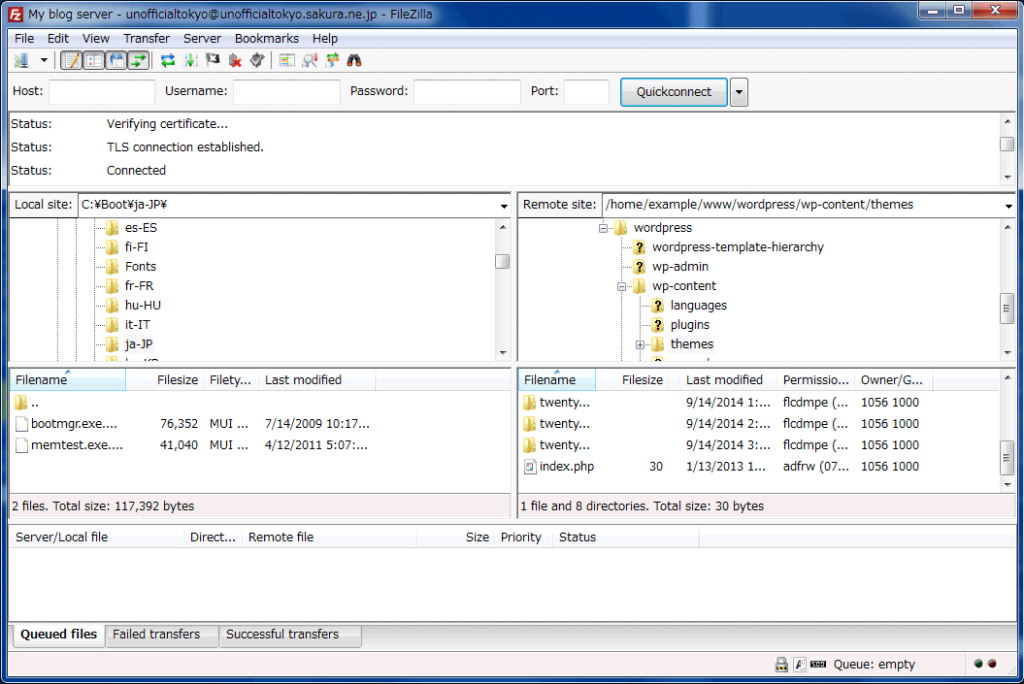
Manually updating your WordPress files will delete the files that already exist. Therefore, you should follow these steps:
- Back up all your WordPress files first by using FileZilla to download them.
- Extract the WordPress files that you downloaded from WordPress.org.
- Replace your existing WordPress files with the new ones by using FileZilla to upload and replace them.
Once you have completed the above steps, you should be able to log into your site as normal. If you can’t, then another issue is causing the MySQL extension error. Once you’re done, you may also want to enable automatic updates so that a similar problem doesn’t occur again.
2. Upgrade or Reinstall PHP
If your PHP version is 5.6 or older, it may be too outdated to connect to the current version of MySQL. All you need to do is upgrade it to get the appropriate MySQL extension. However, you don’t need to reinstall MySQL — that isn’t generally the cause of the MySQL extension error.
How you upgrade or reinstall PHP will depend on your hosting service. For example, in BlueHost, you would use the MultiPHP Manager utility called Bluerock, seen below:
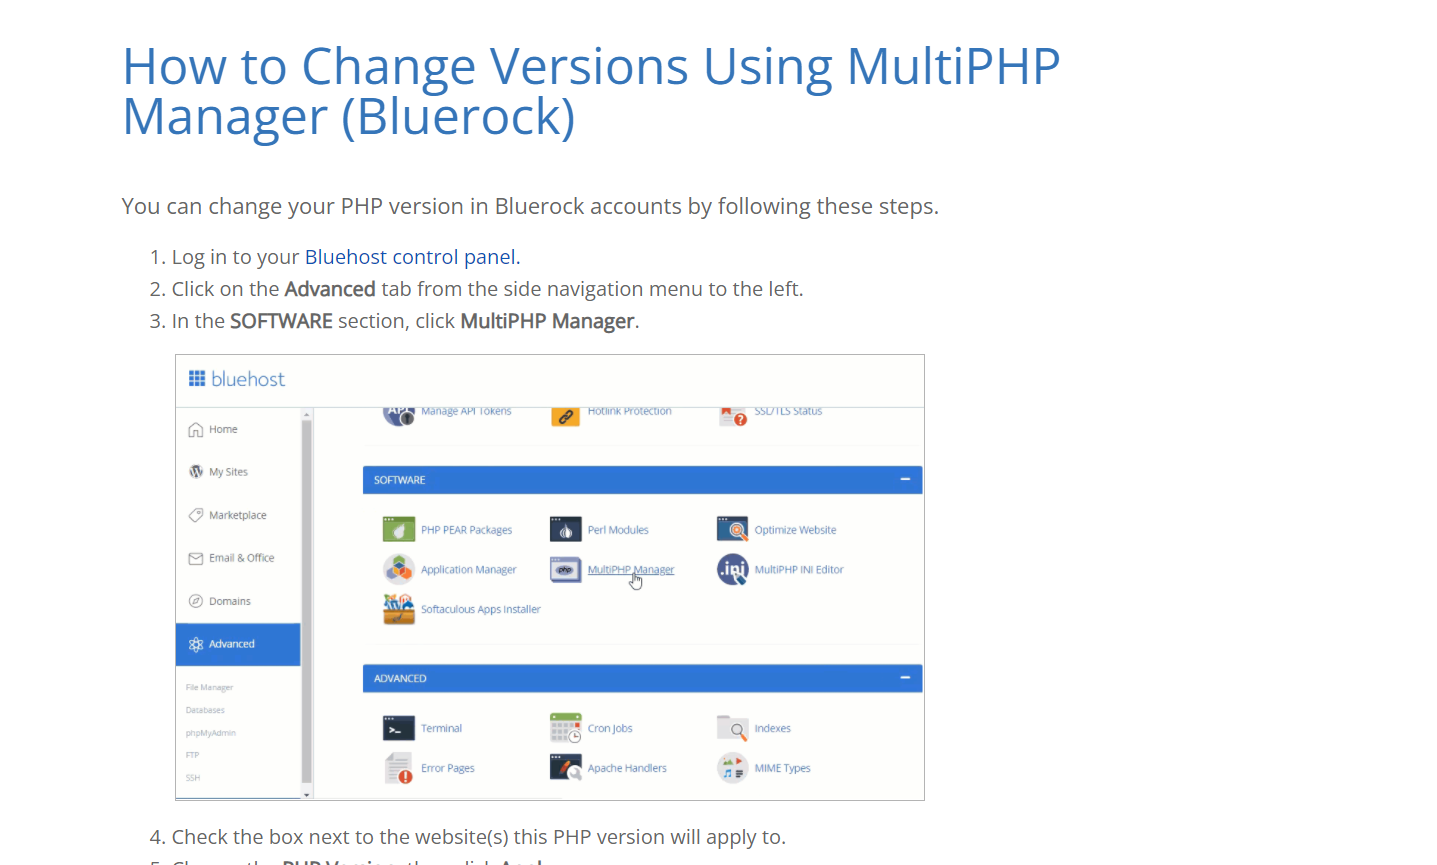
In DreamHost, you would log into your DreamHost Panel and click on Manage Websites > Manage > Modify PHP:
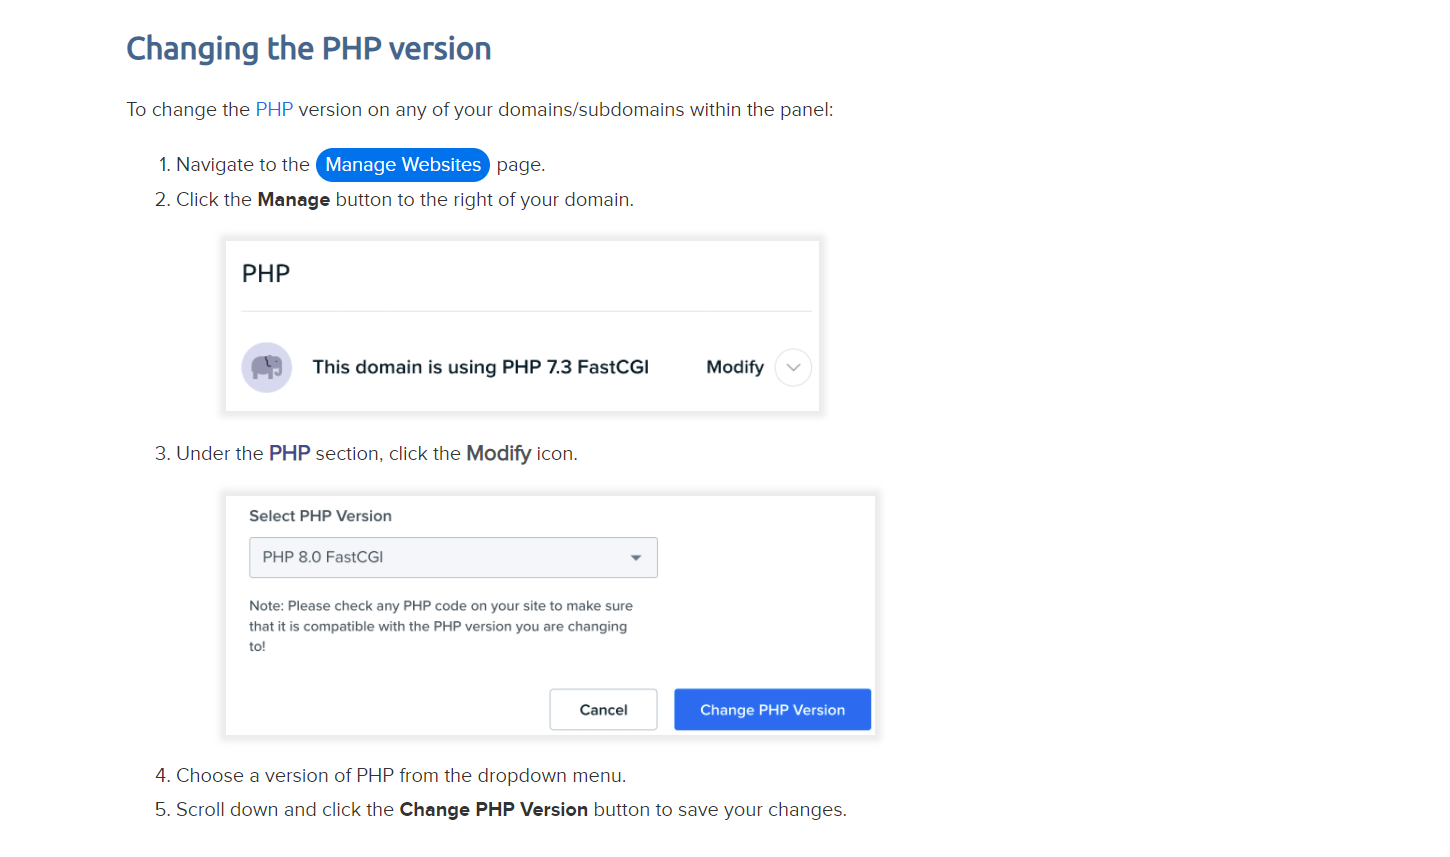
Because this process varies, you might need to contact technical support for your hosting account. The support agent will either be able to walk you through the process of upgrading PHP or even do it for you.
Be aware: if you’ve customized your WordPress site with your own PHP — and that PHP was a much older version — you may still get errors after updating it. This situation is normal because PHP doesn’t support all of its legacy features. Therefore, you’ll just need to update the program to the newest version.
However, if your PHP version is already above 5.6, you may need to uninstall it and reinstall it instead.
3. Reconfigure Your PHP Installation
If you’ve updated WordPress and PHP and you’re still experiencing the error, there may be a configuration issue. PHP’s configuration settings are stored in a file called php.ini. You can use this file to do things such as increase the maximum file upload size for your website.
However, the php.ini file may be in a different location depending on your installation. To locate it, you will need to call the PHPINFO() function as you did before.
Just as the PHPINFO() function lists the current version of PHP, it will also show the location of your php.ini file. It should look something like this:
/etc/php5/fpm/php.iniDelete this file and restart your server per your hosting service’s directions. The next time PHP runs, it will create a new php.ini file with the default configuration.
If you’ve tried the three methods listed above, your MySQL extension error should be resolved. If your WordPress site is still throwing the message, you might need to contact your hosting provider’s technical support team for more assistance.
Conclusion
While it may be concerning to see your WordPress website replaced by an error message, this problem is one of the easiest to fix. In most situations, it’s really just a matter of keeping your site updated. If you don’t have the most recent version of WordPress, PHP, and MySQL, your website may not work properly.
You can try these methods to fix the “Your PHP installation appears to be missing the MySQL extension” error:
- Update your WordPress installation.
- Update your PHP version.
- Reset your PHP configuration.
It’s always best to use the most current versions of WordPress and PHP — not only to avoid errors but also for enhanced security and protection. If none of the above solutions work, you may be dealing with a different database error.
Have you found a different solution? If you’re still experiencing problems with your WordPress installation, or if you’ve found a different answer, let us know in the commentsComments are a feature of WordPress that allow users to engage in discussions about the content of a website. … More section below!


