Are you tired of struggling with managing various tracking and marketing tags (such as Google Analytics, Facebook Pixels, etc.) on your WordPress website? Do you want a solution that simplifies the process, improves site performance, and enhances your ability to track your conversions and marketing efforts effectively?
Look no further! Installing Google Tag Manager (GTM) is the solution you’ve been searching for. With GTM, you can easily add, modify, and remove tags without extensive technical knowledge or relying on developers.
According to BuiltWith data, the use of GTM has significantly increased. In March 2000, about 50,000 websites used GTM, but by February 2024, over 400,000 websites were using it, showing a remarkable 700% growth in 24 years.
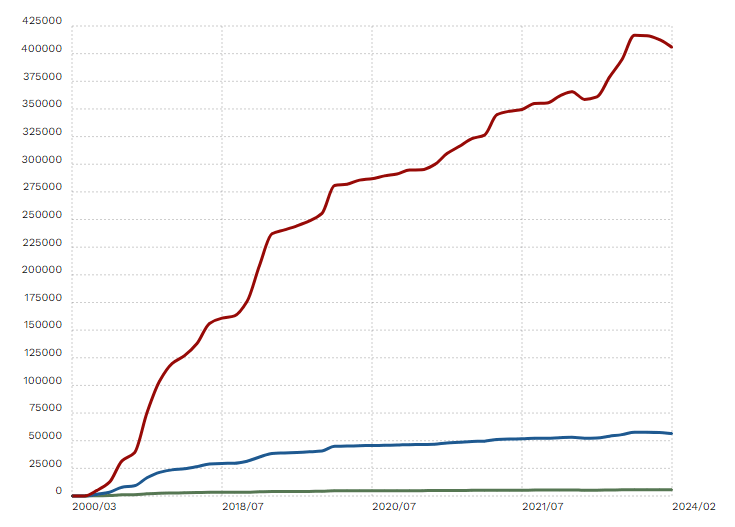
These statistics demonstrate the increasing popularity and trust in GTM as a powerful tool for managing website tracking and marketing tags.
In this article, you will learn:
- How to create a Google Tag Manager account and container
- Steps to add GTM to your WordPress site
- How to test and publish your tags for optimal performance
You’re almost there! Soon, you’ll have everything you need to set up Google Tag Manager on your WordPress site. You’ll be able to streamline tag management, improve your site’s performance, and gain valuable insights into your website’s data.
Ready to begin? Let’s get started!
Table of Contents
Understanding Google Tag Manager
Google Tag Manager is a free tool that allows you to manage and deploy marketing tags (snippets of code or tracking pixels) on your website without having to modify the code. Tags are small pieces of code that help you measure traffic, optimize marketing campaigns, and understand user behavior.
When you use GTM, it makes it easier to add and change tags on your site. Instead of manually changing code whenever you want to add a new tag, you can use GTM’s easy-to-use interface.
This reduces the risk of errors, ensures consistent implementation, and allows for faster deployment of tags. GTM also supports a variety of tags, including Google Analytics, Google Ads, and third-party tags, making it a versatile tool for digital marketers.
Steps to Install Google Tag Manager to WordPress Site Without Coding
Setting up Google Tag Manager on your WordPress site might feel a bit tough initially, but I’m here to make it as easy as possible. In the following steps, I’ll guide you through the entire process, complete with detailed explanations and screenshots.
Whether you are new to GTM or want to improve your skills, following these steps will help you add GTM smoothly to your WordPress site. Let’s get right into it and begin!
Step 1: Go to the Google Tag Manager Website
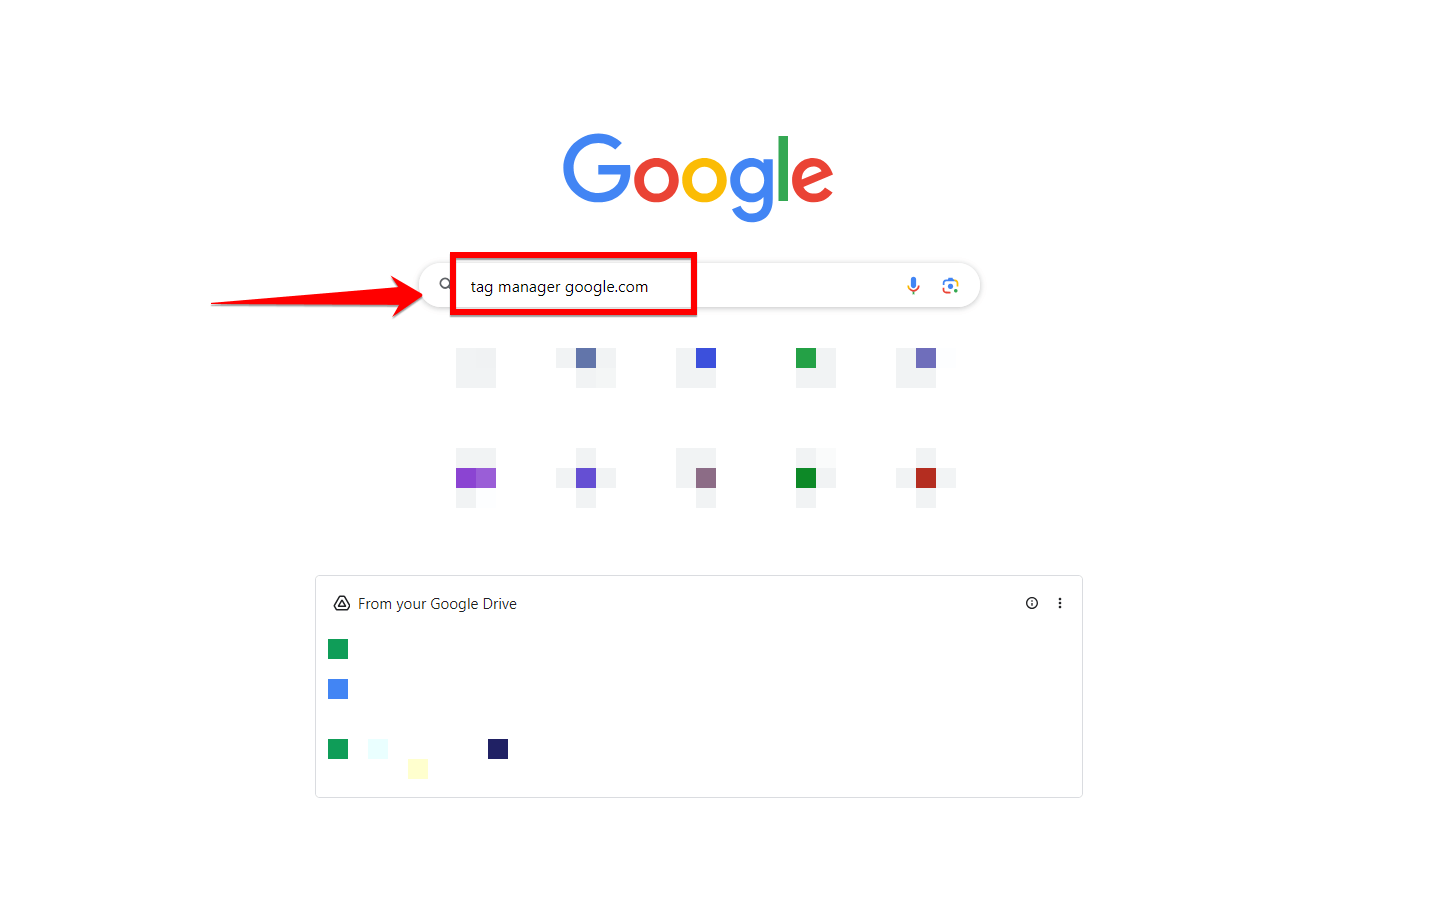
To start integrating Google Tag Manager with your WordPress website, the first thing you need to do is visit the official Google Tag Manager website. Open your preferred web browser and type “tag manager google.com” into the search bar.
You’ll see a list of search results, but what you’re looking for is the first link. It should read “Google Tag Manager,” and the URL should be “https://tagmanager.google.com”. Make sure to click on the correct link to proceed.
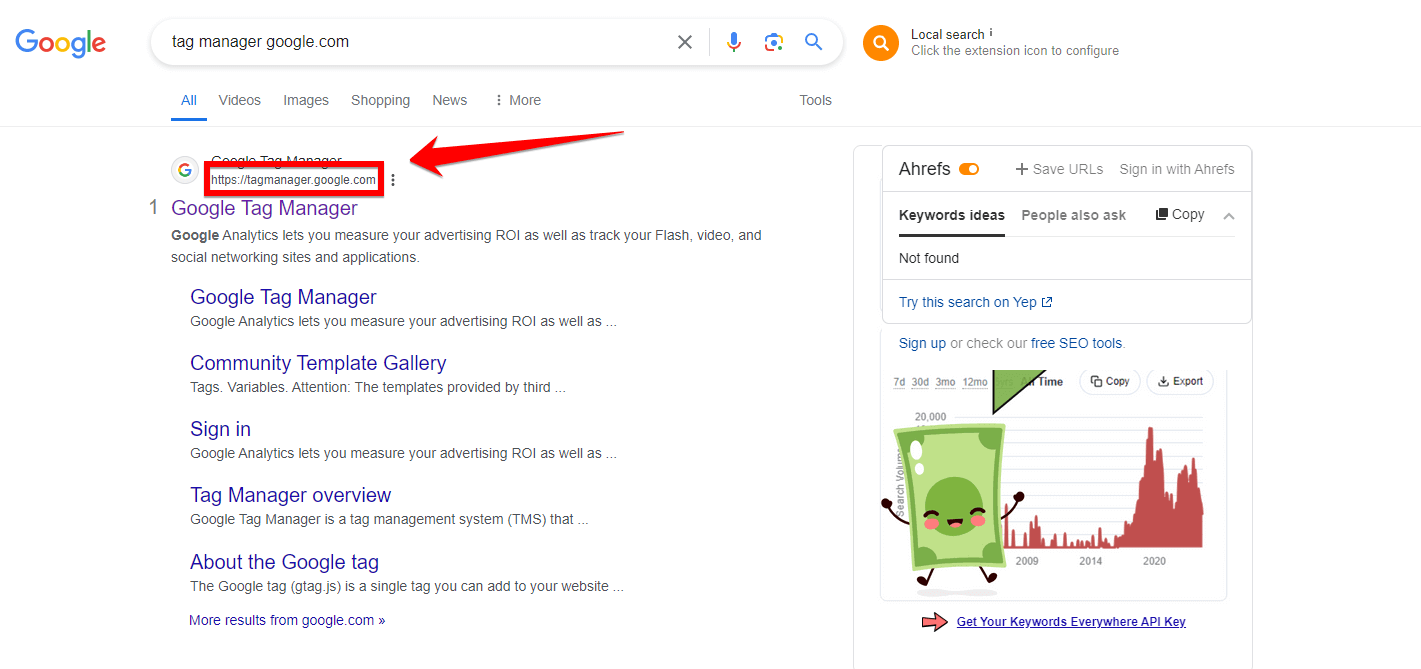
Click on this link to proceed. This will take you to the Google Tag Manager homepage. Being on the official site is important to avoid any wrong information.
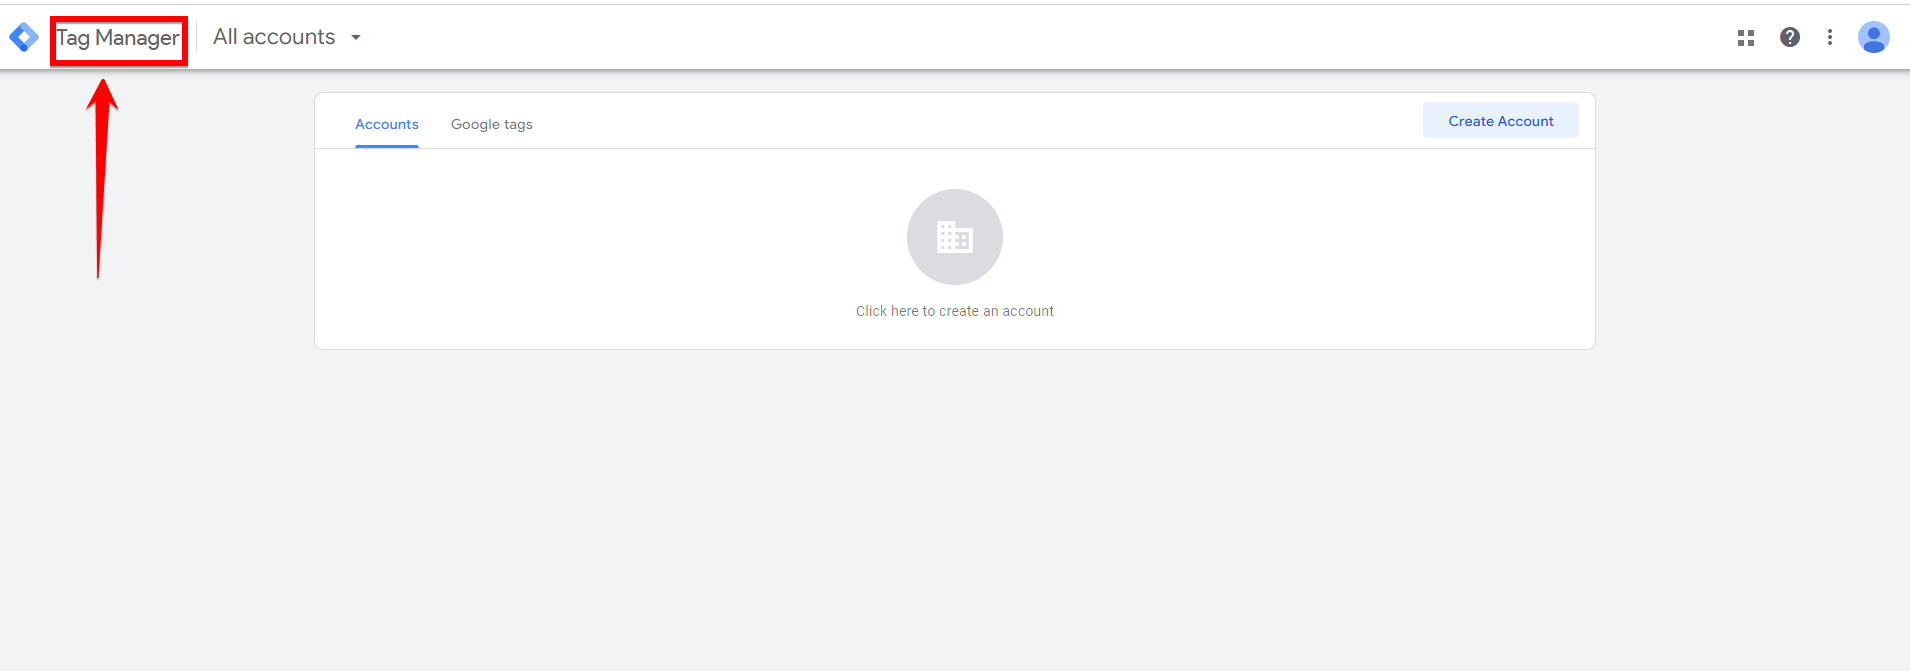
Once you are on the homepage, you will find all the tools and resources you need to set up and manage your tags. This is the first step to using Google Tag Manager effectively on your WordPress website.
Step 2: Make a Google Tag Manager Account
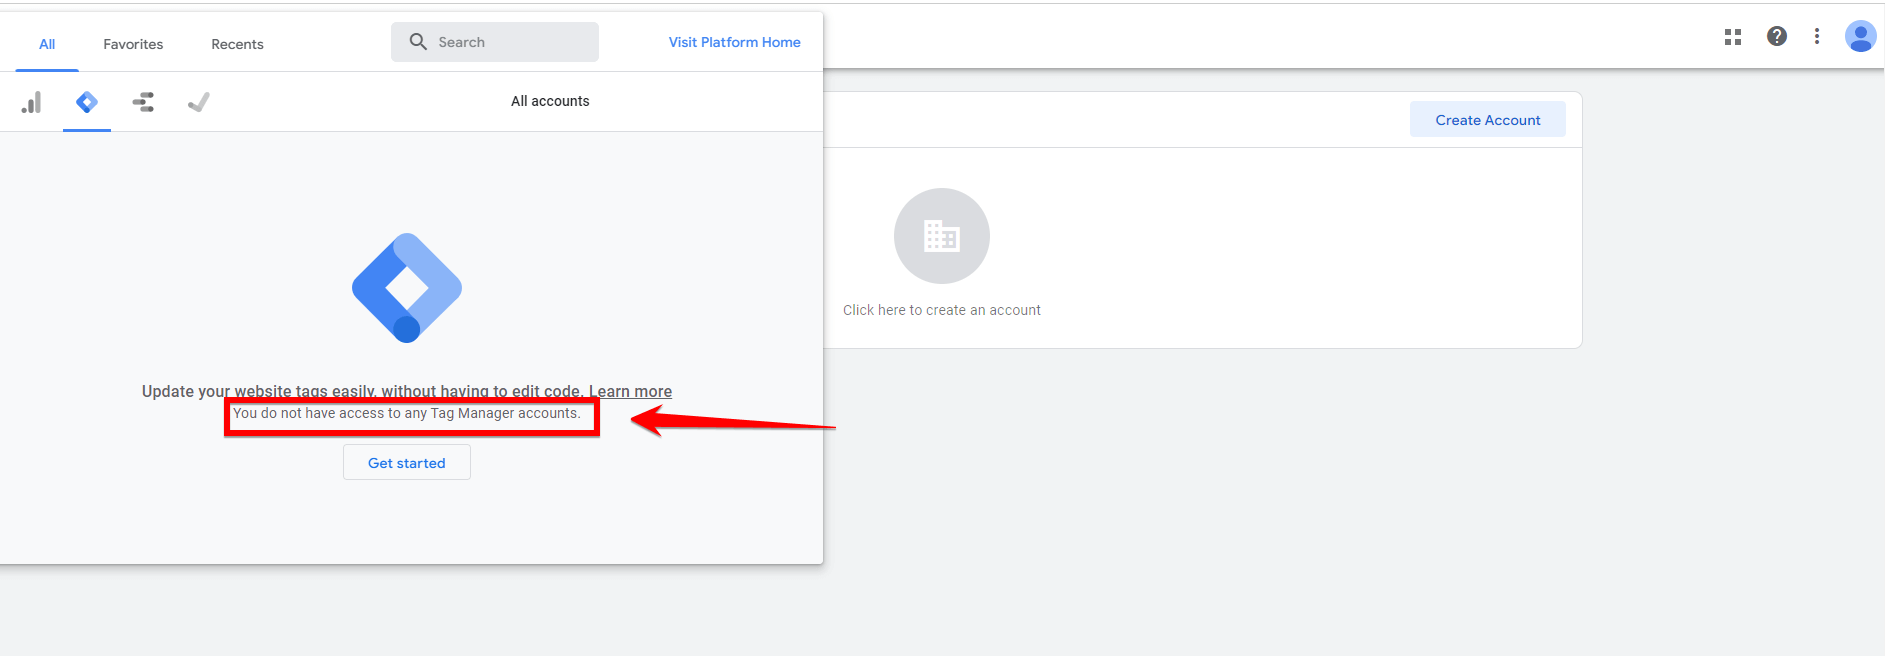
Once you’re on the Google Tag Manager homepage, you will need to create an account if you haven’t already.
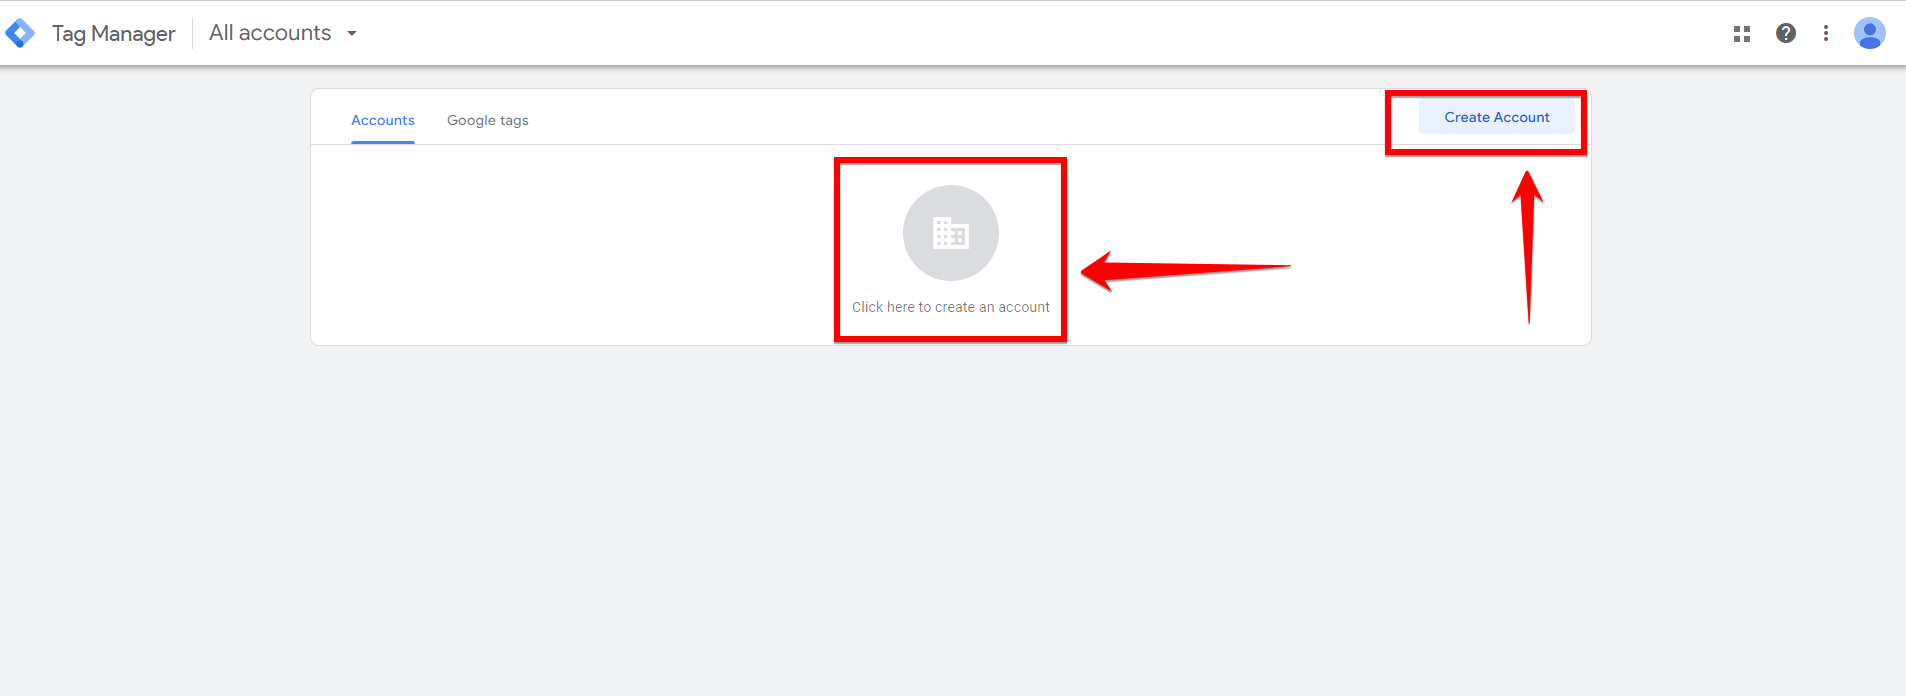
Look for the “Create Account” button, which is usually located at the top right corner of the screen. Click on this button to begin the account setup process. This button is easy to spot and is designed to help new users get started quickly.
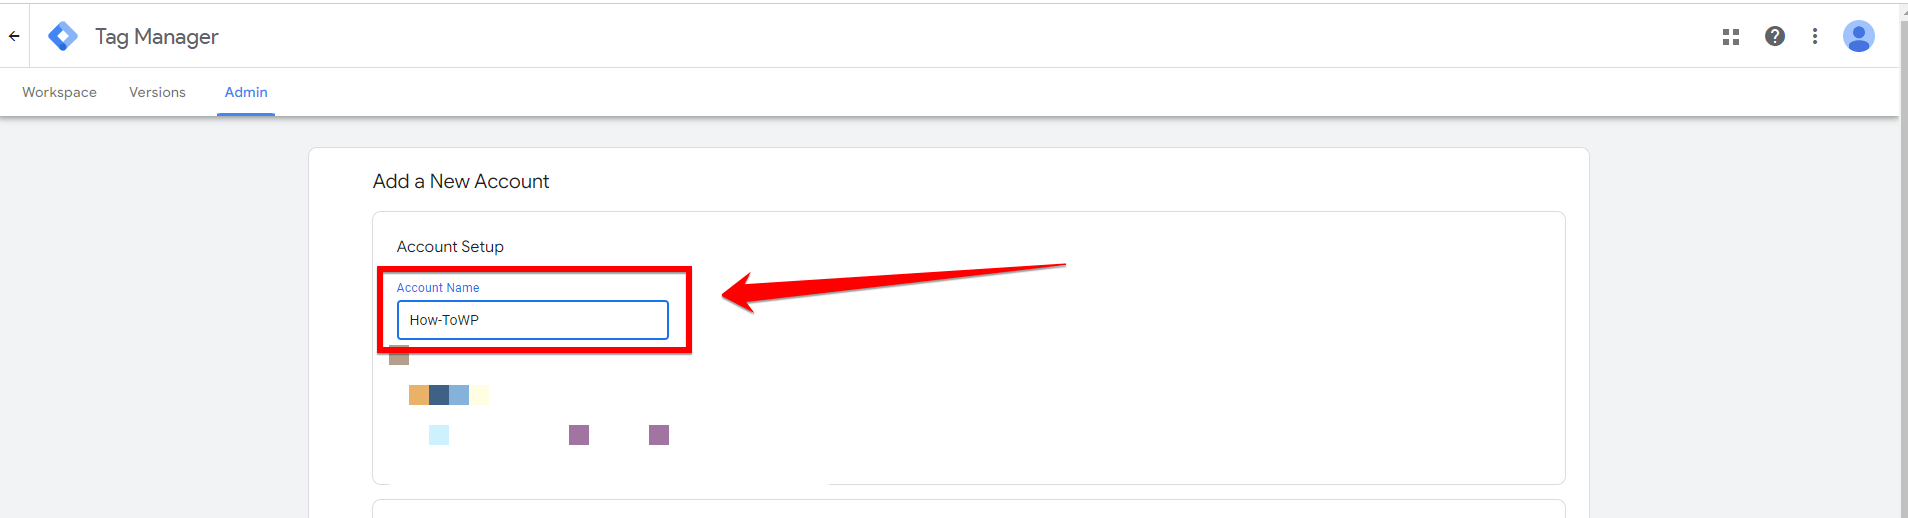
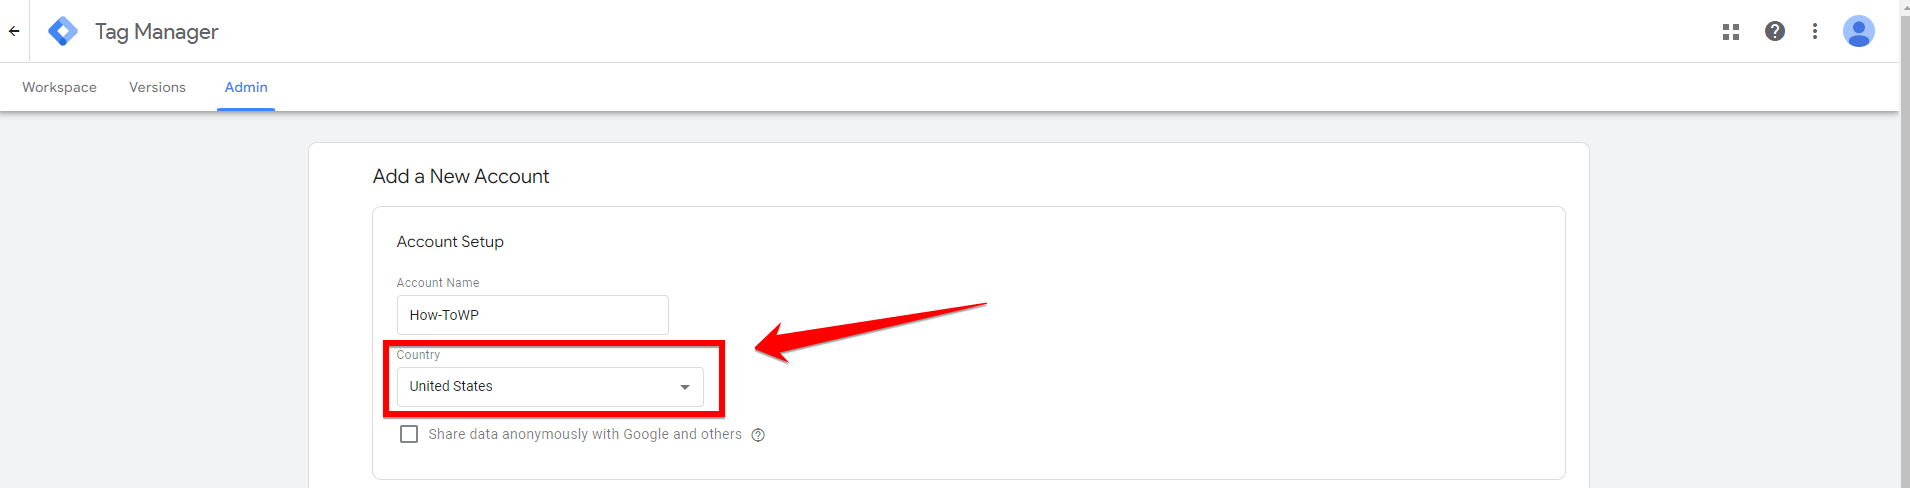
You will be taken to a page where you need to enter your account details. Start by typing a name for your account in the “Account Name” field. It’s a good idea to use a name that reflects your business or project for easy identification. This makes it simpler to manage multiple accounts in the future, especially if you have several projects or clients.
Then, select your country from the dropdown menu under “Country.” This helps Google Tag Manager to tailor its services and support according to your location.
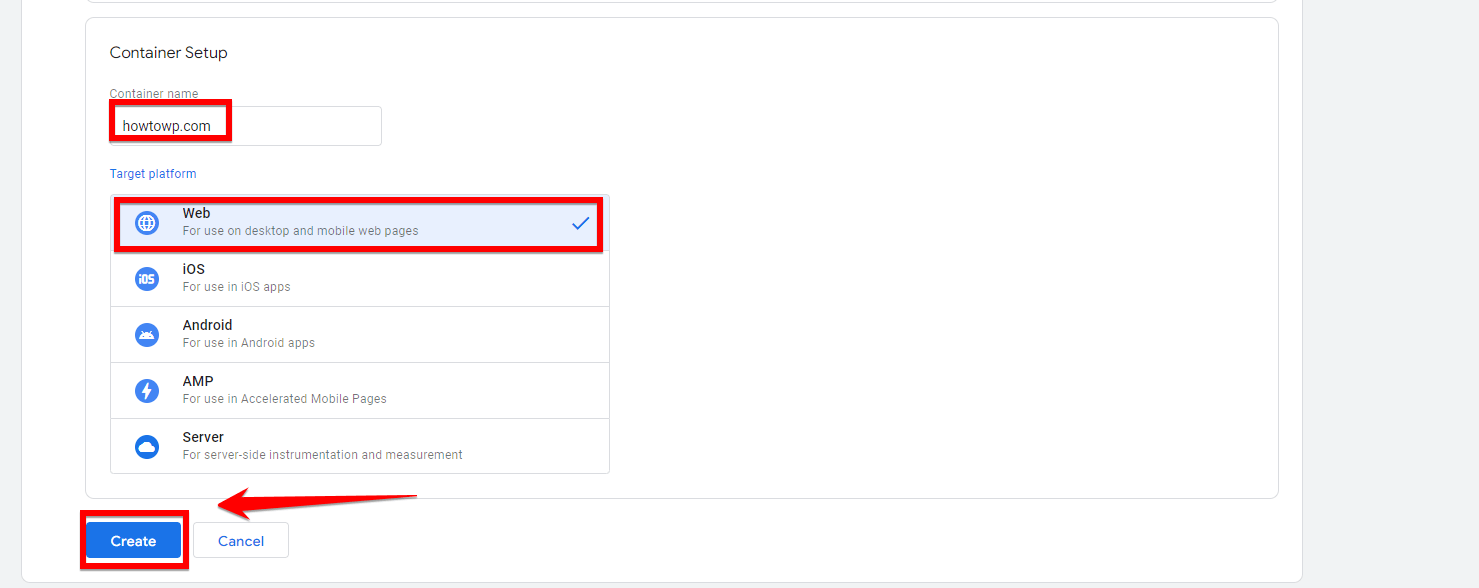
Next, you will need to set up a container for your website. A container is like a storage area where all your tags, triggers, and variables are kept. Enter your website’s URL in the “Container Name” field and select “Web” as the target platform. This container will hold all your tags, such as those for Google Analytics, AdWords conversions, and more.
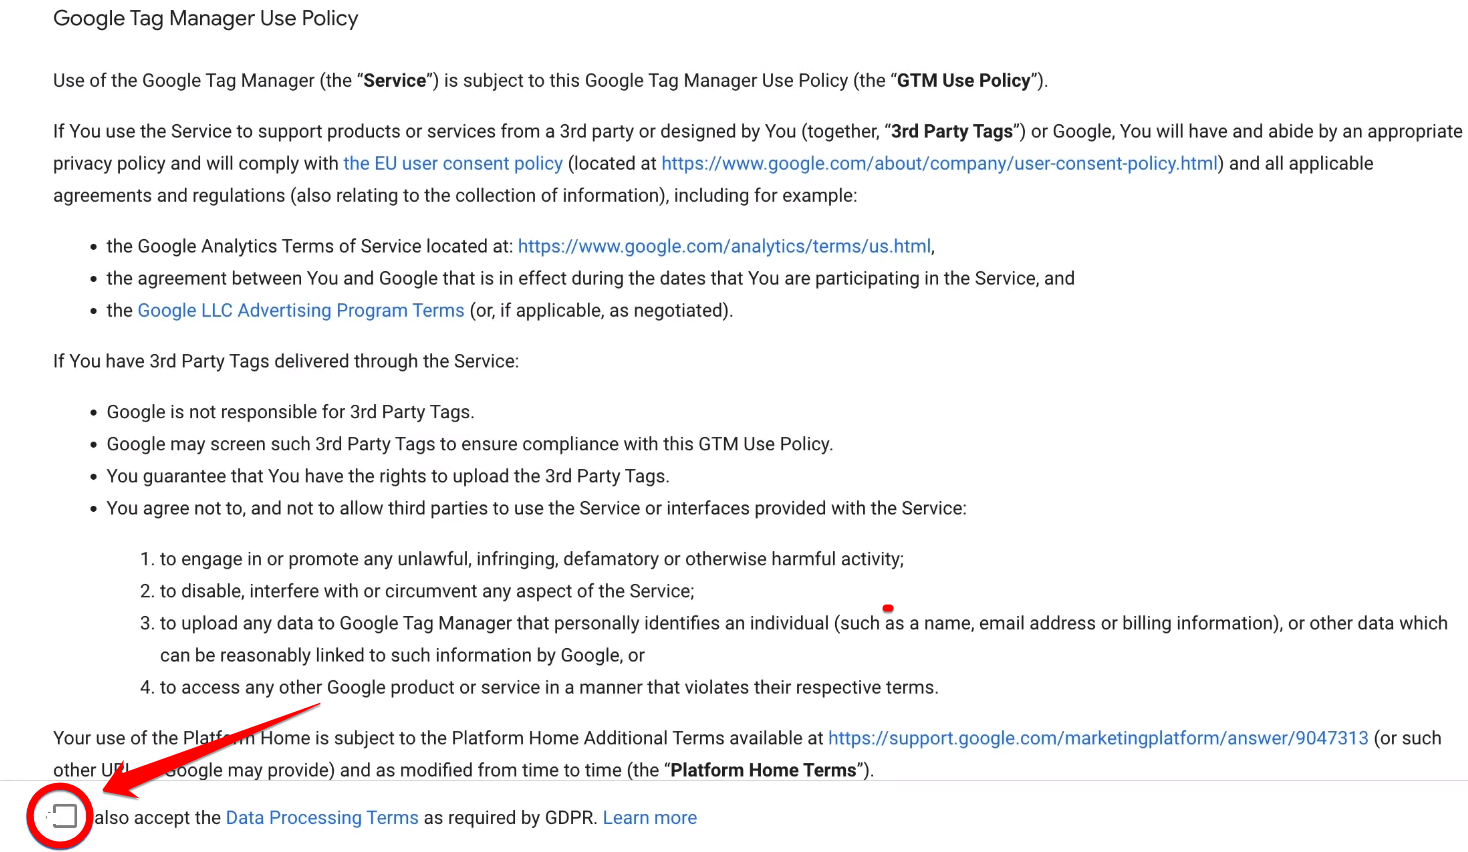
After you fill in your information, you will see a message asking you to accept the Google Tag Manager Terms of Service. Make sure you read these terms carefully as they explain the legal aspects of using the service. They cover important things like how your data is used, your privacy, and what you should do as a user.
If y’all are okay with the terms, click on the “Yes” button to move forward. This is an important step as agreeing to the terms makes sure you get what rules and guidelines Google Tag Manager has set.
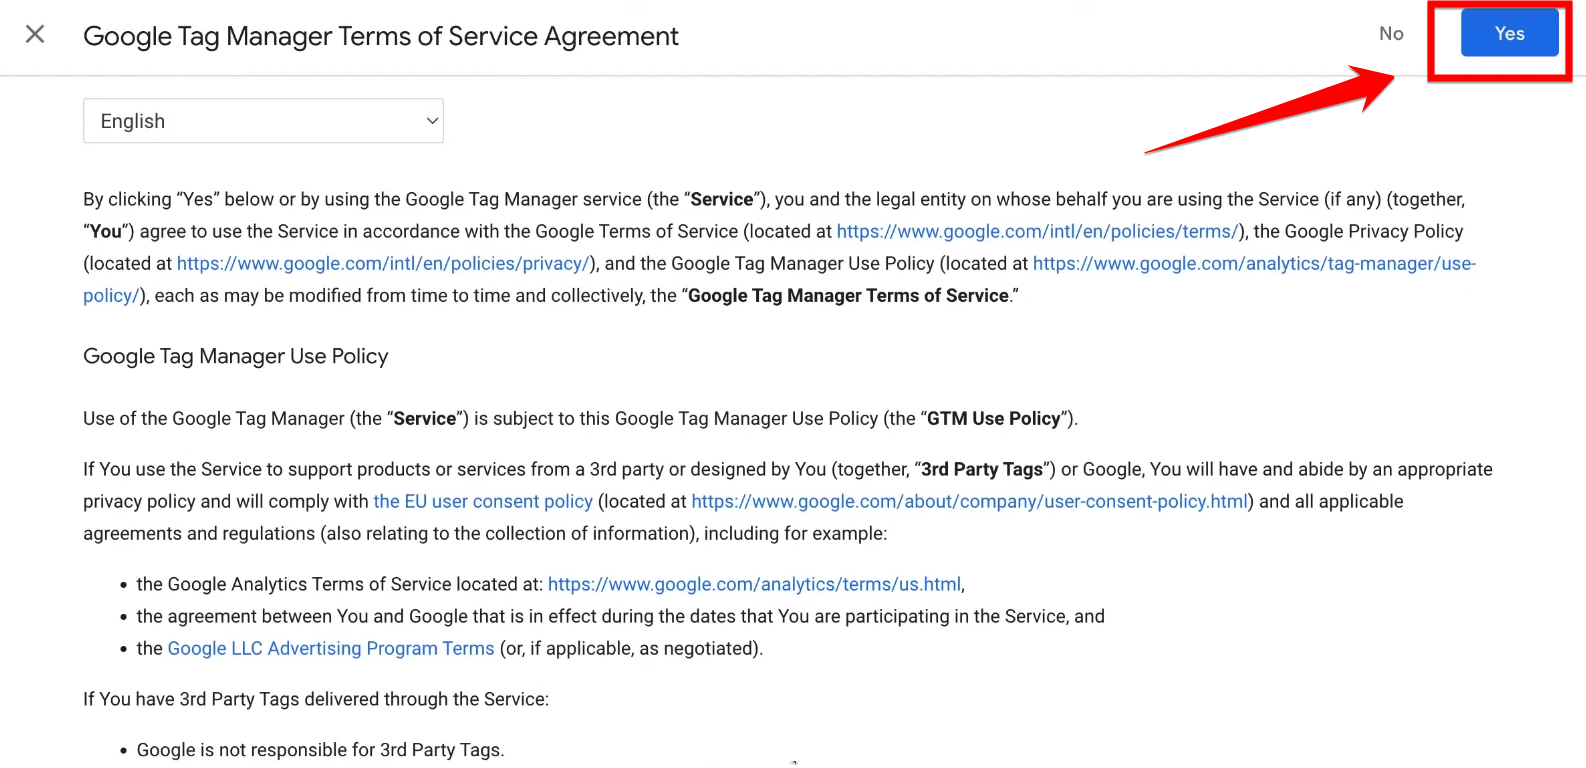
Note: This agreement also keeps you and Google safe when it comes to using the service and handling data.
Step 3: Copy Google Tag Manager Code Snippets
Once your account is created, Google Tag Manager will provide you with two pieces of HTML snippet code. These codes are essential for activating Google Tag Manager on your website.
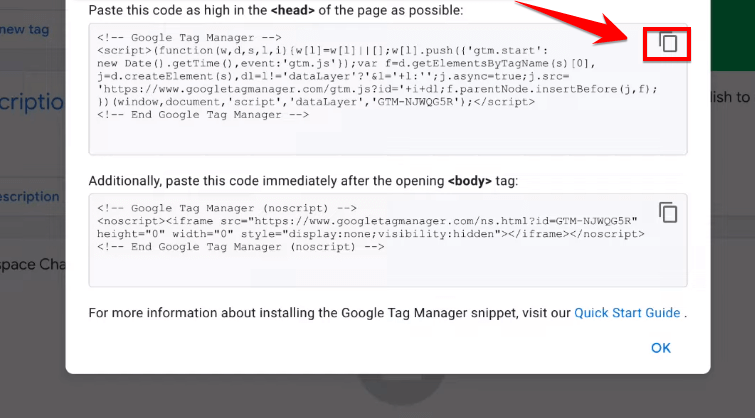
You need to install these codes on your website to activate Google Tag Manager. The first snippet should be placed as high in the “<head>” section of your site as possible, and the second snippet should be added immediately after the opening “<body>” tag.
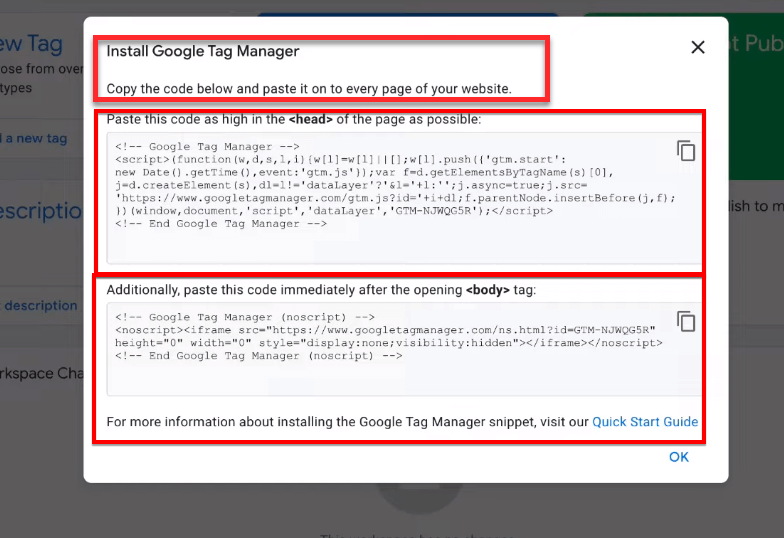
Pro Tip: These snippets will enable Google Tag Manager to fire tags correctly on your site. Make sure to click on the “Copy icon” to copy the first code accurately.
Any mistake in copying the codes can prevent Google Tag Manager from working properly, which can affect your website’s performance and data tracking capabilities.
Using a plugin is a simple and safe way to add the Google Tag Manager code to your WordPress site without touching the theme files. This method reduces the risk of making errors that could potentially break your site. One of the best plugins for this purpose is Header Footer Code Manager (HFCM).
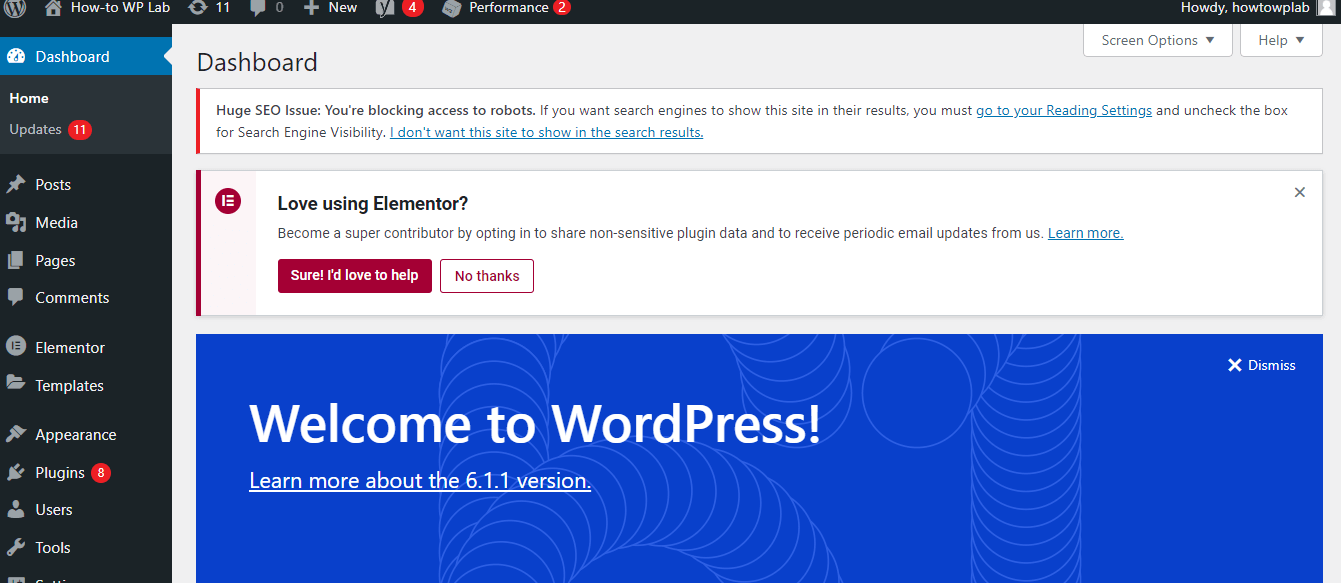
First, log in to your WordPress dashboard. This is the control panel for your website, where you can manage all aspects of your site, including themes, plugins, and settings.
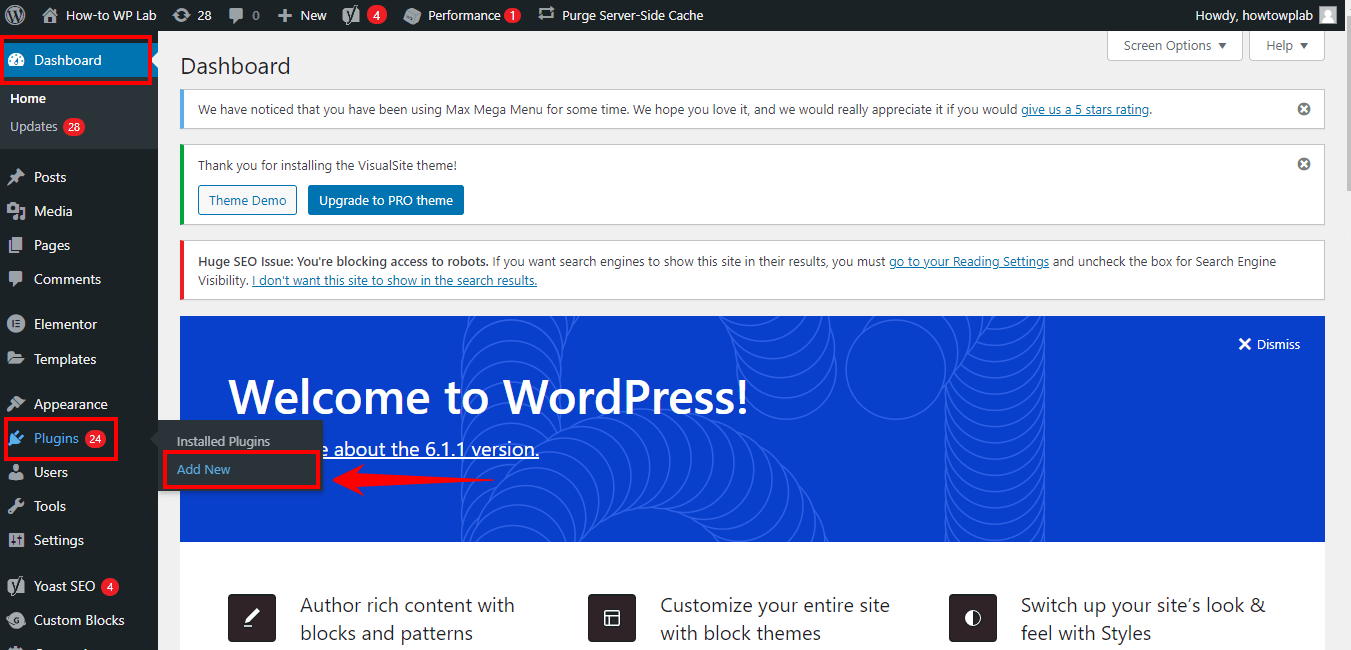
On the left sidebar of your WordPress dashboard, you will see a menu. Look for the “Plugins” option in this menu. Once you are on the page, look for the “Add New” button, usually located at the top of the page next to the “Plugins” heading.
On the Add Plugins page, you will see a search bar on the top right. Type “HFCM” into this search bar. This will search the WordPress plugin repository for the Header Footer Code Manager plugin.
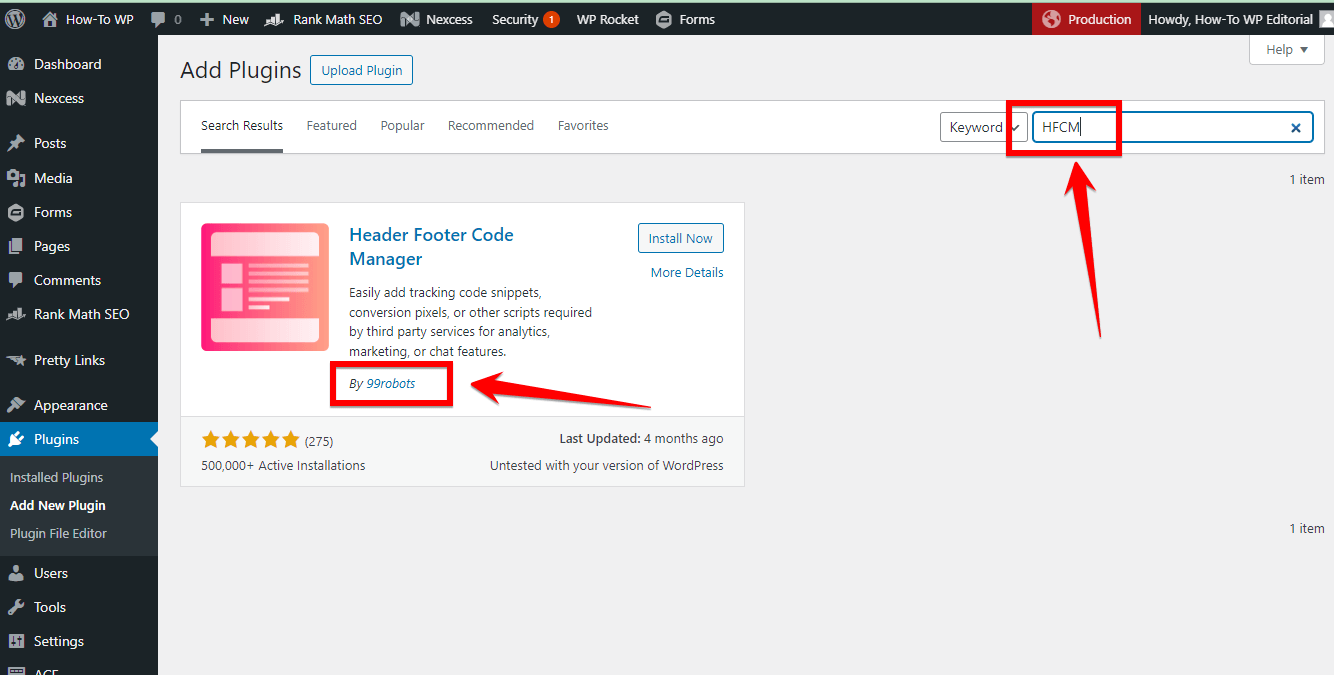
A Pro Tip: In the search results, look for the Header Footer Code Manager plugin developed by 99robots. The plugin should appear as one of the top results. Make sure to choose the correct plugin by checking the developer’s name (99robots).
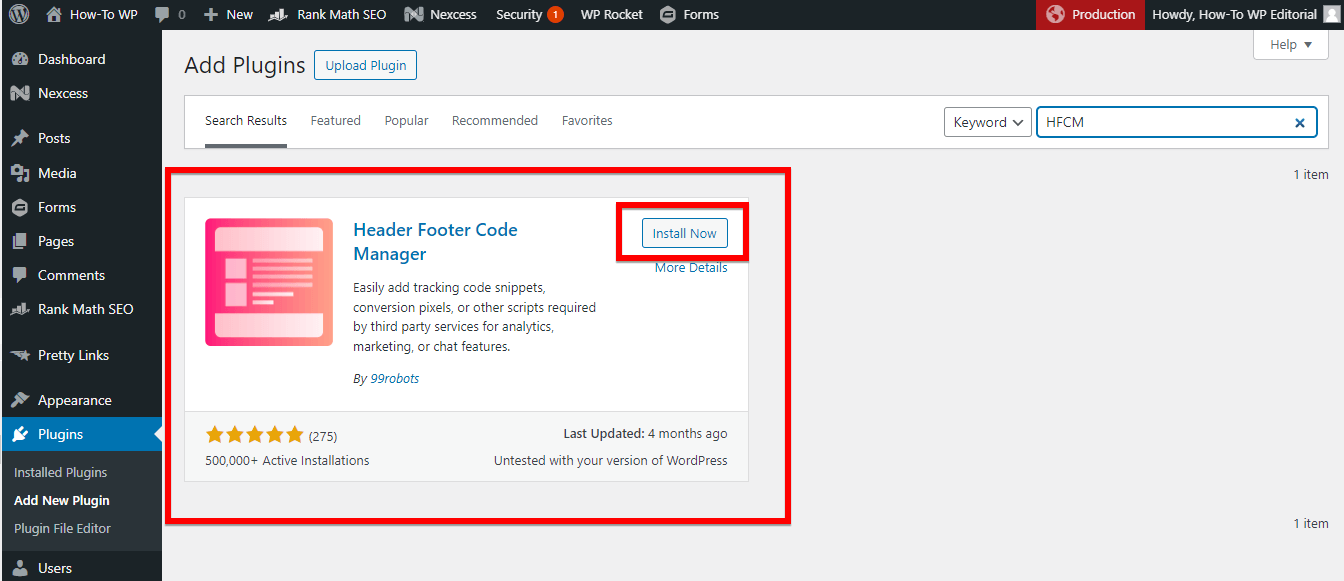
Once you have found the correct plugin, you will see an “Install Now” button next to it. Click on this button to start the installation process. The button will change to show the installation progress.
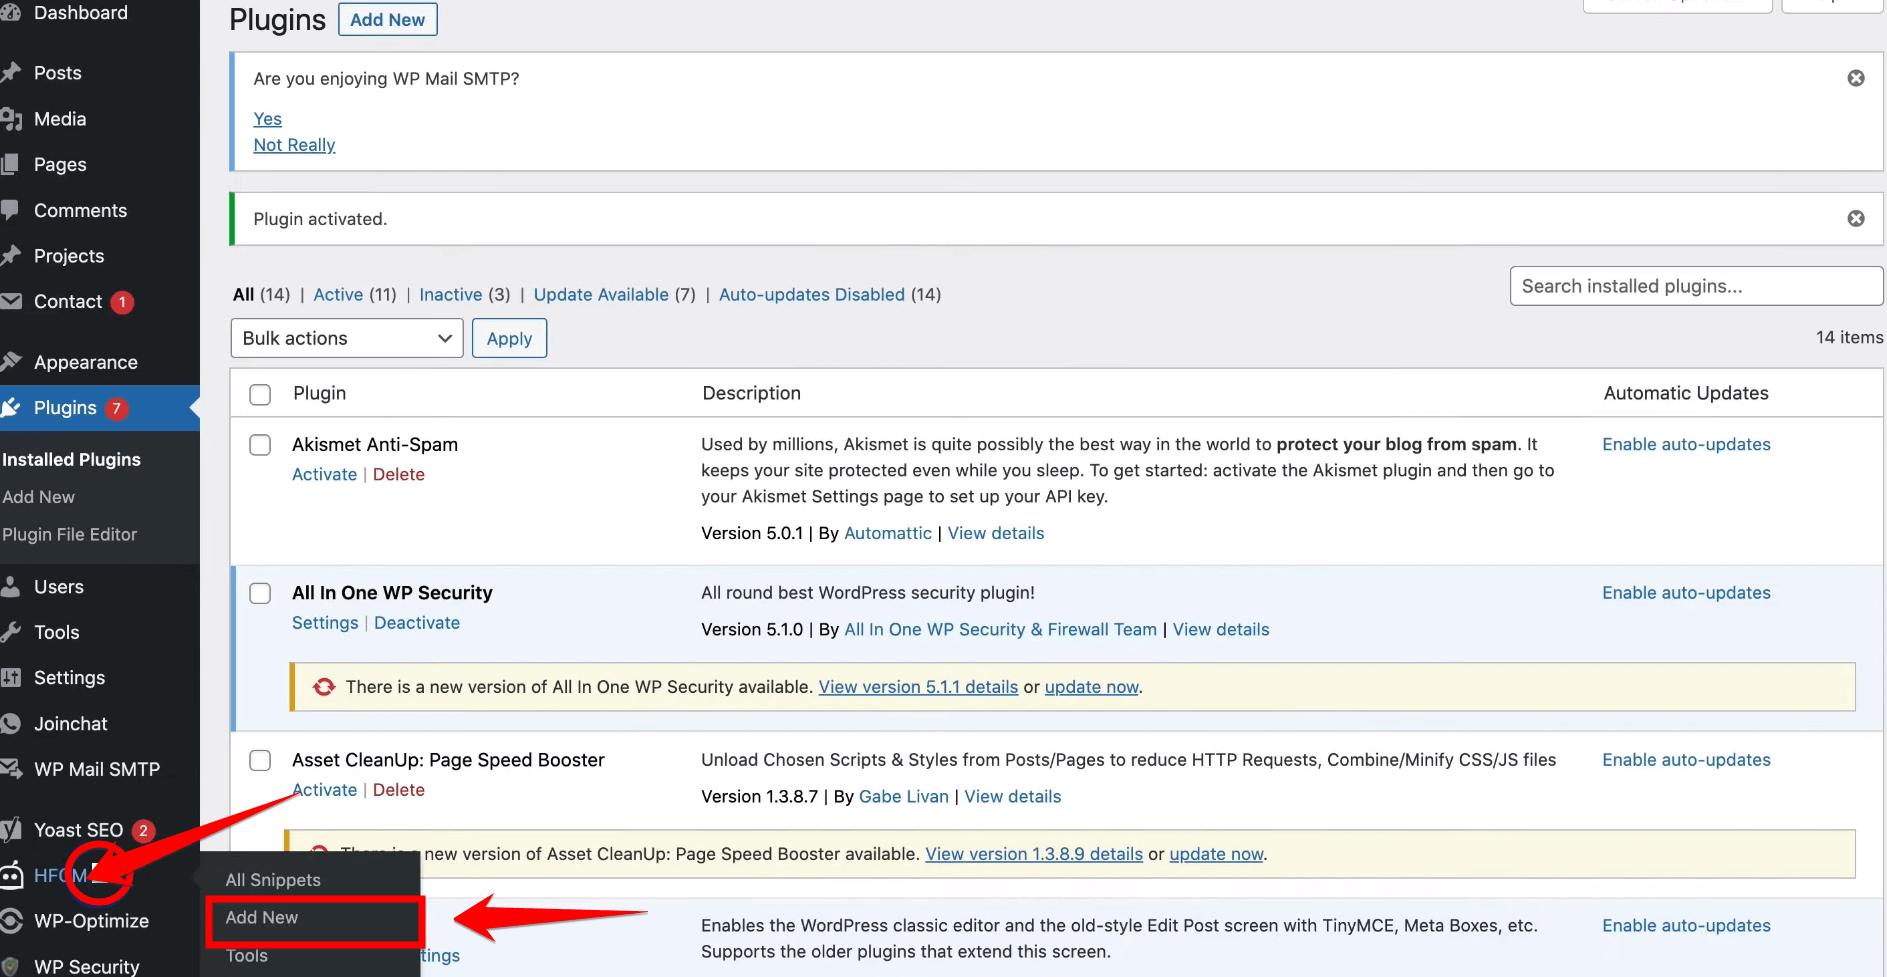
Once the installation is complete, then click the “Activate” button to enable the Header Footer Code Manager plugin on your WordPress site.

Activating the plugin will add new options to your WordPress dashboard, allowing you to easily insert code snippets into the header or footer of your site.
Step 5: Add Google Tag Manager Code to WordPress Header
After activating the HFCM plugin, go back to the “Plugins” section, find Header Footer Code Manager in the list, and click on “All Snippets.” Then click “Add New” to create a new snippet.
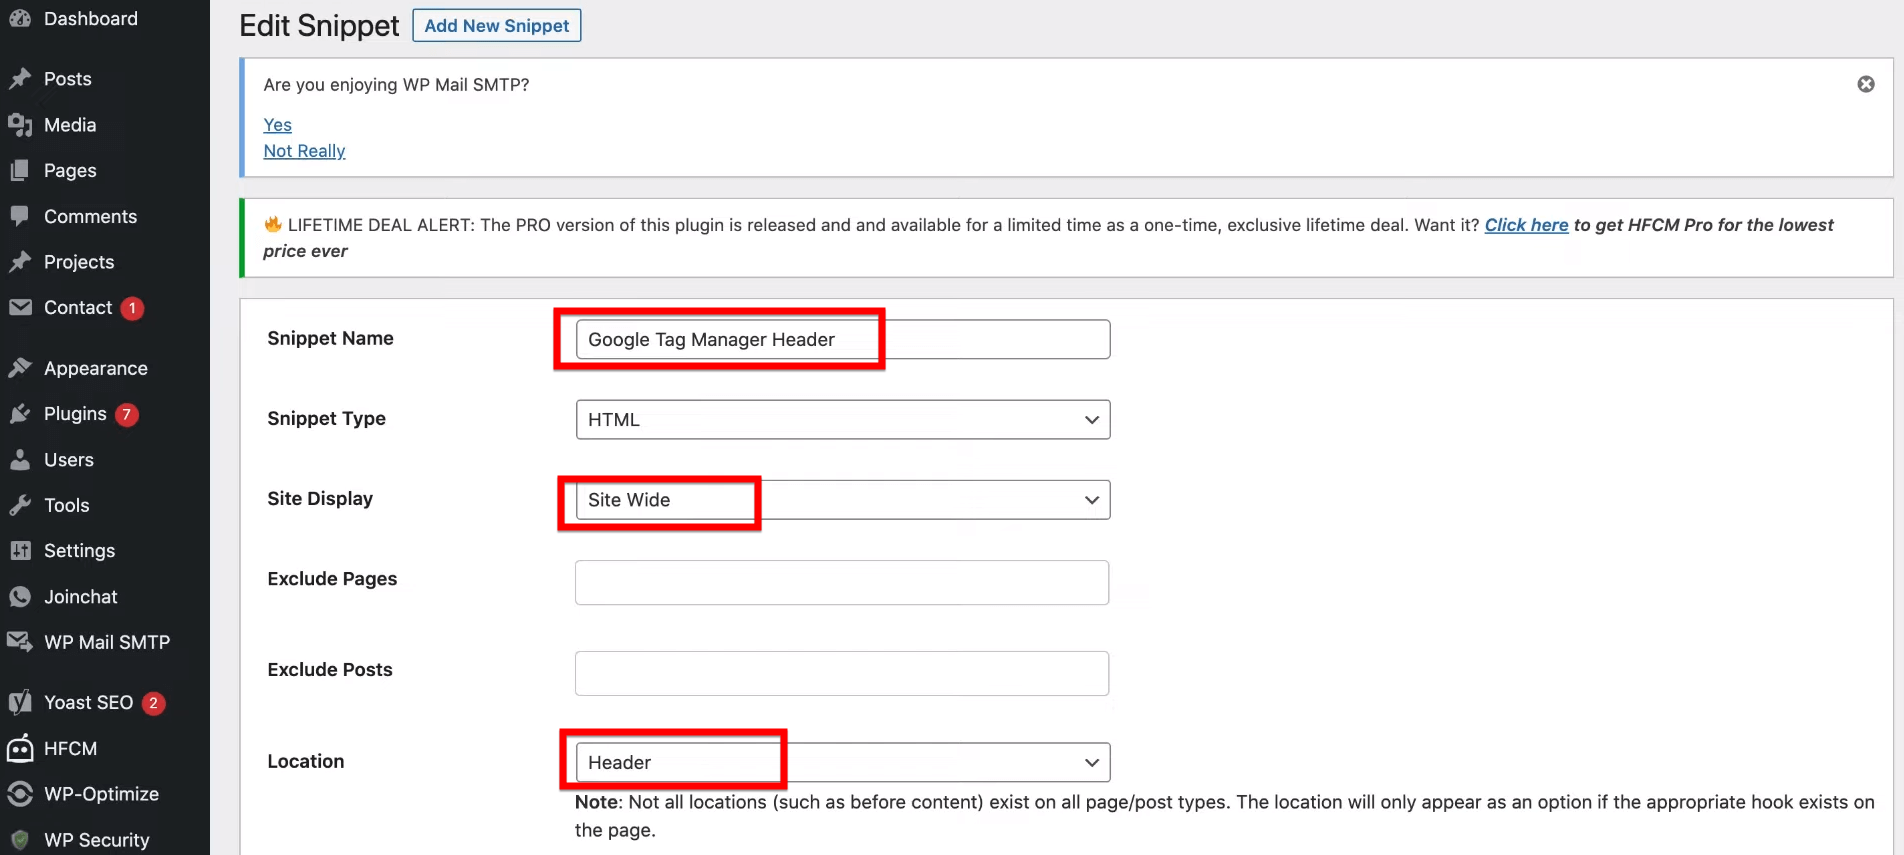
In the “Snippet Name” field, type “Google Tag Manager Header.” Set the “Snippet Type” to HTML and “Site Display” to Site Wide. Select “Header” for the location to ensure the code runs at the top of your pages, which is crucial for proper tag management.
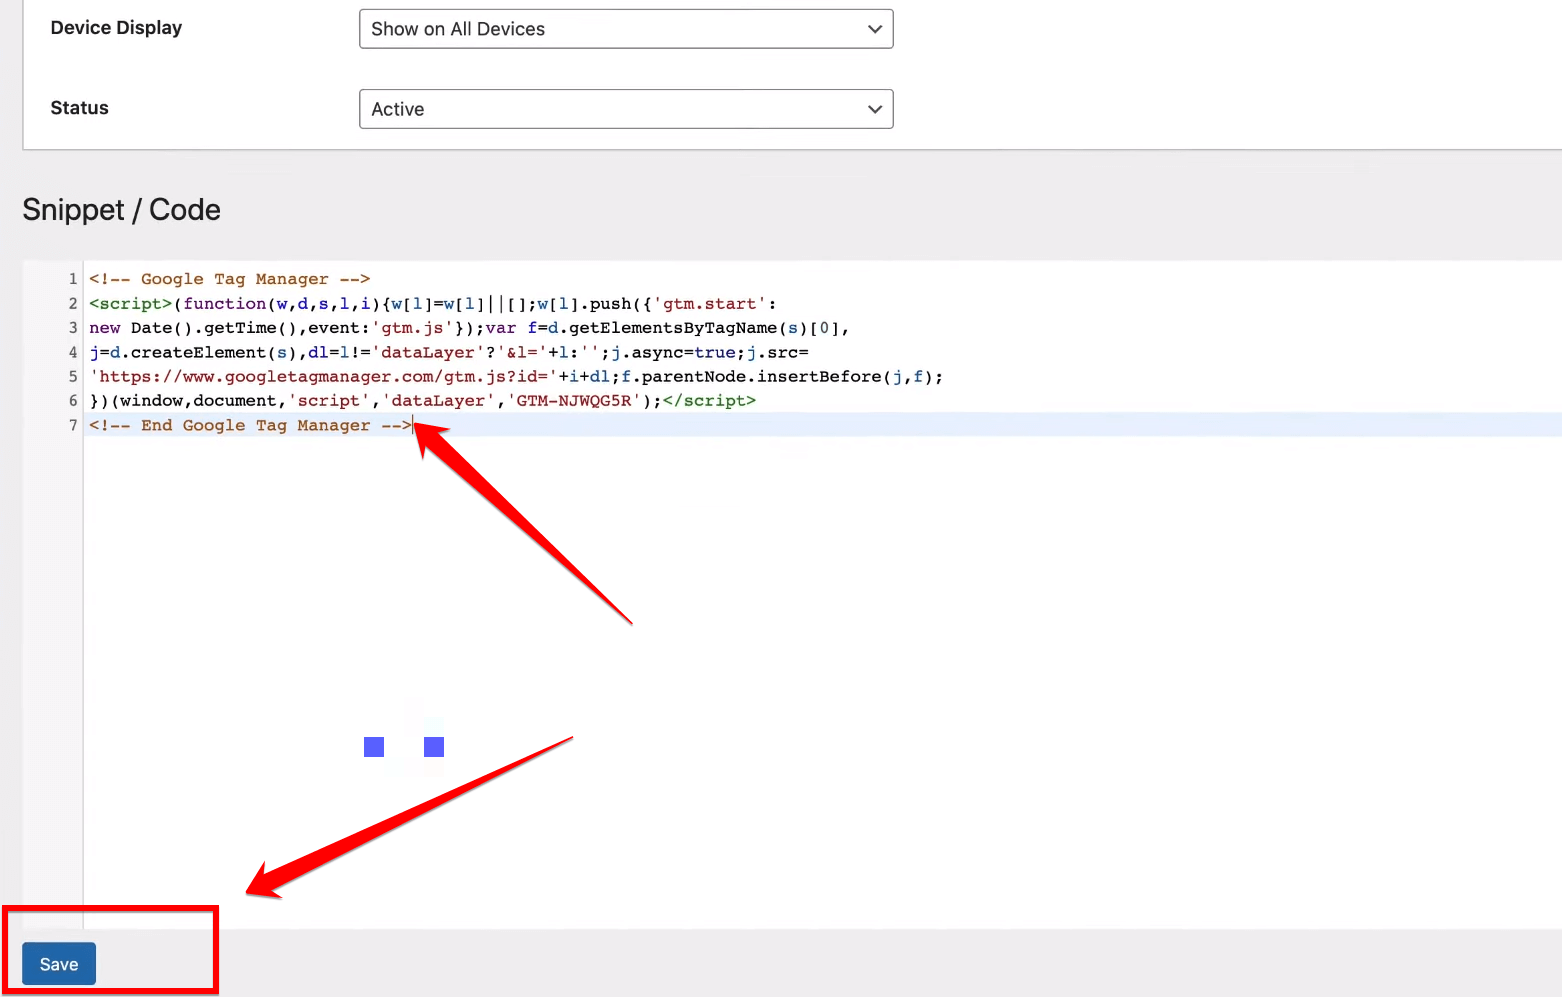
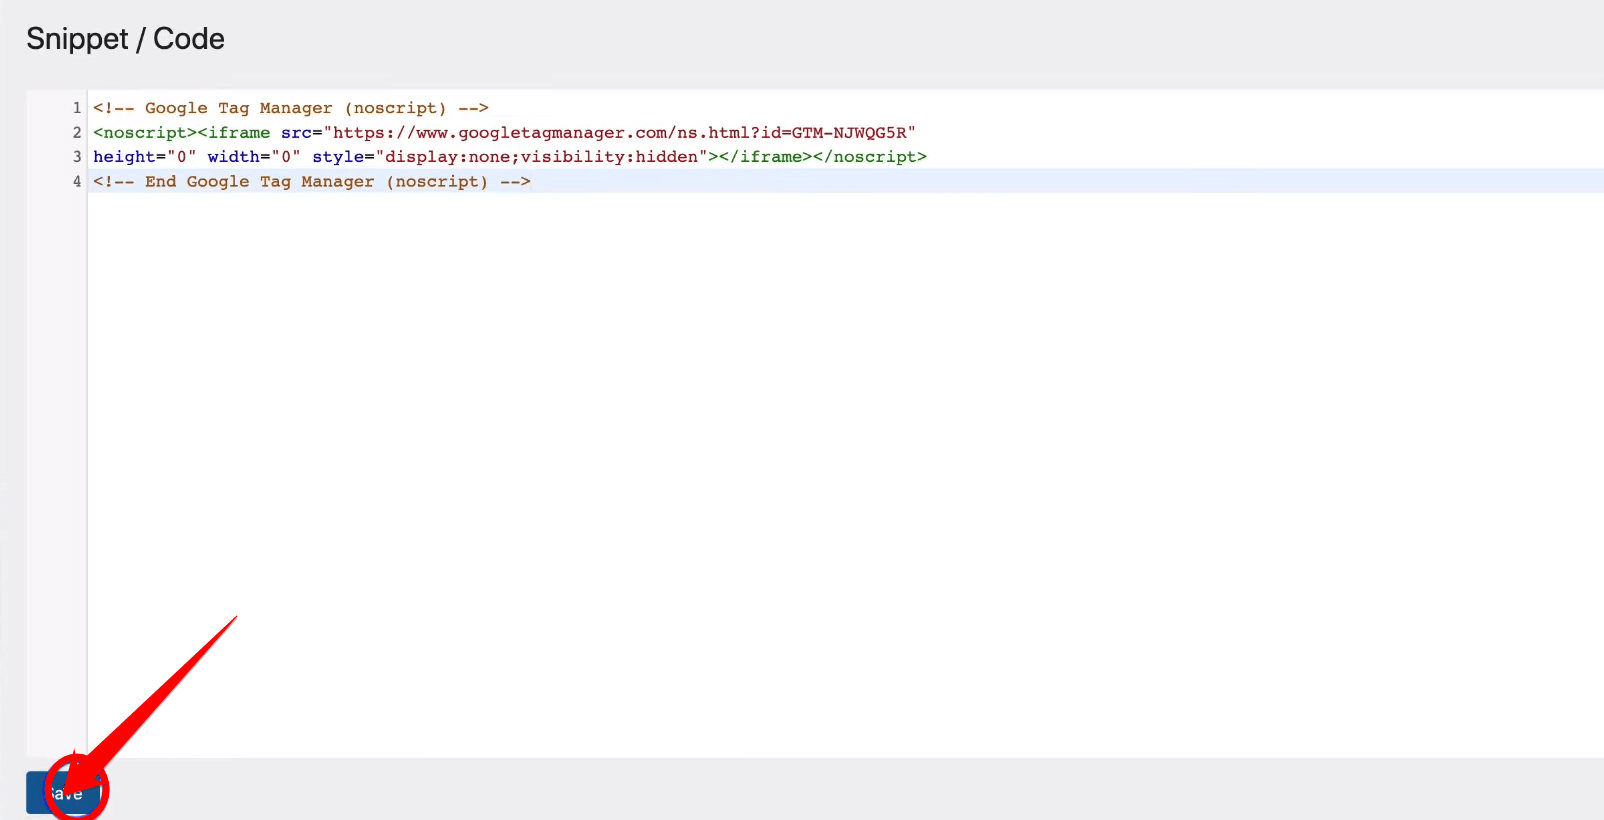
After you have completed these steps, just scroll down a little and you will come across a section labeled as “Snippet/Code”. In this part, you should paste the initial piece of Google Tag Manager code that you had copied earlier into the large text area provided.
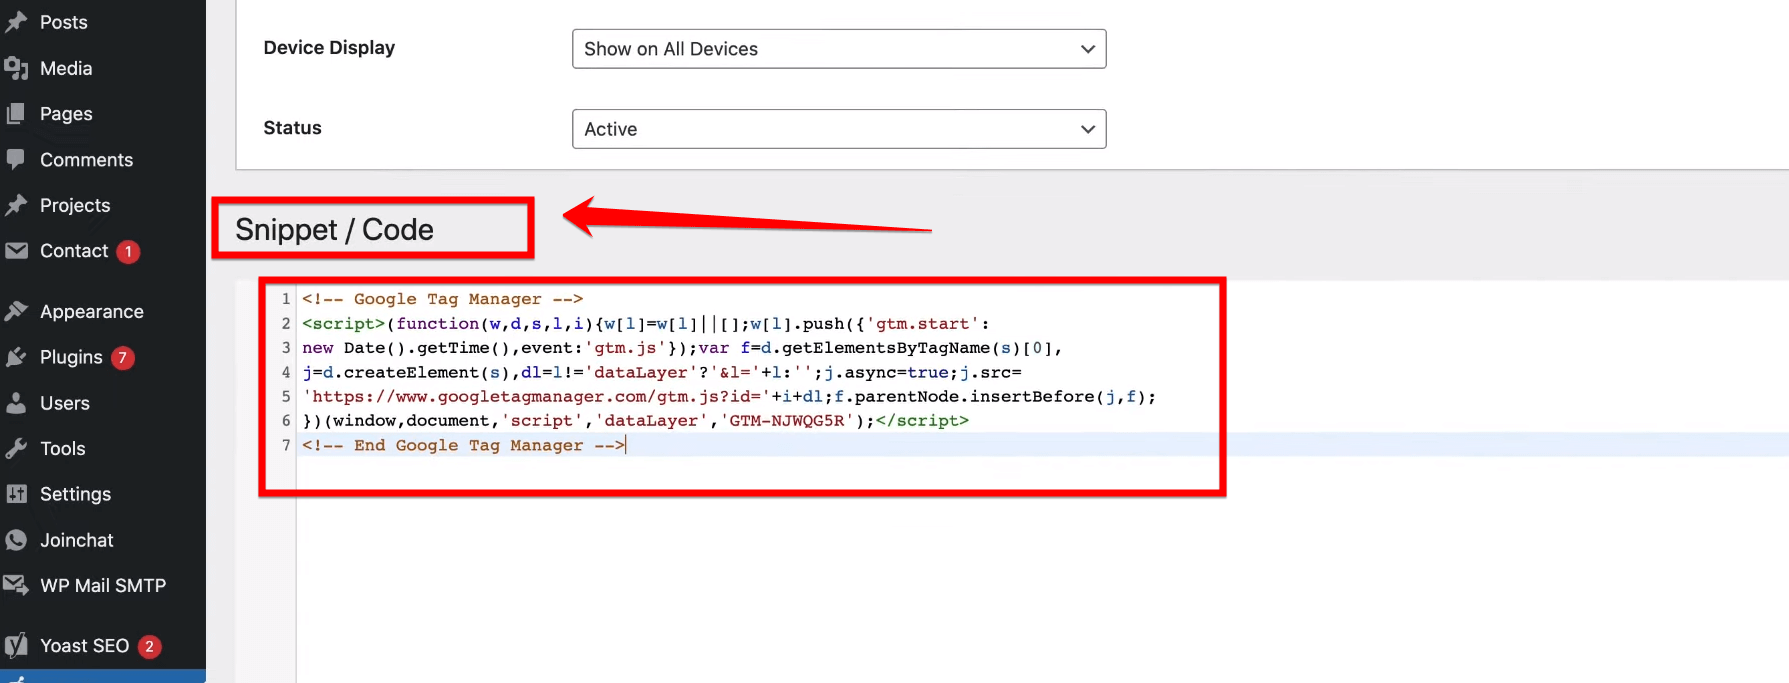
After pasting the Google Tag Manager code into the text box, don’t forget to click on the “Save” button below to ensure that your changes are successfully applied. Once you’ve saved the code, you can proceed to the next step in setting up Google Tag Manager on your website.
It’s very important to check the next step after saving the GTM code to make sure everything is set up the right way. Checking each step will make sure that your website can track and manage important data properly.
Now, to ensure Google Tag Manager can monitor user interactions across your entire site, you’ll need to insert the second code snippet, which goes into the “<body>” section of your pages.
Return to the Header Footer Code Manager plugin under the “All Snippets” section in your WordPress dashboard and click “Add New” to create another snippet.
For this snippet:
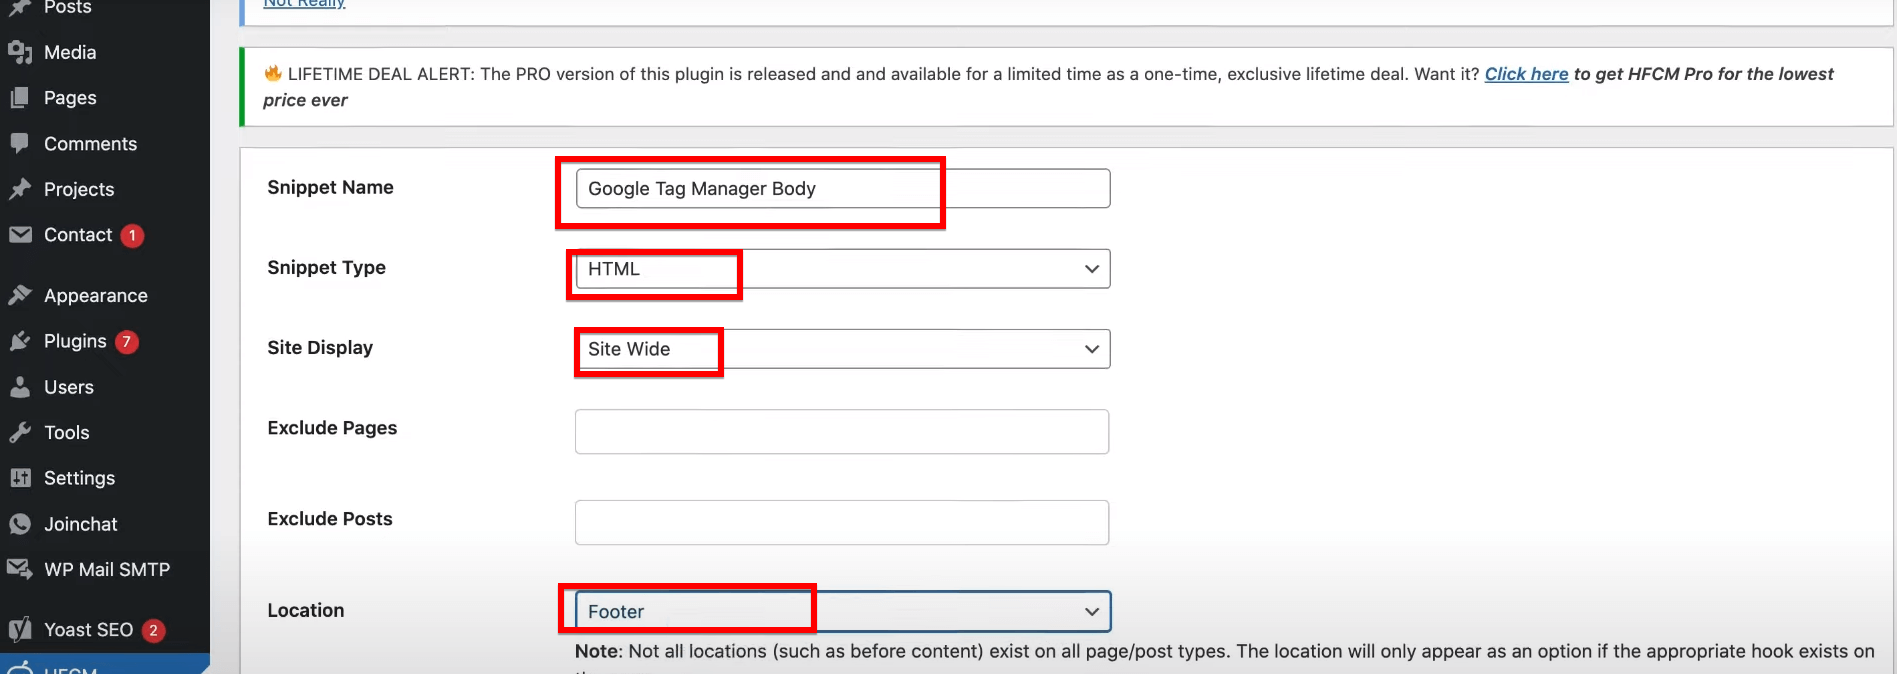
- In the “Snippet Name” field, type “Google Tag Manager Body.”
- Set the “Snippet Type” to HTML.
- Ensure “Site Display” is set to “Site Wide” to apply across all pages.
- Choose “Footer” as the location. This setting is crucial because the script needs to load right after the opening “<body>” tag, and placing it in the footer ensures it doesn’t delay the rendering of your page.
Paste the “<noscript>” tag code you copied from Google Tag Manager into the large text area provided. This part of the code is critical for users who have JavaScript disabled in their browsers—it ensures that tracking still works.
A Pro Tip: Before you paste the code, make sure to check that the snippet is set to “Active.” This step is crucial to ensure everything works smoothly.
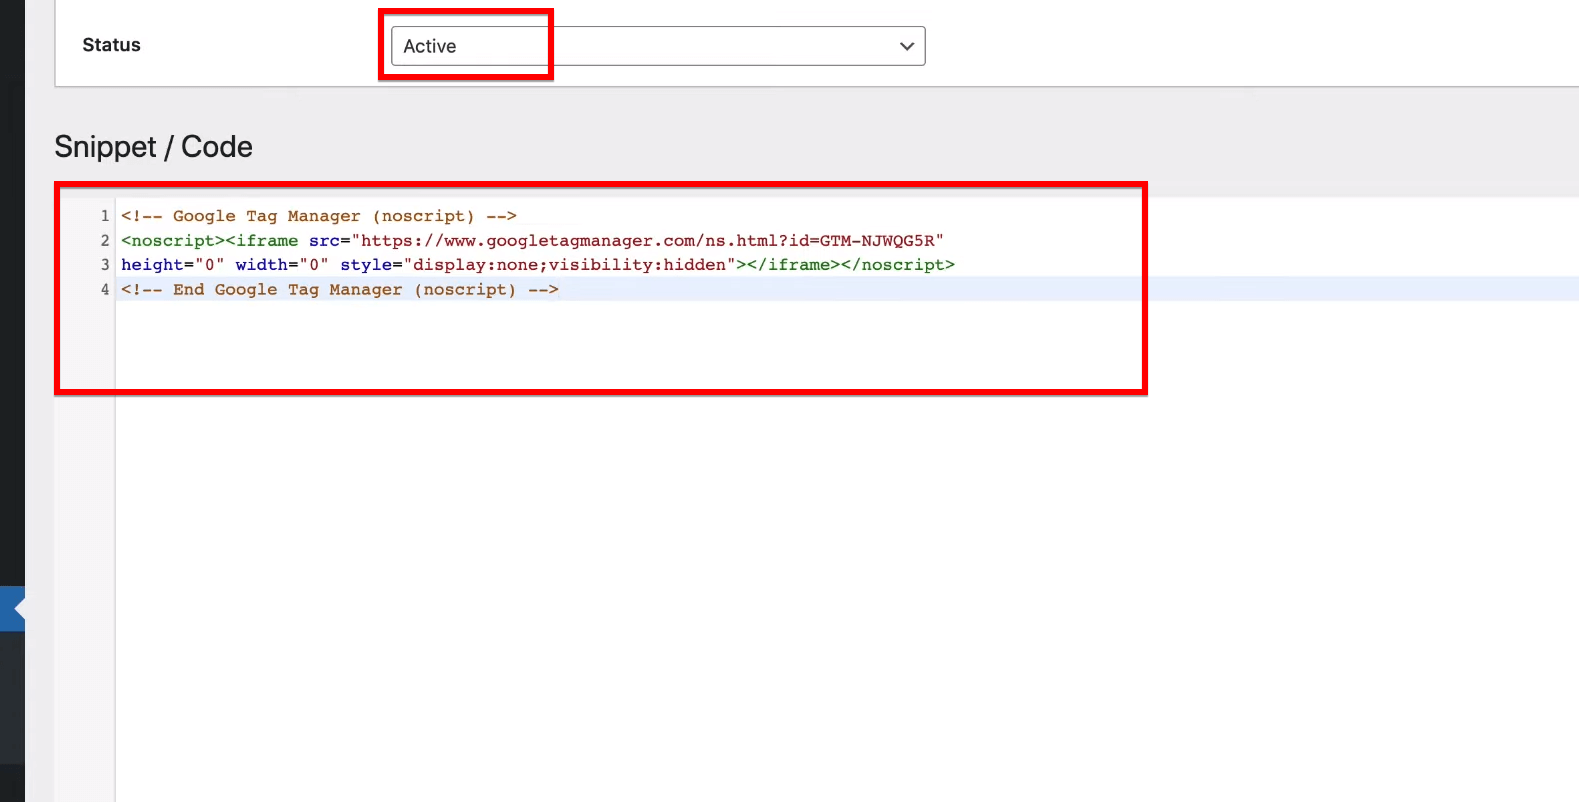
Following that, proceed by clicking on “Save” to implement the changes. This action integrates the Google Tag Manager script fully into your website, allowing you to track and manage user interactions effectively.
Now, let’s take this crucial step to guarantee that your changes are secured and your tracking functions seamlessly.
Step 7: Verify Google Tag Manager Code Installation
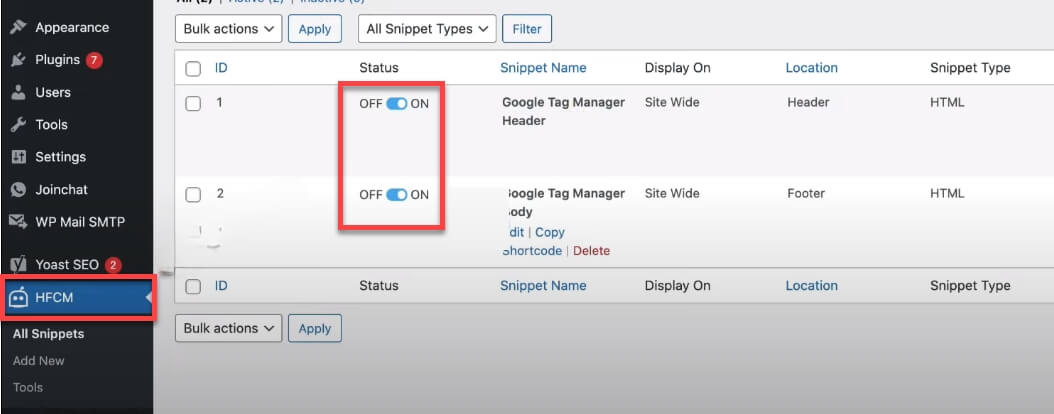
After saving both code snippets in the Header Footer Code Manager, it’s important to make sure they are activated. Navigate to the “All Snippets” section within the HFCM menu on your WordPress dashboard.
Here, you’ll see a list of all the snippets you’ve created. Locate the snippets named “Google Tag Manager Header” and “Google Tag Manager Body.” Ensure the toggle next to each snippet is set to “ON.” This activates the snippets, allowing the Google Tag Manager scripts to run on your site.
With the snippets activated, Google Tag Manager is now fully integrated into your website. This setup enables you to manage various tags for analytics, marketing, and support without modifying your website’s core code directly.
Step 8: Use Google Tag Assistant to Verify Tag Installation
Now that Google Tag Manager codes are installed, it’s important to verify they are working correctly. For this, you can use the Google Tag Assistant, a Chrome extension that helps you check the installation of various Google tags, including Google Analytics, Google Ads, and Google Tag Manager.
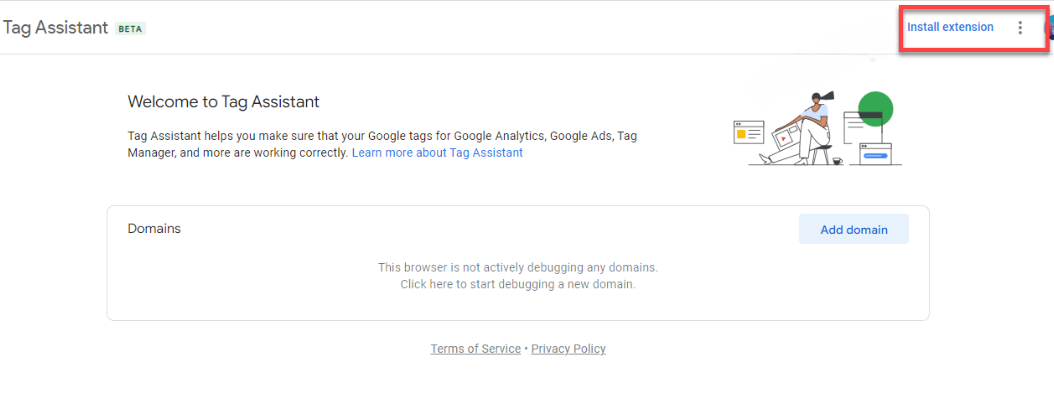
To get started, open Google Chrome and visit the Chrome Web Store. Look for “Google Tag Assistant” and find the extension called “Tag Assistant Legacy (by Google).”
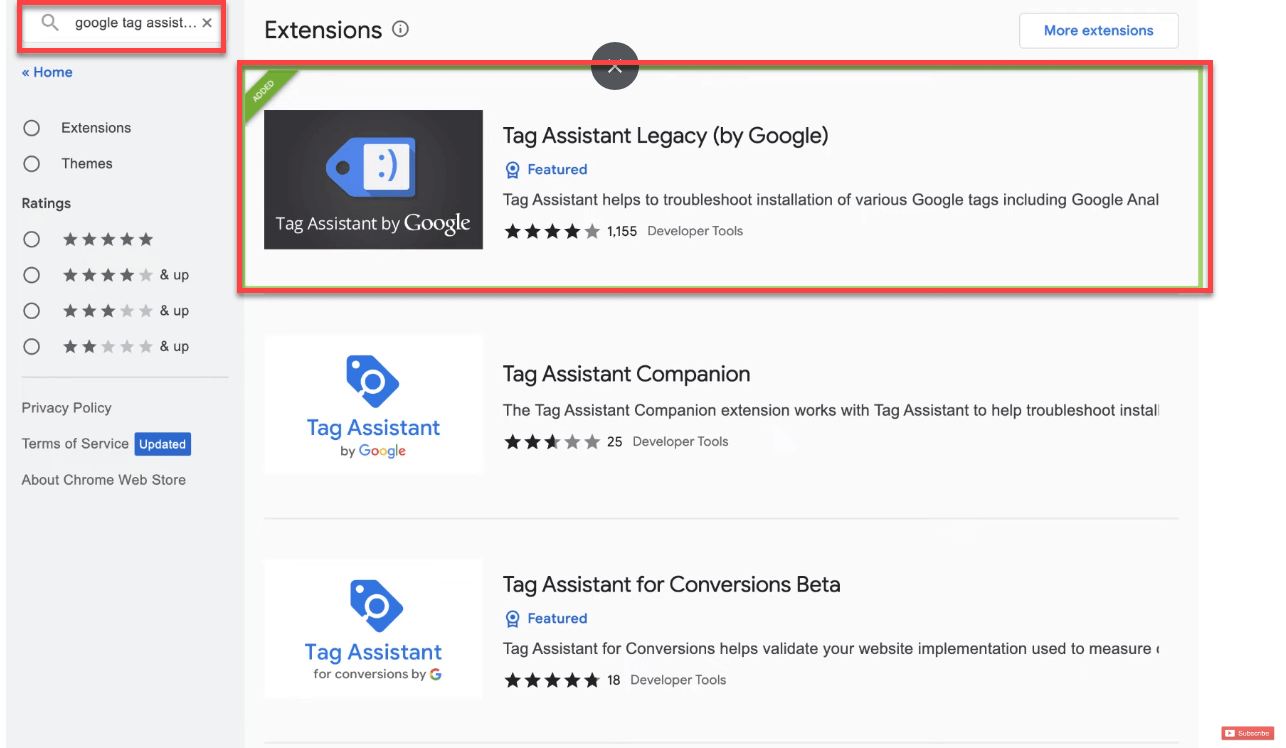
Click on “Add to Chrome” and then on “Add extension” to install it on your browser. This extension will help you troubleshoot and validate the tags on your website.
After installing the extension, click the “Tag Assistant icon” in your Chrome toolbar to activate it. Make sure you are on the website where Google Tag Manager is installed. Click the “Record” button within the Tag Assistant and refresh your webpage. This action allows Tag Assistant to capture and analyze the tag data.
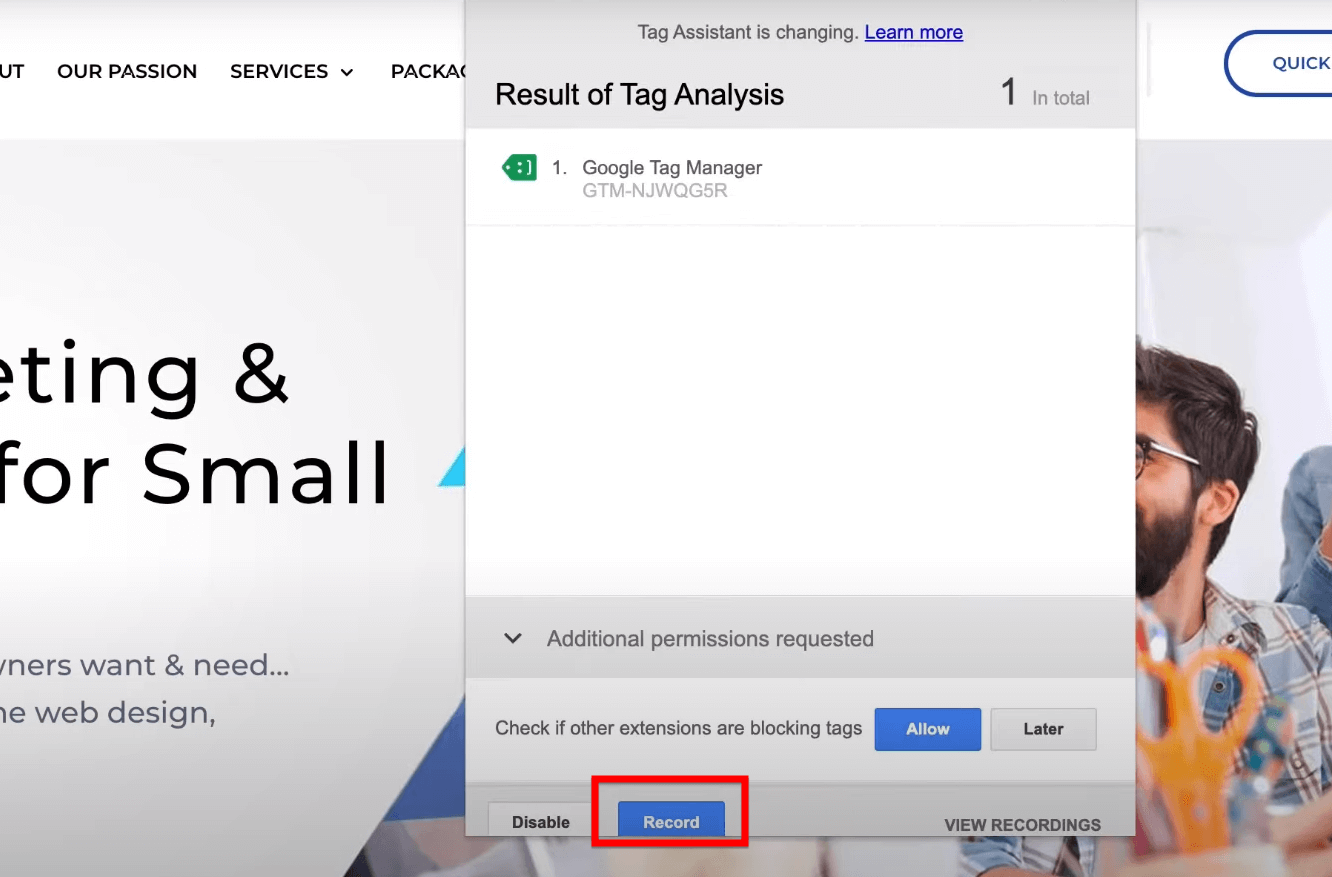
Once the page reloads, Tag Assistant will display the analysis of your tags. Check for the Google Tag Manager tag in the results. It should appear with a green icon, indicating that it is functioning correctly. This green status confirms that Google Tag Manager is active and working properly on your site.
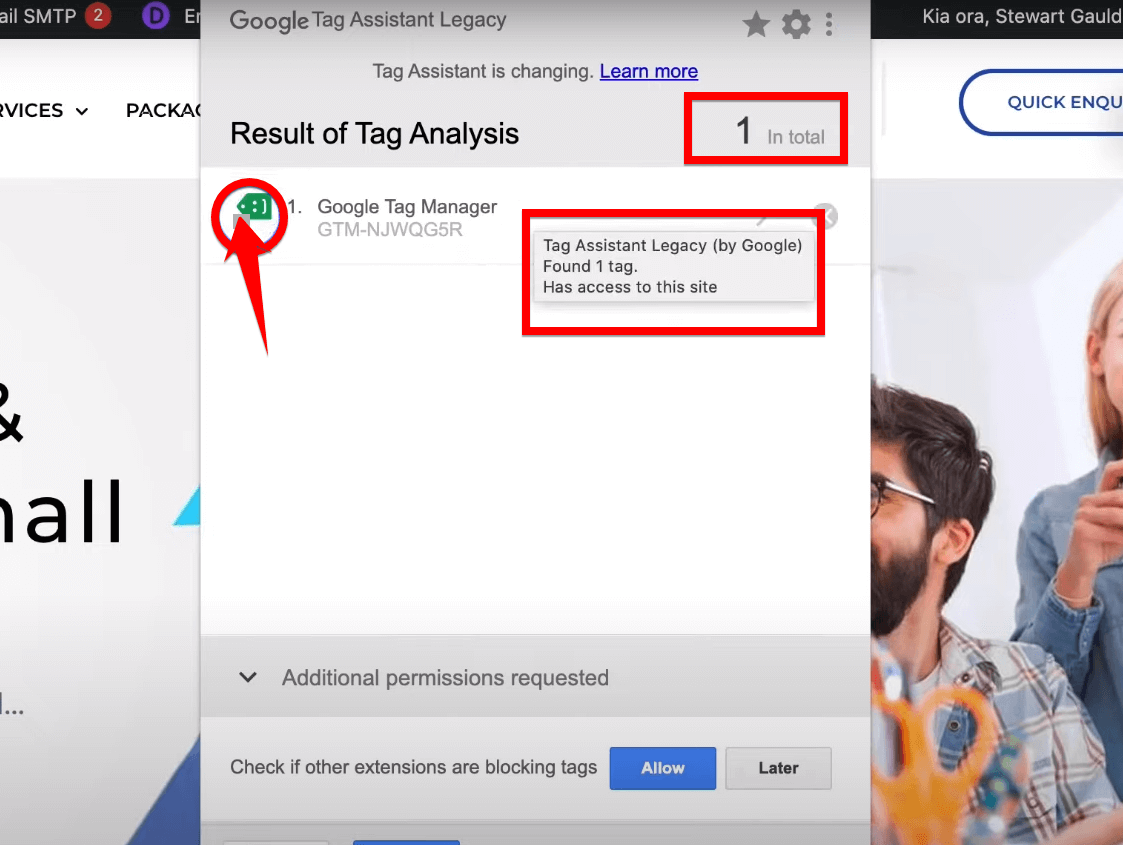
Note: If Tag Assistant confirms that Google Tag Manager is properly set up, great news! Your Google Tag Manager is good to go, and you can efficiently manage website tags. In case of any issues, Tag Assistant will pinpoint what’s wrong, helping you troubleshoot and fix the problems.
Google Tag Manager (GTM) has now been successfully installed on your website, enabling you to effortlessly manage and deploy tracking codes, which can enhance your marketing efforts and site analytics.
Now that GTM is installed, you’re ready to start adding and publishing tags to make your tracking more effective.
Step 1: Access the Google Tag Manager Dashboard
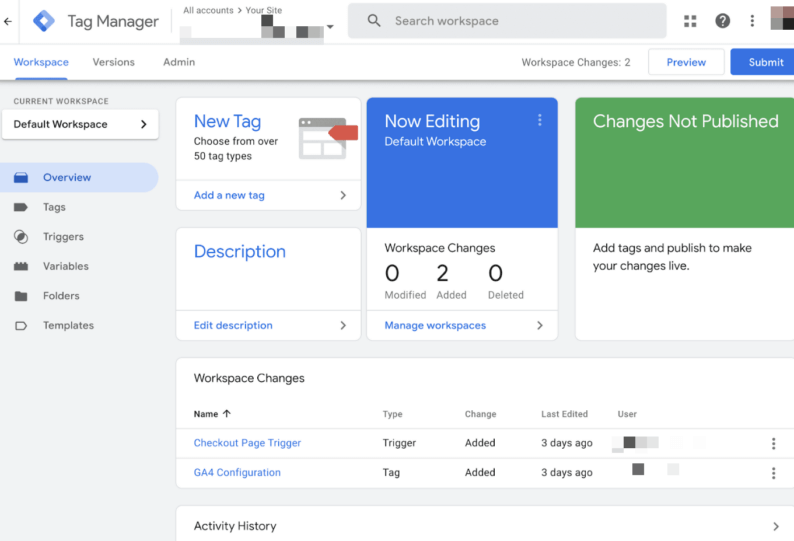
To start, log in to your Google Tag Manager account. Once you are logged in, you will be taken to your Google Tag Manager dashboard. This is the central hub where you can manage all your tags, triggers, and variables for your website.
In the Google Tag Manager dashboard, you will see a list of your existing accounts and containers. Click on the account and then the specific container you want to work with. This will take you to the “Workspace” for that container. The Workspace is where you can create and manage tags, triggers, and variables for your site.
In the “Tags” section, you will see a list of any existing tags you have set up. To add a new tag, look for the “Add a new tag” button, which is typically located at the top right corner or center of the page. Click on this button to begin the process of setting up a new tracking tool.
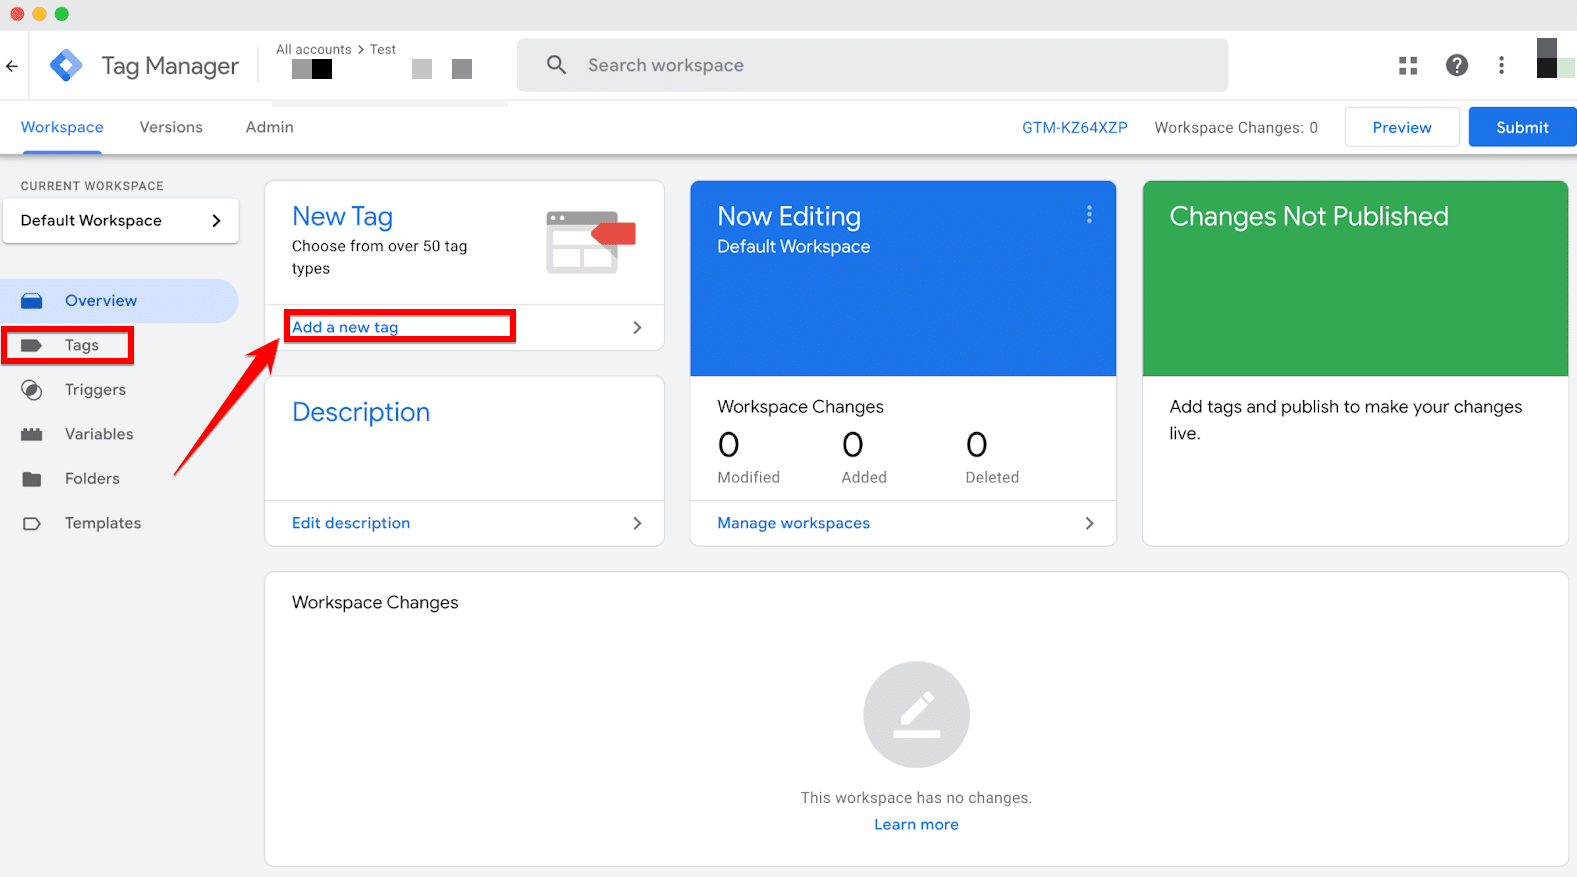
Here, you will be able to name your tag, choose a tag type, and set up the specific configurations required for the tag to function properly on your website.
Step 2: Configure Your New Tag in Google Tag Manager
In your workspace, you’ll see an area labeled as “Untitled Tag.” It’s best to give your tag a descriptive name that reflects its purpose, such as “Site Analysis” if you’re adding a Google Analytics tag. This helps keep your tags organized and clear about their functions.
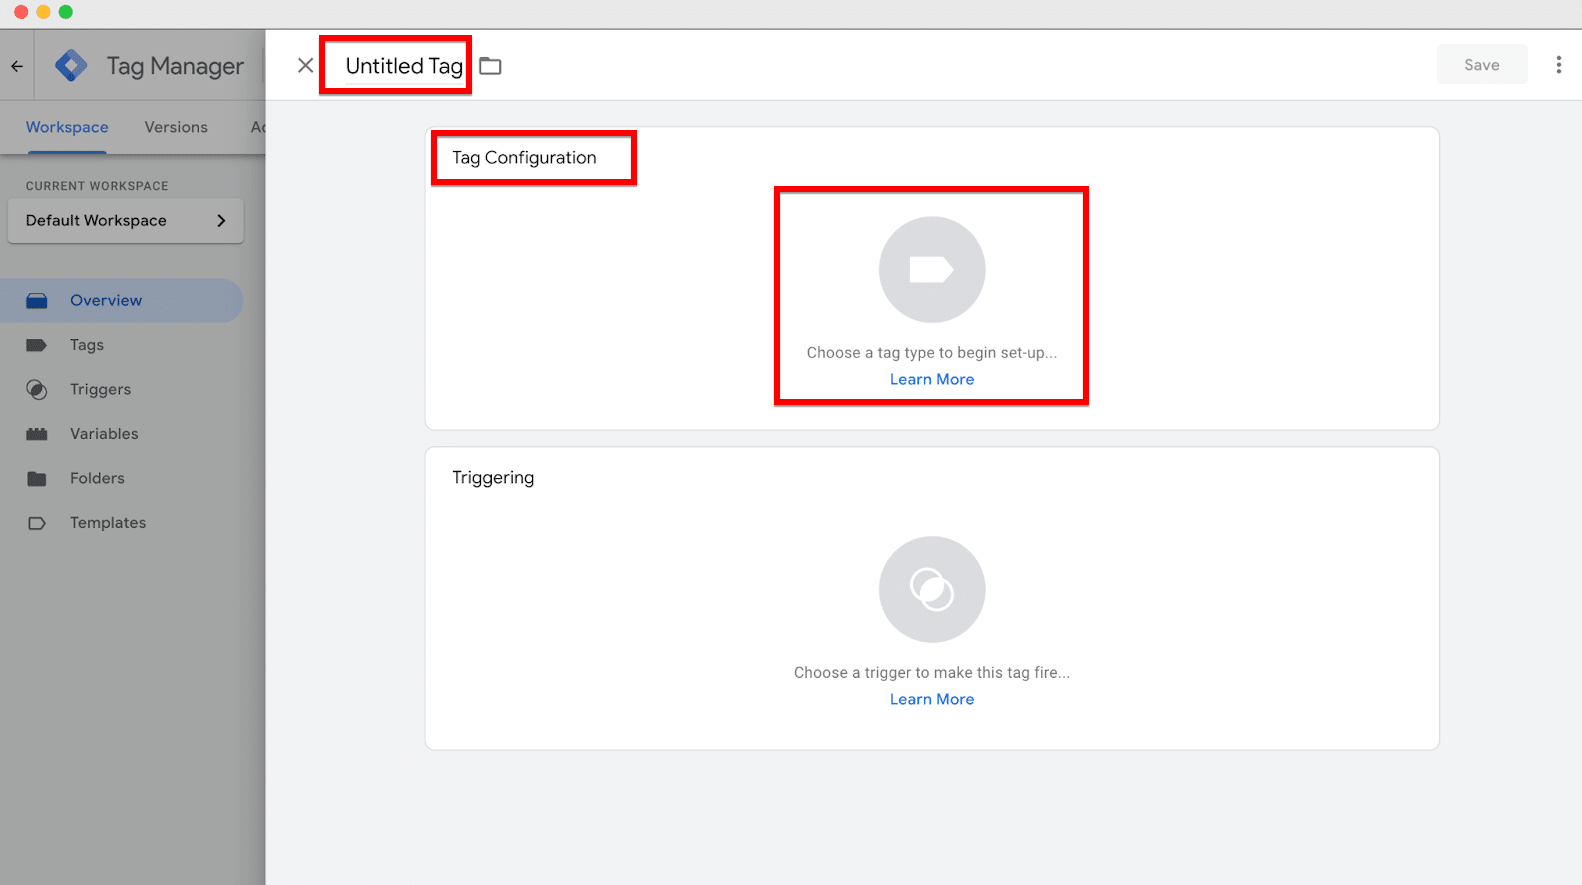
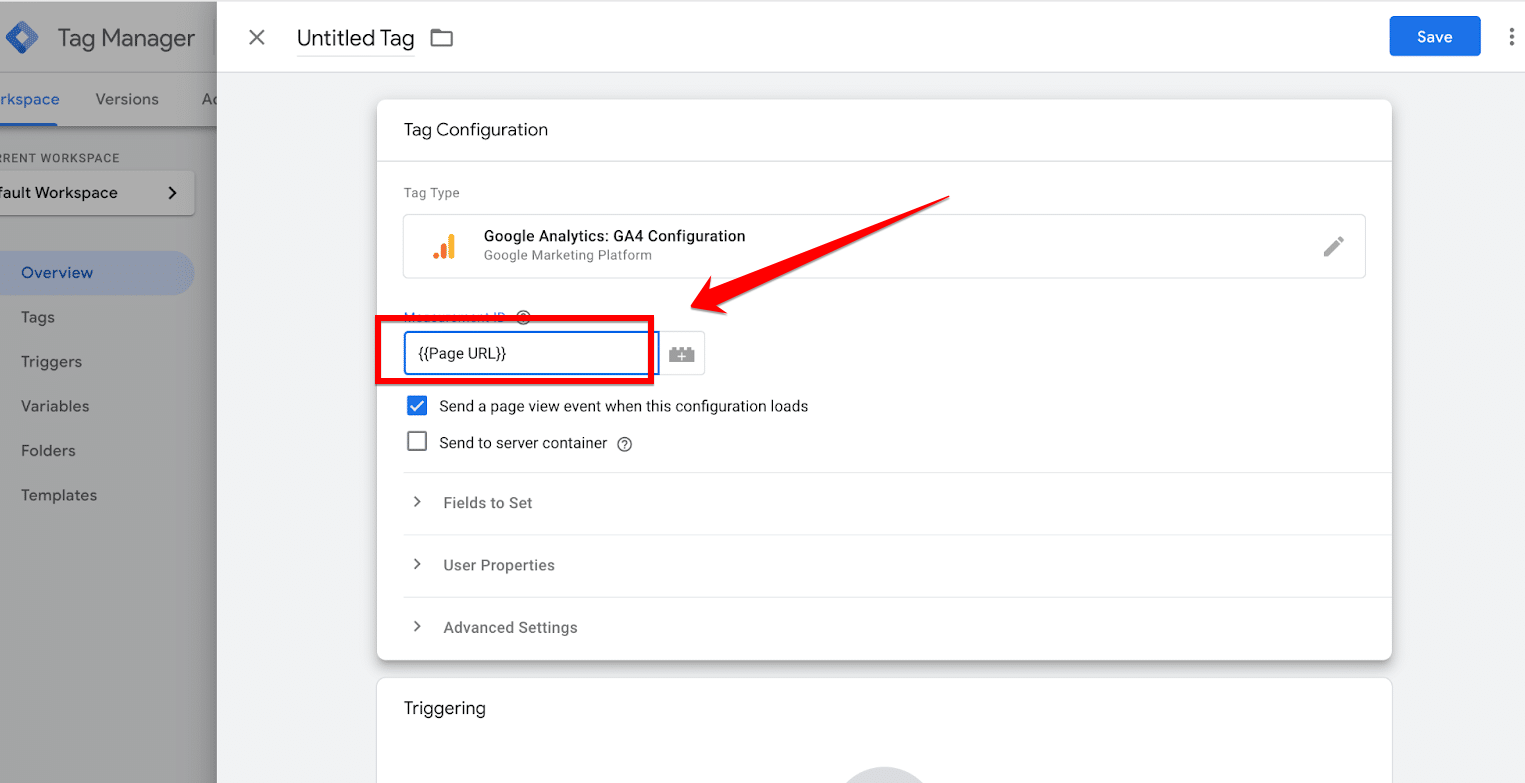
Click on “Tag Configuration” and select a tag type that suits your tracking needs. To track visitor interactions, you might choose “Google Analytics: GA4 Event.” You’ll then be prompted to configure specific settings for the tag.
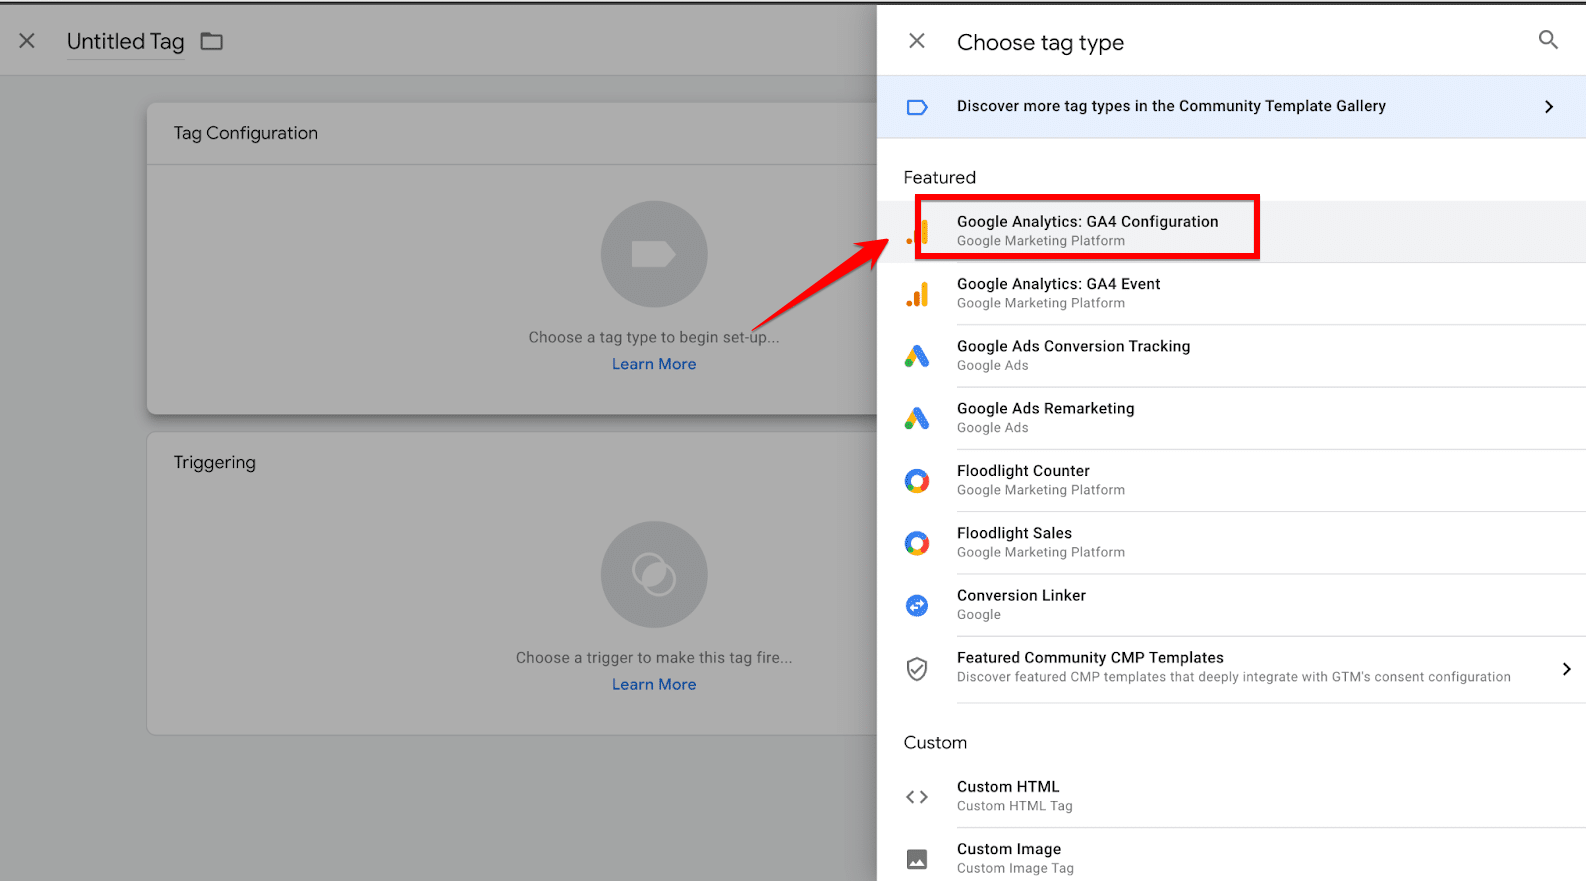
For a Google Analytics tag, this typically involves selecting a Configuration Tag and assigning the appropriate Measurement ID, which links the tag to your Analytics account.
Step 3: Set Up a Trigger in Google Tag Manager
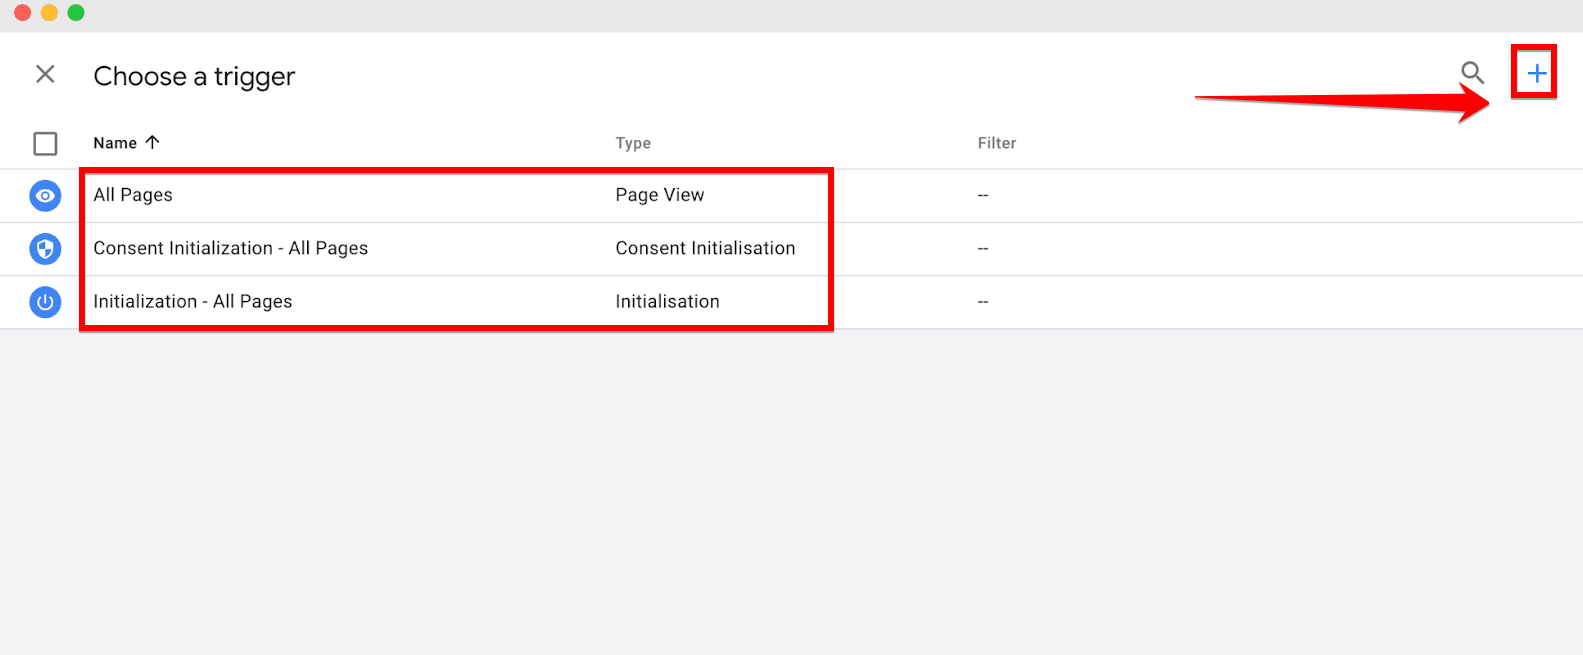
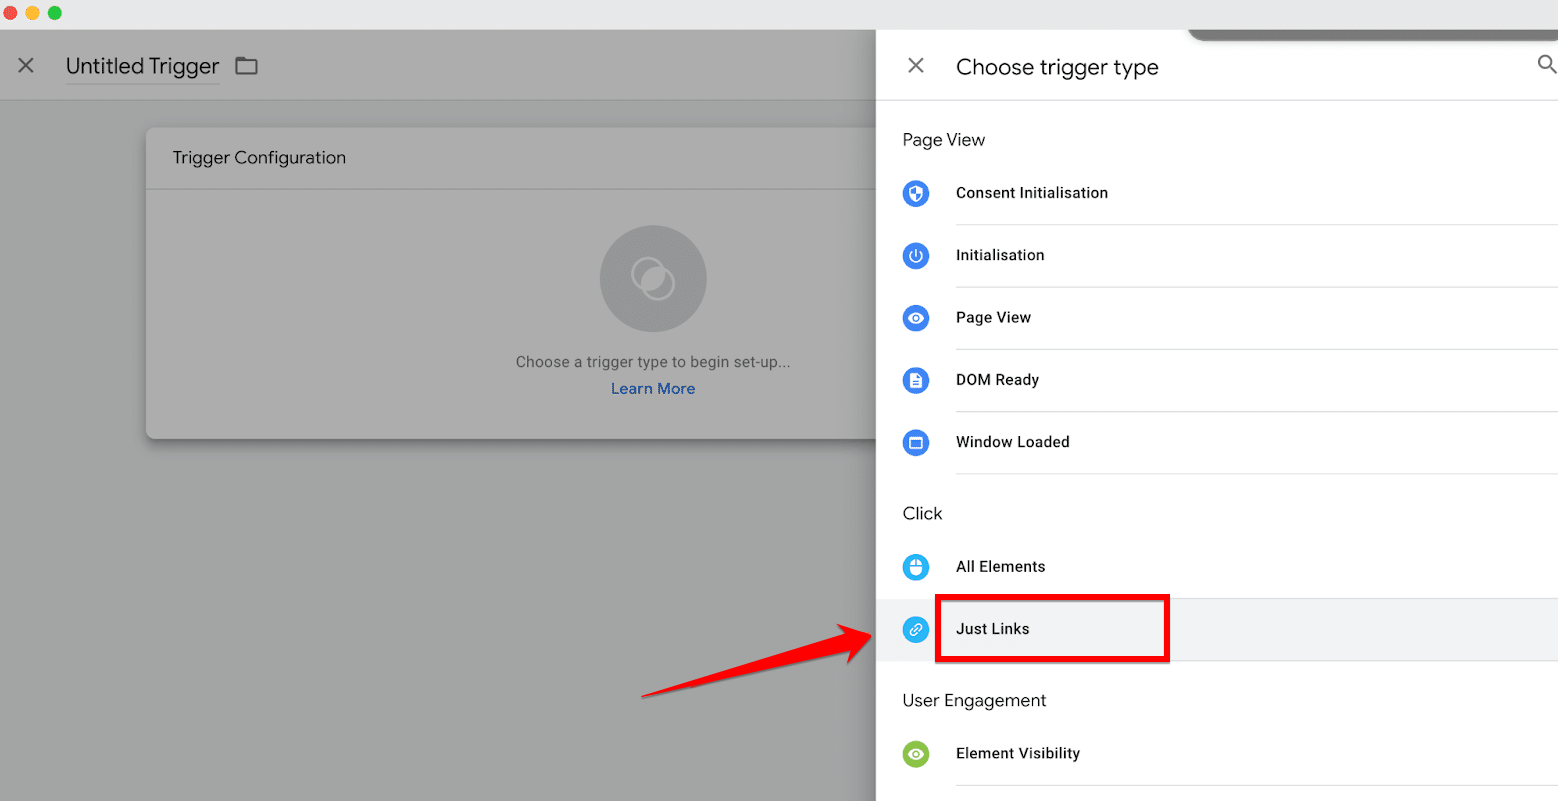
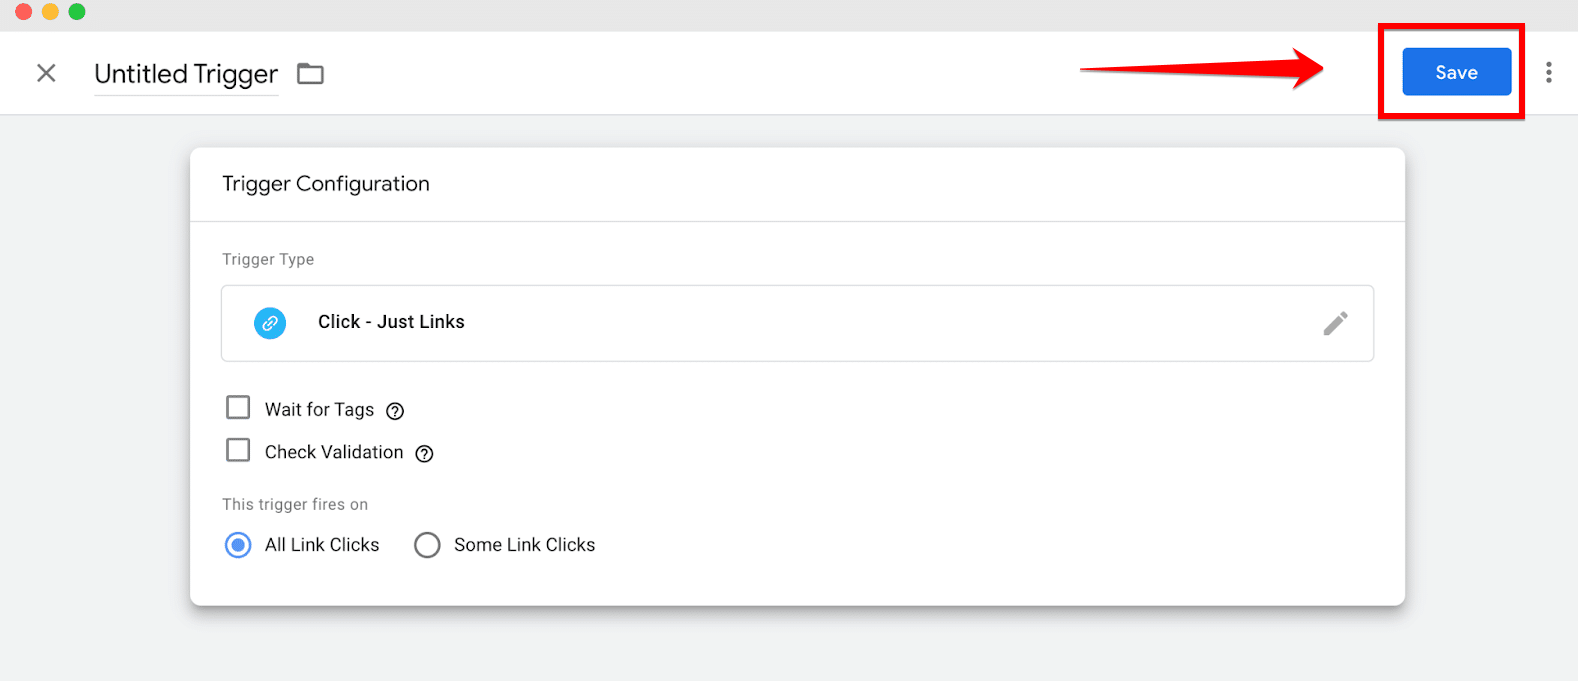
The next step involves defining a trigger that determines when your tag should activate. Select “Choose a trigger” to view available options. If the trigger you need isn’t immediately visible, use the “+” icon to browse additional trigger types.
For example, if you want to track link clicks, you might select “Just Links.” This part of the process tailors the tag to fire based on specific actions, like all link clicks on your site, ensuring you capture the precise data needed.
Step 4: Save and Publish Your Google Tag Manager Tag
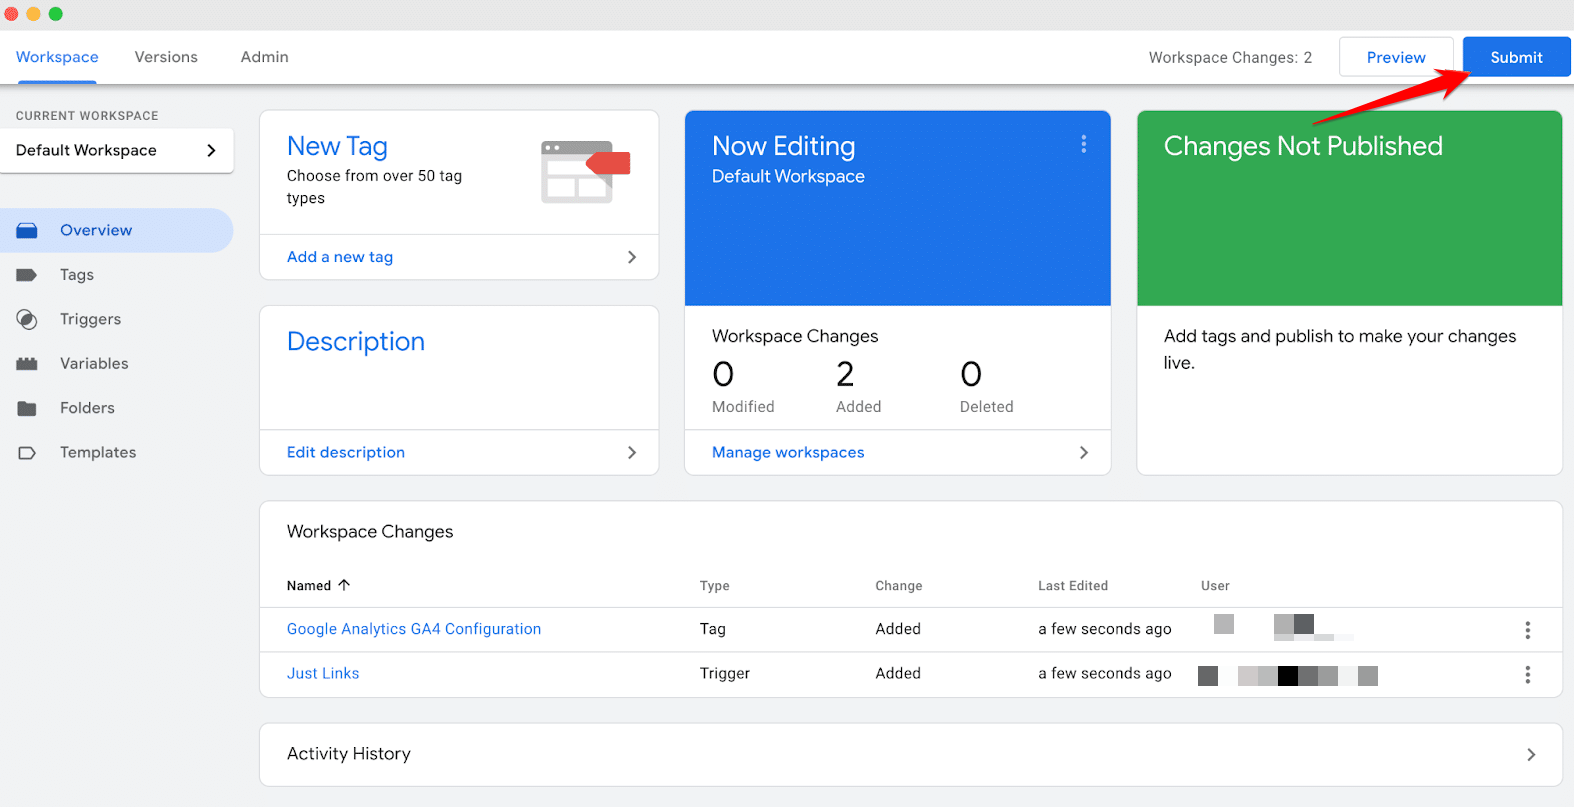
Once your tag is configured and the appropriate trigger set, remember to click on “Save” button to save your changes. Navigate back to the “Workspace” area and review the tag you’ve created. Here, you can double-check the details and make any necessary adjustments before final submission.
To go live with your tag, click on “Submit,” which will push the tag to active status on your website. You will be prompted to “Publish and Create Version,” which finalizes the tag and updates your site. Name the version to reflect the changes made, such as “Initial Google Analytics Setup,” and then publish it to implement the changes site-wide.
Congratulations! You have successfully added a new Google Analytics tag to your website using Google Tag Manager. This setup not only streamlines your tag management but also significantly enhances your ability to track and analyze user interactions and site performance.
Why Should You Install Google Tag Manager in WordPress
Installing Google Tag Manager (GTM) on your WordPress site is a smart move that can significantly boost your website’s capabilities. GTM makes it easy to manage and deploy various tracking codes without needing deep technical knowledge. Let me walk you through why integrating GTM is beneficial and how it can enhance your website.
1: Simplified Tag Management
Managing multiple tags on your website can be a hassle, especially if you have to manually edit your site’s code. GTM simplifies this process. Instead of dealing with code each time you want to add or update a tag, you can use GTM’s user-friendly interface. This means you can easily manage all your tags from one place, saving you time and reducing the risk of errors.
2: Improved Website Performance
Adding multiple tags directly to your site’s code can slow down your website. With GTM, tags load asynchronously, which means they load separately from your main content. This keeps your website fast and responsive, enhancing the user experience. Plus, faster websites tend to rank higher in search engine results, giving your SEO a boost.
3: Enhanced Flexibility and Control
GTM gives you incredible flexibility and control over your tags. You can create, test, and deploy new tags without needing to call in a developer each time. This is especially useful for marketing teams, who often need to implement new tracking codes quickly. With GTM, you can make real-time updates to your tags, ensuring your data collection is always accurate and up-to-date.
4: Comprehensive Tracking Capabilities
GTM supports a wide range of tags from different providers, such as Google Analytics, Google Ads, and Facebook Pixel. This allows you to track a variety of user interactions across your site. You can monitor page views, clicks, form submissions, and even e-commerce transactions. These insights are crucial for optimizing your marketing efforts and understanding how users interact with your site.
5: Easy Event Tracking
Event tracking helps you understand specific user interactions on your site. With GTM, setting up event tracking is straightforward and doesn’t require complex coding. Whether you want to track button clicks, video plays, or form submissions, GTM lets you create custom events easily. This helps you gather detailed data about user behavior, enabling you to make informed decisions to improve your site.
6: Enhanced Security and Debugging
GTM comes with built-in features that enhance the security and reliability of your tags. It includes a preview and debugging mode, allowing you to test your tags before they go live. This ensures that everything works correctly without affecting your website’s functionality. Additionally, GTM’s version control feature lets you revert to previous versions if needed, adding an extra layer of security.
7: Streamlined Collaboration
If you have multiple team members working on your website, GTM makes collaboration easy. You can assign different levels of access to team members, ensuring everyone has the appropriate permissions. This makes it simpler to manage workflows and ensures that changes are tracked and managed effectively.
8: Cost-Effective Solution
One of the best things about GTM is that it’s free. This makes it a cost-effective solution for businesses of all sizes. The platform’s robust features and capabilities offer great value without the need for expensive tools or extensive developer resources. By using GTM, you get professional-grade tag management and tracking without additional costs.
Summary
Well done on successfully setting up Google Tag Manager on your WordPress website! By doing these steps, you can easily handle tags and make your website track user activities better. With GTM, you can keep an eye on how users engage with your site, improve your marketing plans, and understand how your site is performing.
Remember, GTM gives you the freedom and power to adjust and upgrade your tracking as your needs change. Try out new tags to get the most out of GTM. Your journey to a more data-focused and efficient website has just started, and I’m happy I could help you through this important process. Enjoy tagging! 🎉
Subscribe to our Monthly Newsletter
Get monthly updates of WordPress tips, tricks, and tutorials in your email.
Thanks. You have successfully subscribed.