Typography plays a crucial role in defining the overall look and feel of a website. When it comes to WordPress, changing fonts is one of the easiest and most effective ways to personalize your site, enhance readability, and improve user experience. Whether you’re a beginner or a seasoned WordPress user, this guide will walk you through 9 different ways to change fonts in WordPress and how each method can help elevate your site.
Why Changing Fonts Matters in WordPress

Before diving into the technical steps, let’s first discuss why changing fonts in WordPress is so important. The font style you choose for your website not only impacts its aesthetic but also affects user experience. A well-chosen font can:
- Improve readability and accessibility
- Create a unique visual identity for your brand
- Improve the overall user experience
- Enhance mobile responsiveness
- Increase time on site by engaging readers effectively
In short, fonts are a powerful design element that help define your site’s personality. Now, let’s explore how to change fonts in WordPress.
How to Change Fonts in WordPress (9 Ways)
Changing fonts in WordPress is a simple way to enhance your site’s design and readability. Whether you’re looking to improve user experience or match your brand identity, WordPress offers various methods to customize fonts easily. In this guide, we’ll cover 9 ways to change fonts in WordPress, from built-in options to advanced techniques like custom CSS.
1. Changing Fonts Using the WordPress Customizer
One of the easiest ways to change fonts in WordPress is through the WordPress Customizer. Most modern themesA WordPress theme is a set of files that determine the design and layout of a website. It controls everything … More come with built-in font customization options, allowing you to adjust typography without touching any code. Here’s how to do it:
- Go to your WordPress dashboardIn WordPress, the Dashboard is a central hub for managing a website’s content and settings. It is the first sc… More and navigate to Appearance > Customize.

- Look for the Typography or Fonts section (the name may vary depending on your themeA WordPress theme is a set of files that determine the design and layout of a website. It controls everything … More).
- Select the fonts you want to use for different elements like headings, paragraphs, and body text.
- Save the changes and preview them on your site.
Most WordPress themesA WordPress theme is a set of files that determine the design and layout of a website. It controls everything … More support popular font choices like Google Fonts, which gives you access to hundreds of free font options.
Pro Tip: If your theme doesn’t have built-in typography settings, you can always use a pluginA plugin is a software component that adds specific features and functionality to your WordPress website. Esse… More to add font customization options.
2. Using Google Fonts Plugin
If you want more control over your fonts and your theme doesn’t offer a lot of customization options, you can use a Google Fonts plugin. Google Fonts is a free service that provides a wide variety of web fonts that you can easily integrate into your WordPress site.
Here’s how you can install and use a Google Fonts plugin:
- Install a Google Fonts plugin like Easy Google Fonts from the WordPress plugin repository.
- After installation, go to Appearance > Customize.
- You should see a new option for Typography.
- Choose from hundreds of fonts available in the plugin’s settings.
- Adjust the font settings for various text elements such as headings, body text, and buttons.
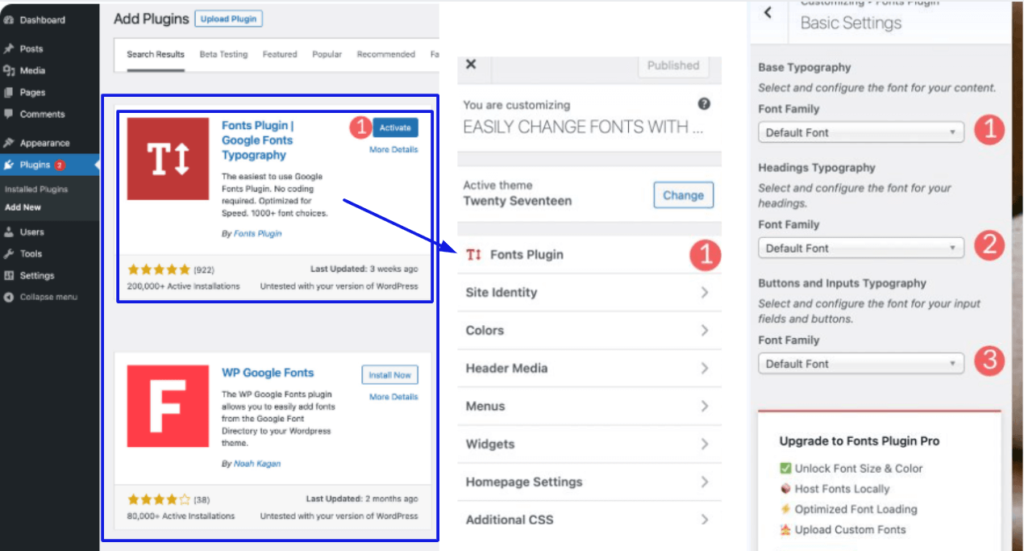
By using this method, you can quickly and easily customize fonts for different parts of your site without writing any CSS code.
3. Manually Adding Custom Fonts with CSS
If you have some basic knowledge of CSS, you can manually add custom fonts to your WordPress site. This gives you the flexibility to use any font available online or even a self-hosted font.
Here’s how you can manually add custom fonts:
- Go to your WordPress dashboardIn WordPress, the Dashboard is a central hub for managing a website’s content and settings. It is the first sc… More and navigate to Appearance > Customize > Additional CSS.
- In the text box, you can add custom @font-face or Google Fonts code.
- To use Google Fonts, you can embed a link in the header and apply the font to your site’s CSS.
Example of adding Google Fonts:
@import url('https://fonts.googleapis.com/css2?display=swap&family=Roboto:wght@400;700&display=swap');

body {
  font-family: 'Roboto', sans-serif;
}
- Save and publish your changes.
Customizing fonts through CSS requires a little more effort, but it gives you complete control over your typography.
4. Using a Theme Builder (Elementor, Divi, etc.)
Theme builders like Elementor, Divi, and Beaver Builder offer powerful design tools to change fonts visually. These pageIn WordPress, a page is a content type that is used to create non-dynamic pages on a website. Pages are typica… More builders allow you to customize fonts for specific sections, widgetsA widget is a small block of content that performs a specific function and can be added to certain areas of a … More, and even individual elements.
Here’s how to change fonts using Elementor, for example:
- Open your page with Elementor.
- Select the widgetA widget is a small block of content that performs a specific function and can be added to certain areas of a … More you want to edit (e.g., heading, text block).
- In the left-hand panel, go to the Style tab.
- Under the Typography section, you’ll find options to change the font family, size, weight, and line height.
- Save your changes and preview them in real-time.

The flexibility of page builders ensures that you can customize fonts on a per-page basis rather than globally across the entire website.
5. Editing Fonts in the Theme’s Stylesheet (style.css)
For users comfortable with coding, you can directly modify your theme’s stylesheet to change fonts. This method allows you to adjust font styles globally across your website.
Here’s how to do it:
- Go to Appearance > Theme Editor.
- Locate the style.css file in your theme’s files.
- Look for the body or h1, h2, h3 elements.
- Add or modify the CSS code to change the font-family.
For example, to change the default font for your body text:
body {
  font-family: 'Arial', sans-serif;
}
- Save the changes and refresh your site.
Note: Always use a child themeA child theme is a WordPress theme that inherits the functionality and styling of another theme, referred to a… More to ensure your customizations aren’t lost when the theme is updated.
6. Changing Fonts in WordPress Widgets
If you want to change the font for text in your widgets, you can easily do so using the WordPress Customizer or a plugin. Here’s how:

- Go to Appearance > Widgets.
- Select the widget where you want to change the font (e.g., Text widget).
- Use the WordPress Customizer or CSS to apply a new font to the widget content.
To do it with CSS:
.widget_text {
  font-family: 'Open Sans', sans-serif;
}
This method is perfect for adjusting font styles in sidebar widgets, footer widgets, or custom HTML widgets.
7. Using the Theme’s Typography Settings
Some premium WordPress themes come with advanced typography settings right out of the box. For instance, themes like Astra, GeneratePress, or OceanWP have built-in options for customizing fonts without needing a plugin or CSS.

To change fonts using theme settings:
- Go to Appearance > Customize.
- Look for the Typography or Fonts section.
- Adjust the settings for headers, paragraphs, and other text elements.
- Publish your changes.
These built-in typography options make it super easy to fine-tune the appearance of your site without relying on external tools.
8. Changing Font Sizes for Better Readability
Sometimes, it’s not just about choosing a different font but also adjusting the size of the fonts to improve readability. Many WordPress themes allow you to adjust font sizes directly through the Customizer or by adding CSS.
Here’s how to adjust font sizes:
- Go to Appearance > Customize.
- Find the Typography section.
- Adjust the font size for headings, body text, or other elements as needed.
- Save your changes.
Alternatively, use CSS:
h1 {
  font-size: 36px;
}

p {
  font-size: 16px;
}
Changing font sizes helps ensure that your site is easy to read across all devices, especially on mobile.
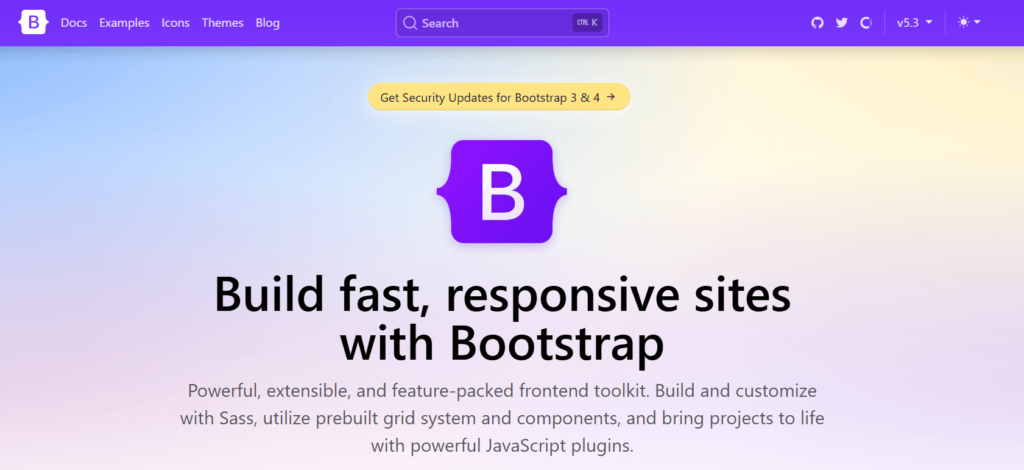
9. Customizing Fonts with a CSS Framework (Bootstrap, Foundation)
If you’re building a more complex WordPress site or want even more flexibility in your font customization, you might want to use a CSS framework like Bootstrap or Foundation. These frameworks offer predefined font styles and grid systems that can help you quickly design and customize fonts.
To integrate a CSS framework with your WordPress themeA WordPress theme is a set of files that determine the design and layout of a website. It controls everything … More:
- Download the framework (e.g., Bootstrap).
- Add the framework’s CSS and JavaScript files to your theme’s header or footer.
- Use the framework’s font styles and classes to customize text elements.
This method is ideal for developers who want full control over typography and design.
Tips for Choosing the Right Fonts for Your WordPress Site
Choosing the right font is key to improving both the appearance and usability of your site. Here are some expert tips to help you select the best fonts for your website:
1. Prioritize Readability: Choose a font that is easy to read on both desktop and mobile devices. Avoid overly decorative fonts for body text.
2. Stick to a Few Fonts: Limit yourself to two or three fonts to avoid clutter and ensure consistency across your website. Typically, one font for headings and another for body text is sufficient.
3. Use Web-safe Fonts: Make sure the fonts you use are web-safe and compatible across various browsers and devices. Google Fonts are a good option for this reason.
4. Consider Your Branding: Select fonts that align with your brand’s tone. If your brand is modern and sleek, use sans-serif fonts. For a more traditional look, go for serif fonts.
5. Optimize for Speed: Excessive use of custom fonts can slow down your website. Make sure to load only the necessary font weights and styles.
FAQ: How to Change Fonts in WordPress
1. Can I change fonts in WordPress without coding?
Yes, many WordPress themes offer built-in typography settings, and you can also use plugins like Easy Google Fonts to change fonts without any coding knowledge.
2. How do I add custom fonts to WordPress?
You can add custom fonts by using a plugin like Easy Google Fonts or by manually adding custom CSS or @font-face rules in the theme’s settings.
3. Are Google Fonts free to use in WordPress?
Yes, Google Fonts are free and can be easily integrated into WordPress using plugins or by adding custom code to your theme.
4. How do I change fonts for specific elements in WordPress?
You can use the WordPress Customizer, theme settings, or page builders like Elementor to target specific elements like headings, paragraphs, and buttons for font customization.
5. Can I change fonts in WordPress on mobile devices?
Yes, most font changes made in WordPress are responsive, but you can further customize font sizes and styles for mobile devices using custom CSS or theme options.
Conclusion: Choose the Best Method for Your Needs
Changing fonts in WordPress is an excellent way to customize your site’s appearance, improve readability, and create a unique user experience. Whether you’re using the WordPress Customizer, a plugin, page builders like Elementor, or diving into CSS code, there’s a method for every skill level.
Here’s a quick summary of the 9 ways to change fonts in WordPress:
- WordPress Customizer
- Google Fonts Plugin
- Manual Custom Fonts via CSS
- Using a Theme Builder
- Editing Fonts in the Theme’s Stylesheet
- Changing Fonts in WordPress Widgets
- Using Theme Typography Settings
- Adjusting Font Sizes for Readability
- Customizing Fonts with a CSS Framework
By experimenting with these methods, you can tailor your WordPress website’s typography to fit your style, ensuring a professional and visually appealing result.
Now that you know how to change fonts in WordPress, it’s time to give your website a fresh look! Keep experimenting with different font styles, weights, and sizes until you find the perfect combination that matches your brand and enhances the user experience. Happy font customizing!
If you’re looking for fast WordPress hosting and seamless font customization, check out our hosting packages and done-for-you updates by clicking the button below: