Are you looking to track visitors on your WordPress website, optimize ad performance, and increase conversions from Facebook ads? When you add Facebook Pixel to WordPress, you gain powerful insights into visitor behavior. Allowing you to create targeted ads that drive results. This tutorial will guide you step-by-step on how to add Facebook Pixel to WordPress. Whether you prefer using plugins, manual code, or a themeA WordPress theme is a set of files that determine the design and layout of a website. It controls everything … More builder.
Let’s dive in and make your WordPress site ready to track and optimize like a pro!
What is Facebook Pixel?
Before we get into the “how,” let’s talk about the “what” and the “why.”
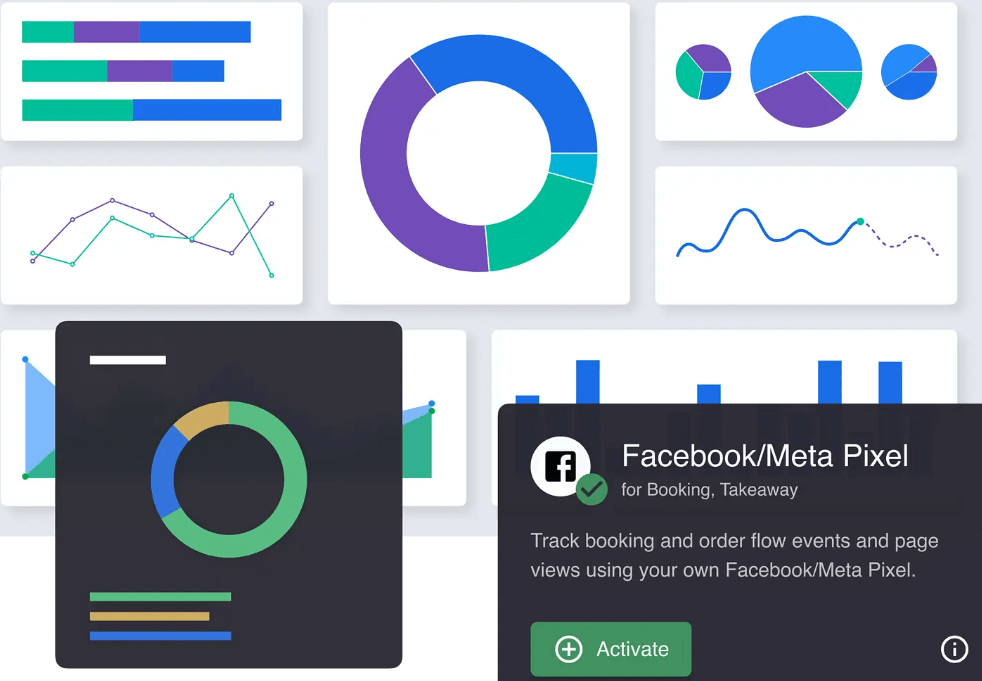
Facebook Pixel is a small snippet of code provided by Facebook. When added to your website, it tracks visitors, monitors their interactions. and sends this information back to Facebook. With this data, you can create more effective ads. Set up retargeting campaigns. Track specific actions (like “Add to Cart” or “Purchase”). And build audiences that look like your best customers.
Prerequisites: Setting Up Your Facebook Pixel
To start, you’ll need a Pixel ID. Here’s how to get it:
1. Go to Facebook Business Manager (business.facebook.com) and log in to your account.
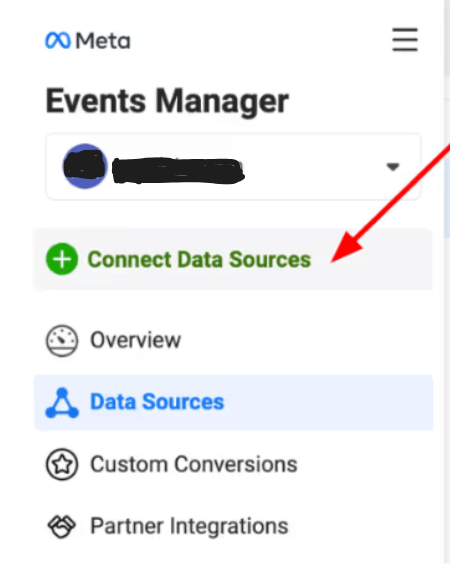
2. Select Events Manager from the left-hand menuIn WordPress, a menu is a collection of links that are displayed as a navigation menu on a website. Menus are … More.
3. Click Connect Data Sources > Web and select Facebook Pixel.
4. Name your Pixel and enter your website’s URL if prompted.
5. Create the Pixel, and Facebook will generate your unique Pixel code. Copy the Pixel ID—you’ll need it in the next steps!
Got it? Awesome. Now let’s go through the different ways to add the Facebook Pixel to WordPress.
Methods to Add Facebook Pixel to WordPress
You can add the Facebook Pixel in multiple ways, and each method has its pros and cons. Here, we’ll cover three of the most popular options: using a pluginA plugin is a software component that adds specific features and functionality to your WordPress website. Esse… More, adding the code manually, and using a theme builder.
Method 1: Adding Facebook Pixel Using a Plugin
If you’re looking for the easiest option (and maybe the safest), using a plugin is probably the best choice. Here’s how to do it.
1. Choose a Plugin: Some popular options include:
– PixelYourSite: This plugin specializes in Facebook Pixel installation.
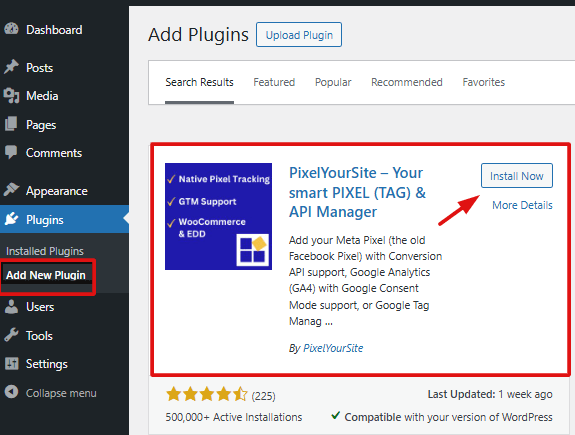
– Facebook for WordPress: Facebook’s own plugin that supports Pixel installation.
– Insert Headers and Footers: A more general plugin that allows you to paste scripts in your website header.
2. Install and Activate the Plugin:
– Go to your WordPress DashboardIn WordPress, the Dashboard is a central hub for managing a website’s content and settings. It is the first sc… More, click on Plugins > Add New, search for your chosen plugin, and Install it.
– Once installed, click Activate.
3. Add Your Pixel ID:
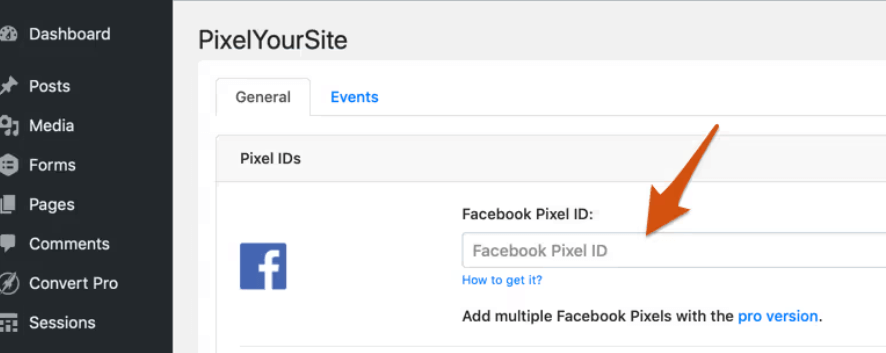
– Open the plugin settings and look for an option to add your Pixel ID. Each plugin will have a dedicated field for this.
– Paste your Pixel ID in the field and Save the changes.
4. Confirm Installation: Use the Facebook Pixel Helper Chrome extension to check if your Pixel is active and tracking correctly.
Why Use a Plugin? Plugins make it easy to install the Pixel without touching code, which reduces the risk of errors and ensures that updates won’t overwrite your Pixel settings.
Method 2: Adding Facebook Pixel Manually in the Header
If you’re comfortable with a bit of code, adding the Pixel manually is another option.
1. Access the Header File:
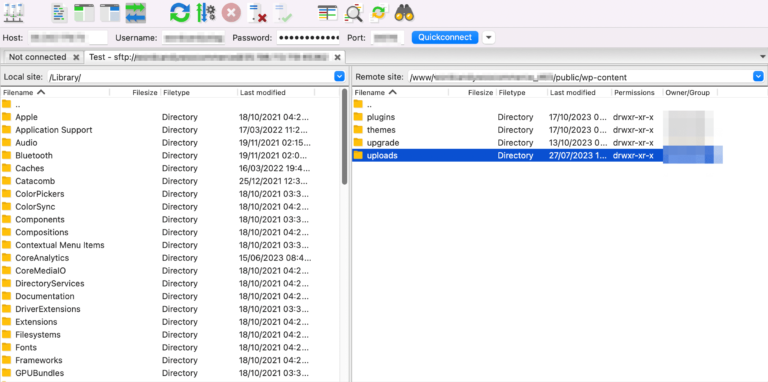
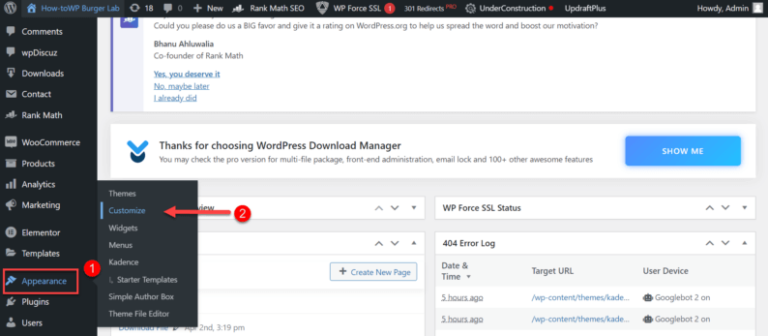
– Go to your WordPress Dashboard and click on Appearance > Theme Editor.
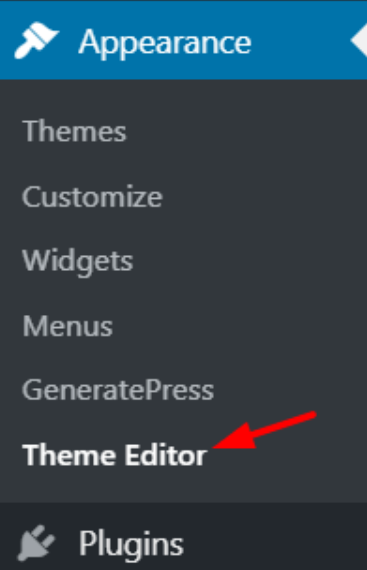
– Open the header.php file (preferably within a child themeA child theme is a WordPress theme that inherits the functionality and styling of another theme, referred to a… More to prevent code loss with updates).
2. Paste the Pixel Code:
– Copy your Facebook Pixel code from Facebook Business Manager.
– Paste it just above the closing `</head>` tagIn WordPress, tags are a taxonomy used to classify and organize posts. They are similar to categories, but unl… More in your `header.php` file.
3. Save and Exit:
– Click Update File to save your changes.
Important Tip: Always back up your theme files before making changes, and consider creating a child theme if you haven’t already. This way, your Pixel code won’t be erased when your theme updates.
Method 3: Using a Theme Builder (like Elementor or Divi)
If you’re using a theme builder, such as Elementor or Divi, adding the Pixel code can be done without accessing theme files.
1. Go to Theme Builder Settings:
– In Elementor, navigate to Elementor > Custom Code in the dashboard.
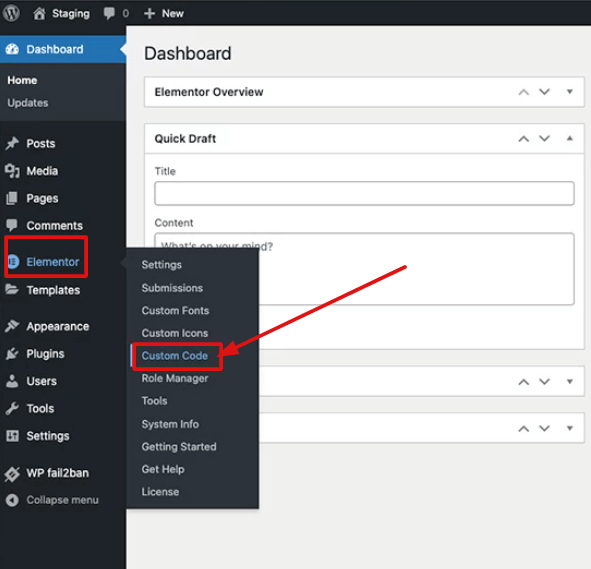
– In Divi, go to Divi > Theme Options > Integration.
2. Add Pixel Code to the Header Section:
– Copy your Pixel code and paste it into the header code section in the theme builder’s settings.
3. Save Changes: After pasting, be sure to Save or Update your settings.
Benefits of Using a Theme Builder: Many builders provide a quick, safe way to add code without editing core files. Plus, it’s easily accessible if you need to make changes.
Verifying Facebook Pixel Installation
After you’ve added the Pixel, it’s important to ensure it’s working correctly. You can do this in a couple of ways:
1. Facebook Pixel Helper Chrome Extension:
Download the Facebook Pixel Helper extension for Chrome.

Go to your website and open the extension to check if the Pixel is firing. A green indicator means it’s tracking successfully.
2. Events Manager in Facebook Business Manager:
In Events Manager, select your Pixel and look for recent activity or events to verify that it’s tracking interactions from your site.
Maximizing Your Facebook Pixel’s Power
Now that your Pixel is live, let’s make it even more effective with these tips!
- Set Up Event Tracking: Events help you track specific actions like “Add to Cart,” “Purchase,” or custom actions that are important to your business. Set up events in the Events Manager to get deeper insights into user behavior.
- Use Retargeting and Lookalike Audiences: With Facebook Pixel, you can create retargeting ads to reach previous visitors. Build lookalike audiences to find users similar to your best customers. These strategies often lead to better engagement and higher conversions.
- Ensure GDPR Compliance: If you’re in a region affected by GDPR, be sure to implement a cookie consent banner that notifies users about tracking. Many plugins offer this feature and keep your site compliant.
Conclusion
Adding Facebook Pixel to WordPress can open up a world of valuable insights. And audience-building opportunities. Whether you’re a beginner or an advanced user. This guide gives you the tools to get started with Pixel tracking quickly and accurately. By following these steps, you’ll be able to see how users interact with your site. Retarget them effectively, and improve your overall ad performance.
Ready to boost your Facebook ad strategy? Give these methods a try, and start tracking like a pro today!
FAQs
- Can I add multiple Facebook Pixels to a single WordPress site? Yes, though this is typically done for advanced tracking needs. Some plugins support multiple Pixel IDs.
- Is Facebook Pixel free to use? Yes, Facebook Pixel itself is free, though using the insights effectively may require ad spending.
- How can I delete a Facebook Pixel if I no longer need it? Remove the Pixel code from your website or deactivate the plugin you used to install it.
And there you have it! With this guide, you’re all set to start using Facebook Pixel on WordPress to gain deeper insights. Optimize your ads and grow your business.
Looking to add Facebook Pixel to WordPress for better ad tracking and conversions? Our hosting packages not only offer fast WordPress hosting. But also include done-for-you updates to keep your site running smoothly. Click the button below to explore our plans. Get the tools you need to add Facebook Pixel to WordPress effortlessly!
